Ableton is an easy tool to use and a difficult one to master. But fortunately, there are quick fixes and workflows which separates noobs from professionals. For example, using shortcuts, processing multiple samples in one go, quick transpose, and much more. It’s all here.
So, whether you’re a beginner, struggling with slow workflow or you simply are curious, here are beginners tips and tricks for Ableton you wouldn’t want to miss.
Read: Best Free DAWs for Windows and Mac
Ableton Tips & Tricks for Beginners
1. Using Keyboard as Piano
You might consider buying a MIDI keyboard or a piano when you start using a DAW. But I’d argue against it because you’re just starting out and spending so much on one gear is not a wise option.

Don’t worry, if you’re starting out, you can use your laptop’s keyboard as a controller.
For versions up to Live 9, this feature is enabled by default. If you’ve Live 10 you can enable it from the top right corner with the keyboard button or simply press M. All the white keys are assigned to the middle row (A, S, D) of the keyboard while the black ones are on the top row (W, E).
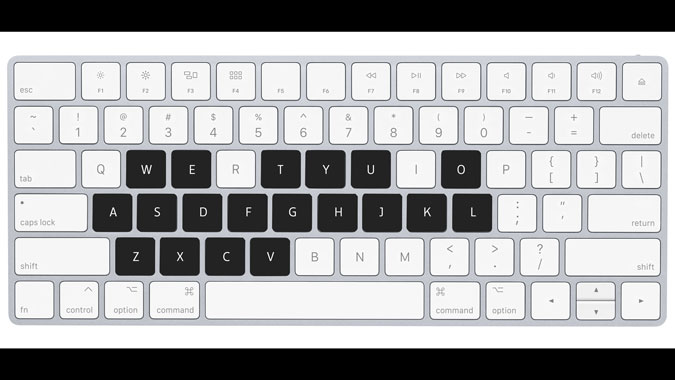
You also have the flexibility to change the octave by pressing the Z key which lowers the octave and X which pushes it an octave up. With C, V keys you can adjust the velocity of the incoming note as well, in intervals of twenty.
2. Using Simpler
If you’re into electronic music, you already know the scope of using almost any sound in the track. For example, you can record your dog barking or even your shaving kit, process it in simpler and make a distinct sound out of it. Let’s talk about Simpler which is a basic sample editor in Ableton.
So you simply drag and drop audio or open it with simpler.
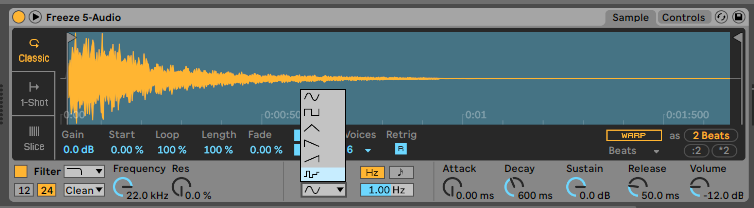
Tip: Not all the sounds will have a pitch, use Ableton’s in-built tuner and in the control tab change the pitch.
For tweaking the sound, you’ve pitch, volume, envelop filter, etc. It also borrows some normal clip features such as warping options which keeps things in tempo so you don’t have to worry about going out of beat. You can tweak your sound more by adjusting the frequency, amplitude, etc.
Attention: Dragging and dropping will just use the selected part, or in and out of a clip.
3. Warping More than One Tracks
There are chances you’ve drums and percussions on multiple tracks but you need to process them together. Though a lot of us have used warp mode, doing it with multiple clips together to get the time right will not only be convenient but also save us time. Here is a simple way to warp multiple tracks together.
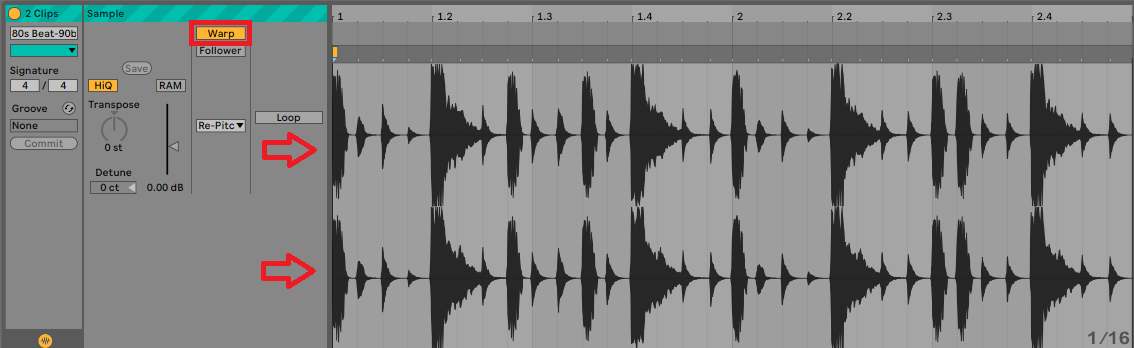
You have to select multiple tracks, now if they’re of the same length you won’t have a problem but even a tiny bit of difference will show you, ” Clips selected are of different length”. To make all these tracks of the same length simply press ctrl+j for Windows and cmd+j for mac. That’s it. Now be it beatmatching or syncing multiple microphones together, you can easily save lots of time and energy with the multiple warping features.
4. Quick Transpose
I recently shifted from FL Studio to Ableton, and piano roll is something I use a lot. It’s easy to play notes and melodies, but to be able to layer tracks with harmonies and shift notes to different octaves takes more steps which I feel wastes my time. Is there a quicker way to do it? Yes. Here’s how.
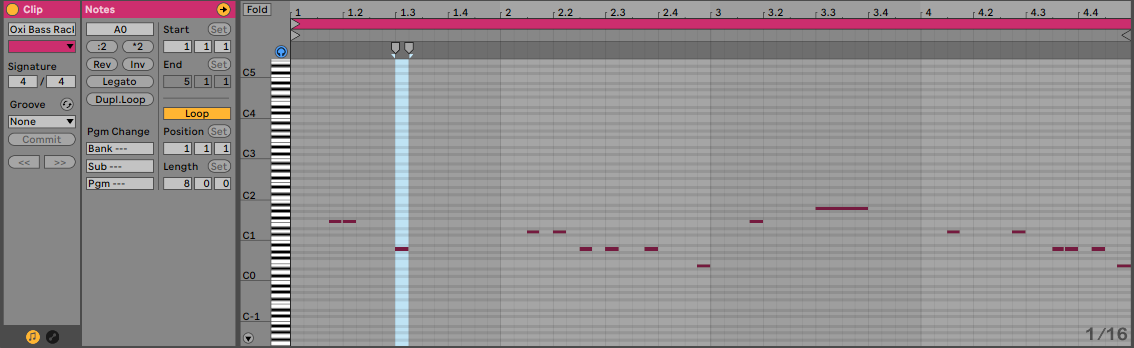
Access the piano roll, select all the notes or the ones you wish to transpose and click shift + up arrow key. This will do a quick octave shift of all the notes. It not only comes in handy while transposing the notes in pian roll but also in effects for example in the pitch plugin.
5. Save Audio Settings
Ableton is notoriously famous for its interface which is designed to make you tweak the audio and make it unrecognizable. But every time you drag the audio onto the track it gives you a fresh sample to work with rather than retaining all the properties that you tweaked. So? Is there a way you can save all of this?
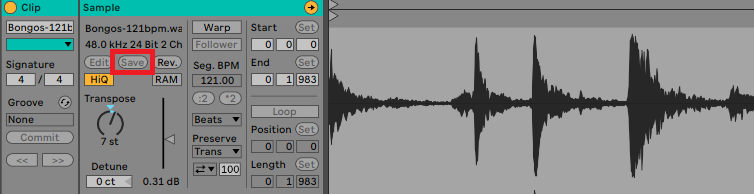
Let me tell you it has always been there and staring right at you. Select the audio, modify it, try changing the pitch, modulate it and click save. The delete the audio and drag it onto the track again. This will give you the exact audio that you tweaked as the information is now saved in the audio file. Pretty handy, right?
6. Short-cuts
You can save a lot of time using shortcuts, to be specific almost eight days a year. I’ve already talked about typing accelerator, aText and now it’s time to talk about Ableton’s shortcuts.
| Shortcut | Windows | Macintosh |
| Full Screen | F11 | CTRL CMD +F |
| Show In/Out | CTRL ALT + I | CMD ALT + I |
| Preferences | CTRL + , | CMD + , |
| Return to Default | Delete | Delete |
| Session/Arrangement View | Tab | Tab |
| Hide/Show Detail View | CTRL ALT + L or Shift + F12 | CMD ALT + L or CTRL Shift +F12 |
| Hide/Show Sends | CTRL ALT +S | CMD ALT + S |
Closing Words
Tips and tricks won’t make you a better musician but it sure will make you a smarter one. Using features like multiple track warping, saving audio settings and use of shortcuts helps save on time and energy. These tricks are so personal and user-specific that you can actually find them yourself. Until then, I hope the ones I shares helps you and sure, feel free to share your tips with me!