Google has been busy building an ecosystem with Android and ChromeOS, just like Apple did with macOS and iOS. Some ecosystem features are supported by other OS, whereas some are unique to Android and ChromeOS. In this list, we won’t include any third-party apps that help bridge the gap between Android and ChromeOS. All listed features are integrated directly into both operating systems. Some are enabled by default too. Here are all the Integrated ChromeOS and Android ecosystem features you need to know.
Table of Contents
Nearby Share is a feature that is used to share files between nearby devices on Android phones, tablets, and Chromebooks. Previously, when you sent files between two devices using Nearby Share, you needed to accept them on the other device to receive them.
With the recent updates, now you can send files to other devices logged in with the same Google Account without the need to accept them on the other device. So you can share files from your Android or ChromeOS device to your nearby ChromeOS or Android device instantly. You just need to enable both Wi-Fi and Bluetooth for this feature to work. Once enabled, the service will connect to other devices on its own and enable file sharing between devices.
1. Nearby Share is enabled on Android and ChromeOS by default. To check, open the Settings app on your Chromebook by clicking on the clock at the bottom right corner. Then click on the cog icon to open Settings.

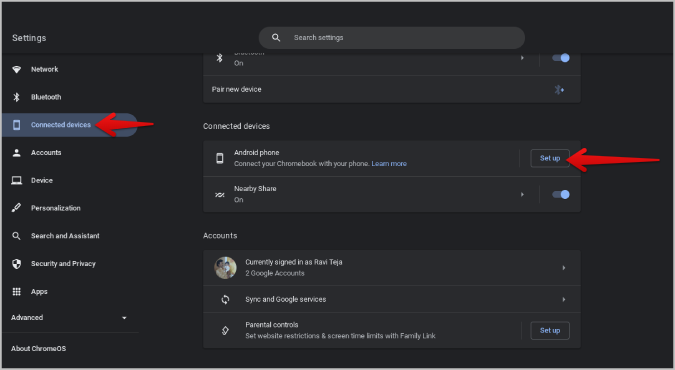
2. On the Settings app, click on the Connected devices option in the left sidebar. Then enable the toggle beside the Nearby Share option.

3. You can also click on the Nearby Share option to change settings like your device visibility, device name, etc.

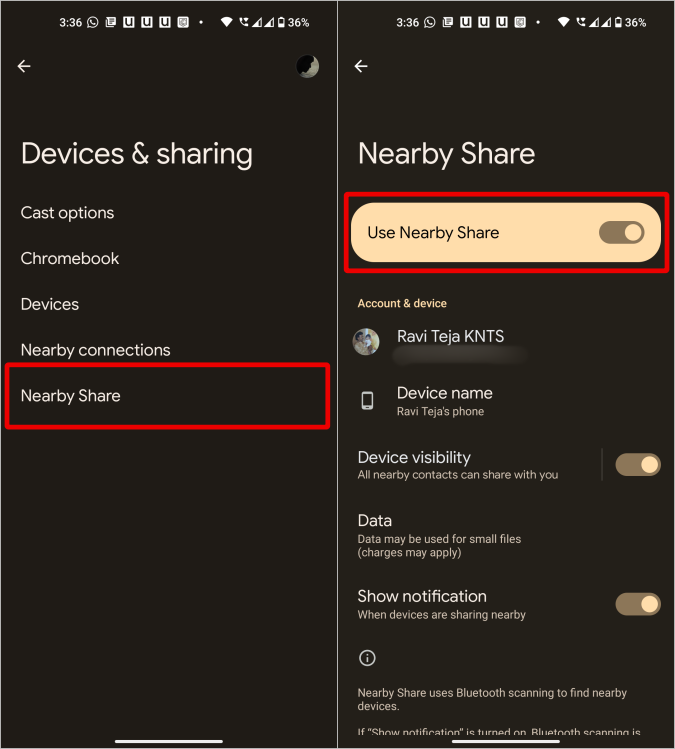
4. On an Android phone, open the Settings app from the app drawer, select Google, and then select the Devices & sharing option.

5. Here you should find the Nearby Share option, tap on it. On the next page, enable the toggle beside the Use Nearby Share option. Below you can change the Nearby Share Settings accordingly. For more info, check out, how to use Nearby Share on Android.
When sharing, you will see the Nearby Share option in the Share Sheet on both Android and Chromebook. Click on it to scan for the nearby devices and select the other device to share files with it. You can use the feature to share files with other devices, not just your Android and Chromebook though.
2. Fast Pair
The Fair Pair feature is used to connect to Bluetooth accessories like earphones, speakers, smart home gadgets, etc. quickly. It is available on Android and was recently added to ChromeOS too. However, both the devices and the accessories you want to connect should support fast pairing for this to work.
If you have any device that supports Fast pair, just open that device or turn it on to get a pop-up on your Android phone and Chromebook. You can then tap on the Setup button in the pop-up to continue the setup process easily.
Once paired, every time you turn on or go near them, your Android phone and Chromebook will connect instantly without any manual input.
As these devices directly link to your Google account along with the device, they can also automatically connect to your other devices logged in with the same Google account. So all the devices that are connected to your Android phone will be automatically connected to your Chromebook too without further manual input.
Fast pair is enabled by default and works in the background if you running Android 10 or above and ChromeOS 103 or above.
3. Phone Hub
Phone Hub is a ChromeOS feature that enables you to control various Android actions directly on ChromeOS. First, you need to connect both devices from the ChromeOS Settings. Once done, you can control your phone when it is nearby and connected via Bluetooth. Phone Hub offers the ability to control hotspots, sound modes, and an option to locate your phone.
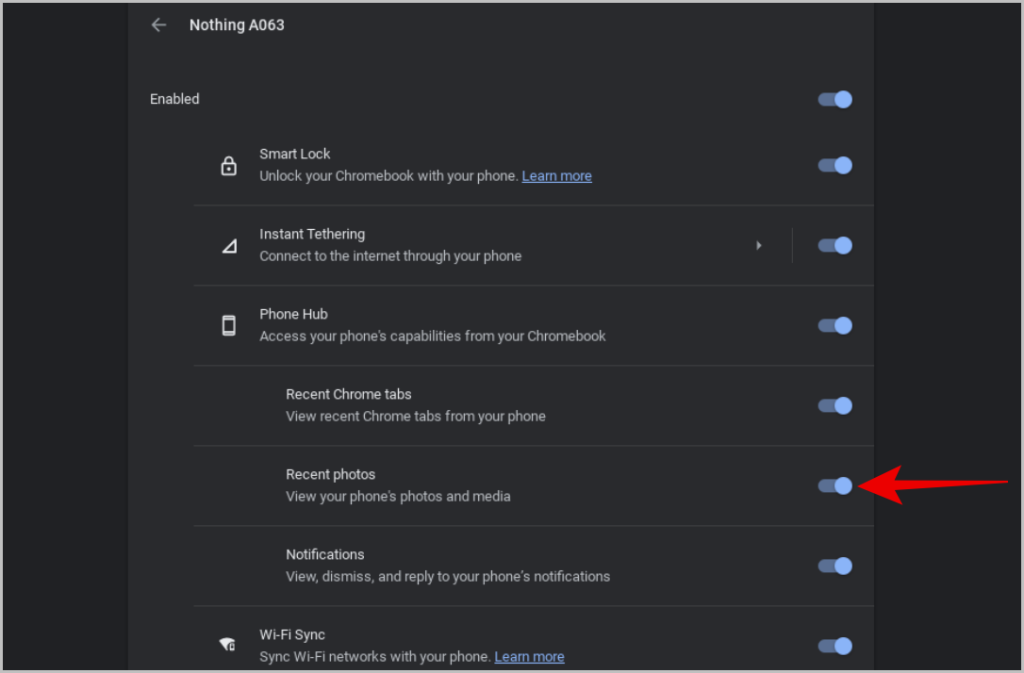
1. Apart from that, Phone Hub is a mix of many ecosystem features combined. It is disabled by default, but you can enable it by opening the Settings app on ChromeOS, then selecting the Connected devices option in the left sidebar and selecting the phone.

2. If you have not connected your phone to your Chromebook, then click on the Set up button.
3. Then click on Accept & continue in the pop-up.

4. Now select the phone and make sure that the Phone Hub is enabled here.

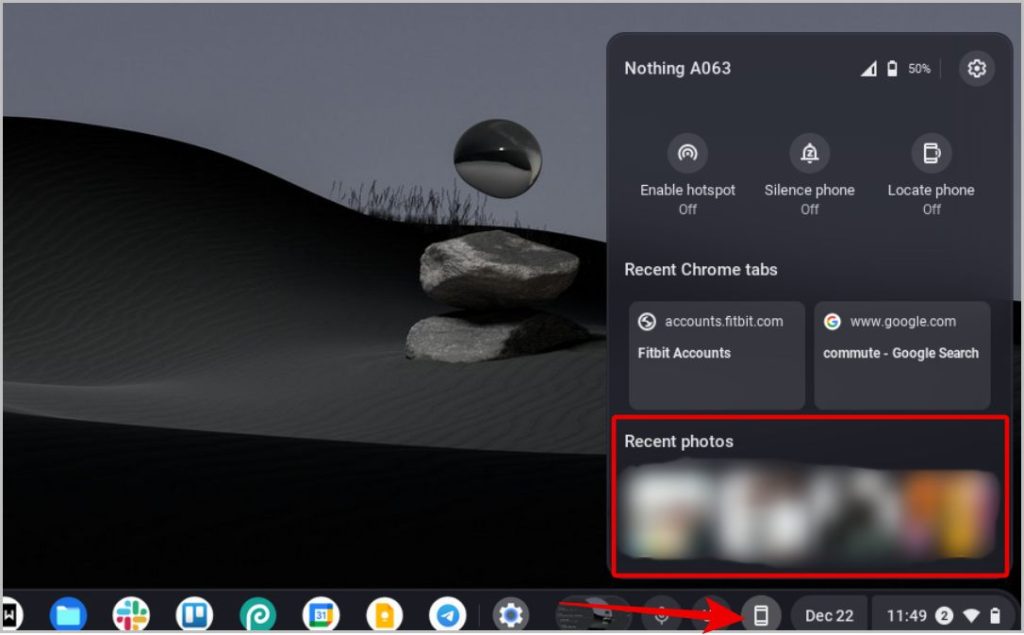
5. Once enabled, now you can just click on the Phone Hub icon in the ChromeOS Shelf to access the controls.

4. Recent Chrome Tabs
This is a feature under Phone Hub. It will automatically be enabled when you connect your Android phone to ChromeOS as shown in the Phone Hub section above. It shows the recent two searches on Android’s Chrome browser on your Chromebook. To check them, click on the Phone Hub icon in the Chrome OS Shelf.
1. If you cannot find the Recent Chrome Tabs section in the Phone Hub, open Settings app > Connected devices, select your phone, and enable Phone hub if not enabled already. Now enable the toggle beside Recent Chrome Tabs.

2. Now your Android searches can be accessed from ChromeOS Phone Hub. To open, just click on the Phone Hub icon on the ChromeOS Shelf.

This feature is extremely useful if you want to switch your browsing from your Android phone to the Chromebook’s bigger display.
5. Recent Photos
Just like Recent Chrome Tabs, Phone Hub also has a Recent Photos option which shows the last 4 photos from your phone on your Chromebook. Also, once your phone is connected to the Chromebook, Recent Photos will be enabled by default.
1. To disable or to make sure that it is enabled, just open Settings > Connected devices > Select your phone and enable the Recent Photos option under Phone Hub.
2. Now just click on the Phone Hub icon in the bottom ChromeOS Shelf to check out the last 4 photos on your phone.
As of now, it just shows the last 4 photos and you do not have any customization options to stop specific folders from being indexed, for example.
6. Android Notifications on ChromeOS
Once you connect your phone to Chromebook, another feature that is enabled by default is the display of Android notifications directly on ChromeOS. You can control it from Settings on your Chromebook > Connected devices then open your phone and enable the toggle beside Notifications.
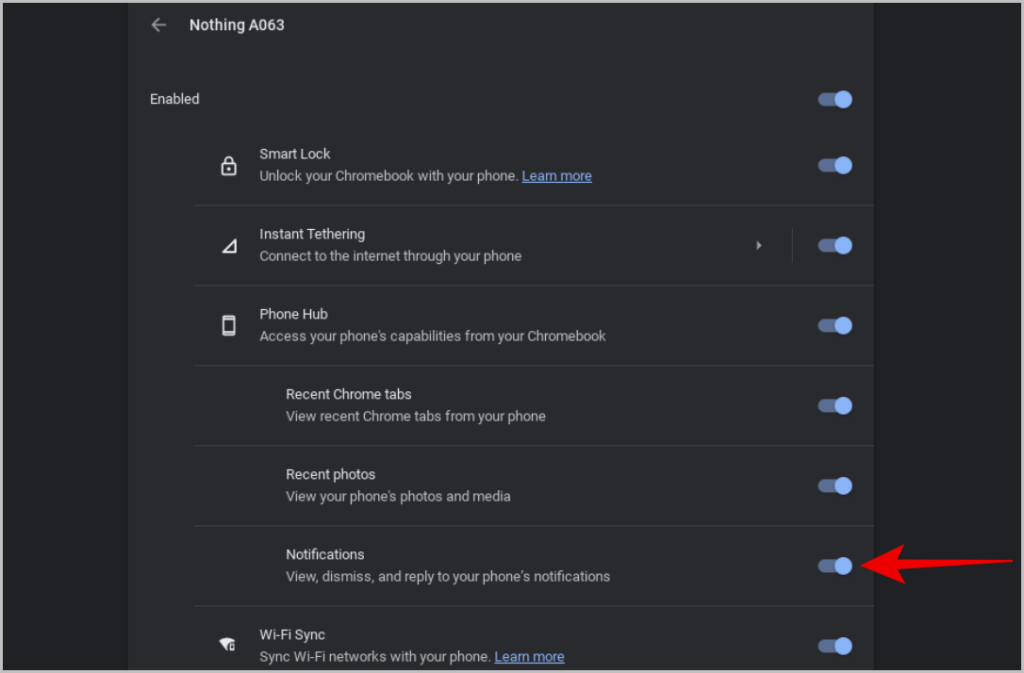
Although you get all your notifications directly on the Chromebook, there are many limitations. For example, you cannot open the app by clicking on that notification yet.
7. Smart Lock
Smart Lock is an Android and ChromeOS feature where you can use the fingerprint scanner on your phone to unlock your Chromebook. Once enabled, when you are on the lock screen page on your Chromebook, just use the fingerprint scanner on your phone to unlock.
1. This feature will be automatically enabled once you have connected your phone to your Chromebook. To turn it off, go to Settings > Connected devices, select your phone and turn off the toggle beside Smart Lock.
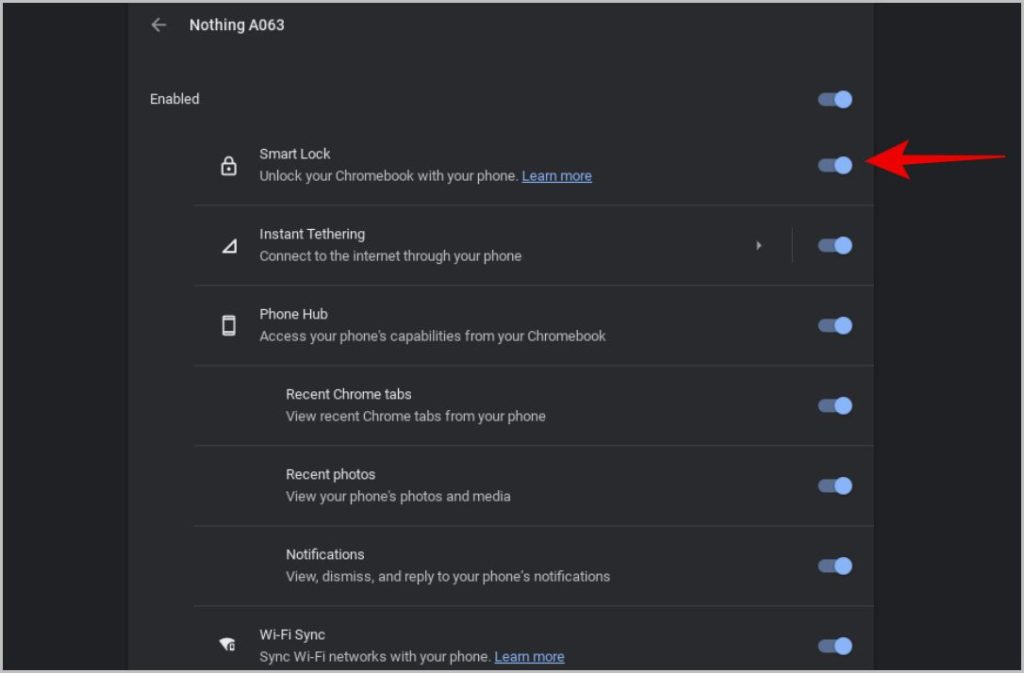
From now on, your Chromebook will be unlocked using the fingerprint scanner on your phone.

8. Wi-Fi Sync
Chromebook normally saves all the Wi-Fi passwords and automatically logs you in when you log in on another Chromebook. By enabling the Wi-Fi Sync feature on your Chromebook, it syncs those passwords with your phone too. That way, you can automatically connect to Wi-Fi networks on the Chromebook that you have logged in from your phone.
1. Wi-Fi Sync is disabled by default. To enable it, open Chromebook settings > Connected devices > select the phone, then enable the toggle beside Wi-Fi Sync.

2. If the option is greyed out, you need to enable Chrome Sync first. To do that, open the Accounts option in the left sidebar > Sync and Google services > Manage What you sync, and make sure the Wi-Fi networks or Sync everything option is turned on.

Now you can get back to Connected devices settings and enable the toggle beside Wi-Fi Sync.
Unique ChromeOS and Ecosystem Features
As Google announced, they are planning on accessing messaging apps on your phone from Chromebook, the ability to mirror your apps from your phone on your Chromebook, etc. Since ChromeOS integrates with the Google ecosystem. So you get the same apps like Google Drive for cloud storage, Chrome for browser, etc. on both Android and Chromebooks.
Here is how you can customize and personalize your Chromebook further to get the most out of it.