While there are numerous ways to share files between Windows and Mac, probably the easiest one is to use SMB sharing which is built-in on both Windows and Mac. All you need is both computers under the same WiFi network. In this article, we’ll set up shared folders on Windows and access it from a Mac. Let’s begin.
After following this article, you will be able to share the folders from your Windows computer and access it from a Mac. You would also be able to copy and delete the files directly from your Mac without needing to get up from your table. Alternatively, if you want to share the files from your Mac and access on Windows, follow this guide on how to Access Mac Shared folders from Windows.
Access Windows Shared folders from a Mac
Step 1. Enable File Sharing On Windows 10
The first thing you need to do is enable File sharing on your Windows which will allow everyone on your Network access to those. You can either plug in a LAN cable or connect your devices to the same Wi-Fi network to ensure high-speed data transmission. Sure, the speeds won’t be as high as the ethered connection but it would still be better than using Google Drive or flash drives.
The first step is to turn on File Sharing on your Windows computer, you can skip to the next step if it is already enabled. Go Settings and open ‘Network and Sharing Center’.
Pro Tip: Keep all the devices on the same network for easy access in the future.
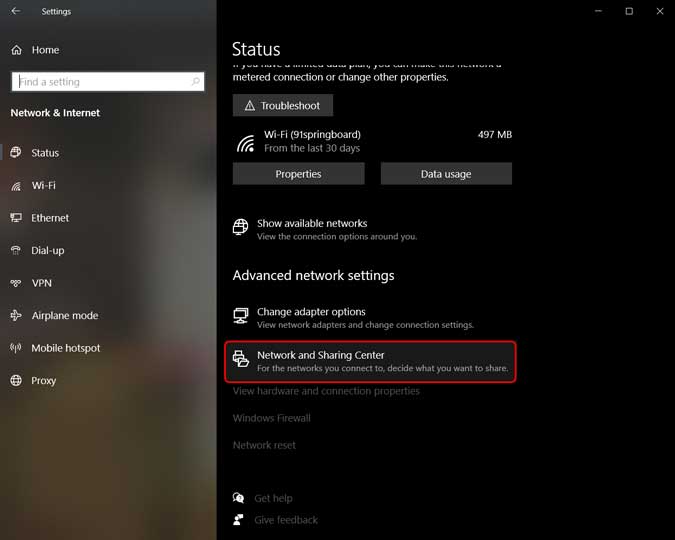
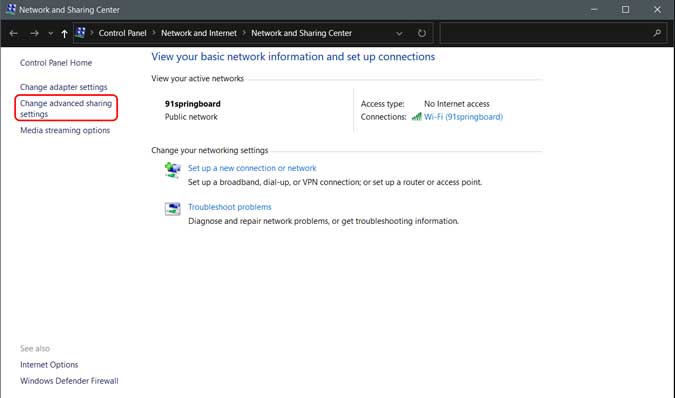
It would open a new window, look on the left pane and click ‘Advanced Sharing Settings‘ to open Sharing Settings.
Read: How to install Chrome OS on any Windows computer
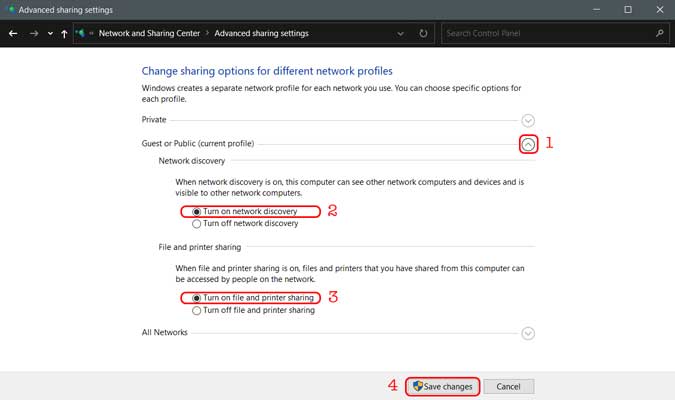
On this page, you’ll see three different Network Profiles; Private, Public, and All Networks. Turn Network Discovery and File Sharing on all the three profiles. If you’re worried about your privacy then you can do this on your current profile and it should still work. Click ‘Save Changes‘.
Unfortunately, it doesn’t work if your Windows PC has no password on it. In such case, you will have to set a new password by going to a user account in the Settings of your Windows.
Also Read: 12 Best Photo Viewer for Windows 10 (2020 Edition)
Step 2. Share a Folder on Windows
Now that the File Sharing is turned on, we’ll share a folder. Open your Windows computer and navigate to the directory which you want to be shared. To demonstrate, I’ll share a folder from C drive but you can share any folder of your choice.
Right-click on the folder, and click Properties.

Go to the Sharing tab and click the Share button under Network File and Folder Sharing.
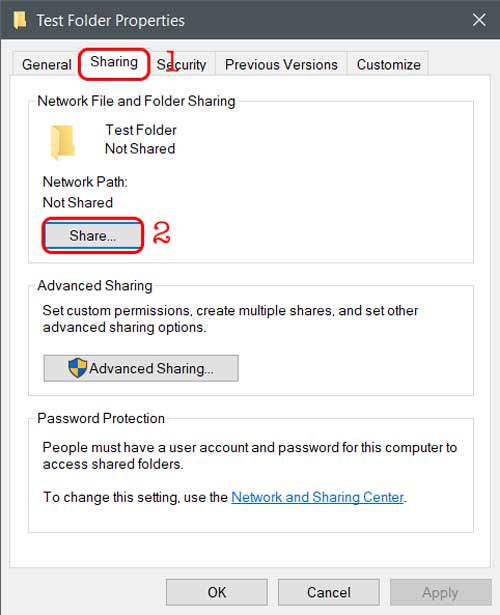
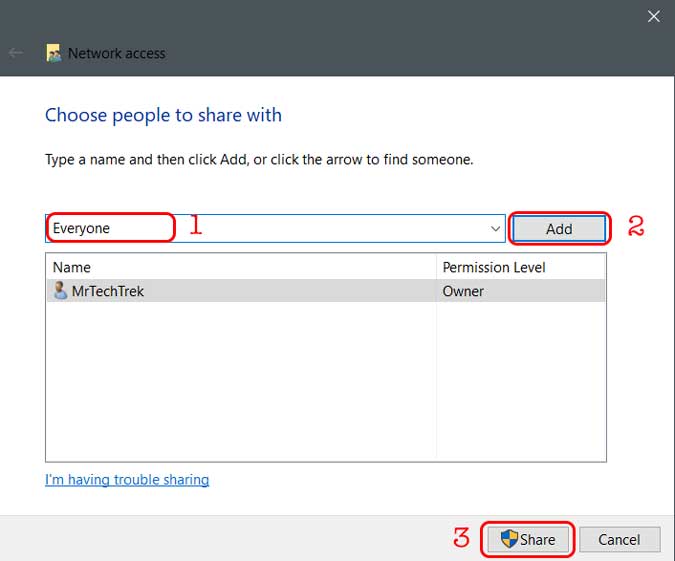
Here you can add people who can access the shared folder. If the folder you want to share doesn’t have sensitive data, type “Everyone“, click ‘Add‘ and then click ‘Share‘. Your folder is now shared with every user on the network.
Make sure you’ve allowed reading and writing to the shared folder in Windows. That way, you can save and delete files to it from your Mac later on.

You can see the folder is shared in the image below. The phrase underlined in red is the hostname for your Windows computer. Note it down somewhere because we’ll need it later on to establish a connection.

Must Read: How to Share Hotel Wi-Fi With Multiple Devices
Step 3. Access Shared folder On Mac
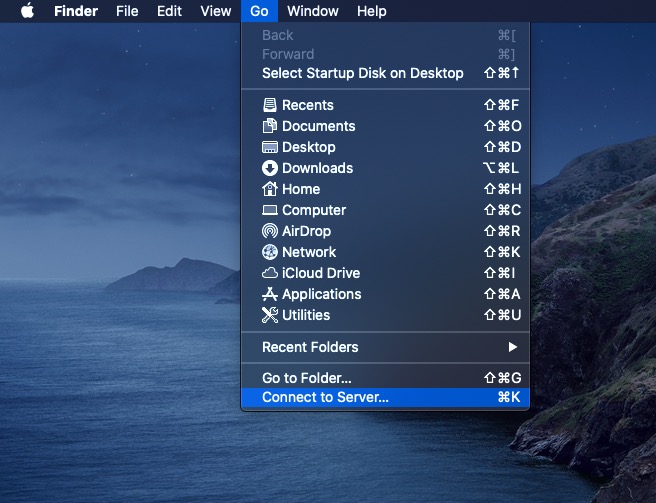
To access the shared folder on a Mac computer, open Finder and on the menu bar on the top, click on Go > Connect to Server. Press CMD+K on the keyboard.
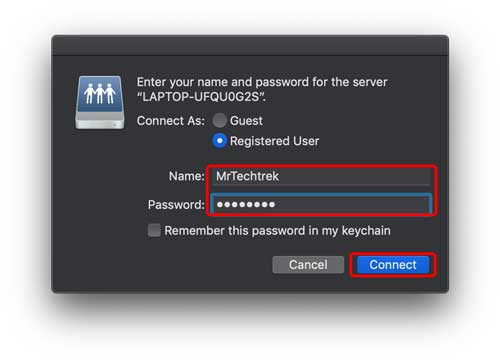
Enter the hostname we note down earlier while sharing the folder on the Windows. Type “smb://WINDOWS-HOSTNAME” and press enter.

It would prompt you to enter the credentials, enter the username and password of your Windows computer and click ‘Connect‘.
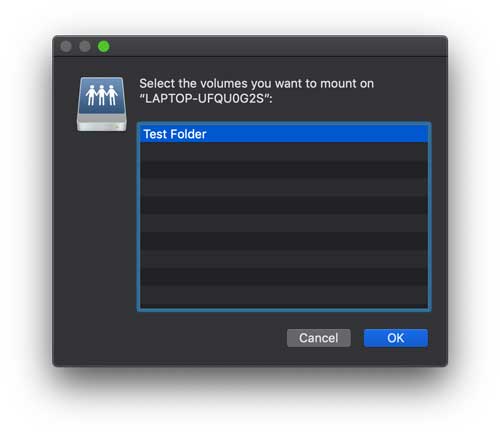
It would show you all the folders that are shared, choose one that you want to mount of your Mac.
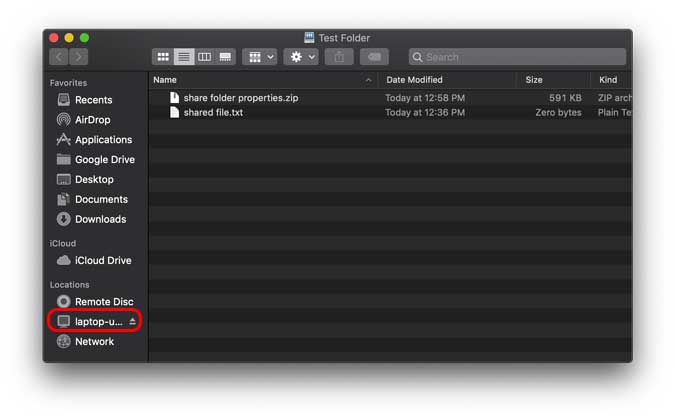
There you go, you can now access all the files of the shared folder. Simply open up your finder and look for your Windows PC name in Finder’s sidebar. Clicking on it will bring up your Windows folder. However, you will get an error message if the Windows Computer is locked or powered off.

You will see your Windows folder where you can drag and drop files or even delete it, depending on the permission you have set while setting up Windows sharing for that folder.
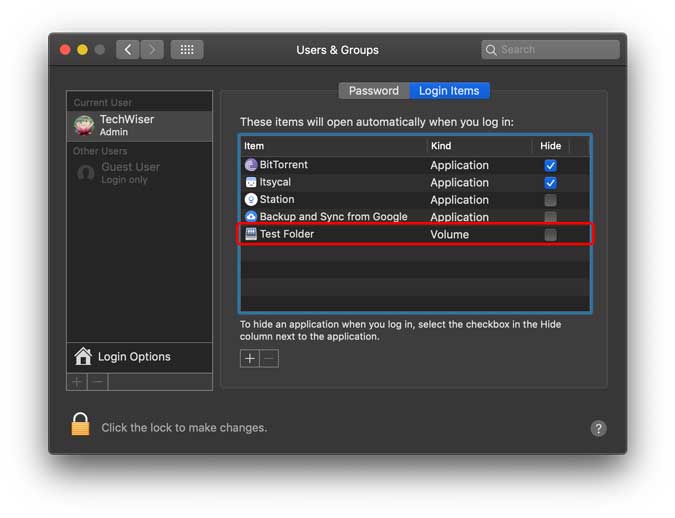
If you want to mount other folders, simply repeat the Second portion of this article. To make it even more seamless, just add the mounted folder to login items so that the Network Drive is automatically mounted every time you restart your computer.
Go to System Preferences> Users and Groups> Login Items> Add the Mounted Drive.
Wrapping Up: Sharing Folders
That was a quick way to set up sharing and accessing Windows shared folders from a Mac. It is a convenient and reliable way of accessing large files over the network when you don’t move around a lot. We use it for sharing Rendered video files that reduce the dependency on Google Drive and flash drives. Alternatively, there are plenty of apps that let you share files over the local network. Go ahead map the drives and let me know if you face any problems. You can comment down below or reach me on Twitter.