Accessing your router from anywhere in your home is easy. Simply type in your router’s IP address (usually 192.168.1.1 or 192.168.0.1) in a web browser. But, how about accessing your router remotely? Especially, when you are out on a vacation or traveling?
Before we come to that, let’s take a look at some of the reasons to access your router remotely:
- Your parents or family often ask you to fix the home Internet.
- You want to check if the kids are playing games on PC, phone or tablet, instead of doing their homework.
- You suspect your neighbors are mooching on your Wi-Fi when you are not at home.
- You can access important files on an external hard drive connected to your router from anywhere.
Why Not Use a Remote Desktop App Like TeamViewer?
While you can also access your router with apps like TeamViewer, you need to keep the computer turned on at your home all the time. This is not practical if you are out and about for more than a couple of days. But routers are always turned on, whether you are at home or not.
So when we skip any remote desktop apps, you don’t have to install any additional software. All you need is a web browser and you can access your router from anywhere. Let’s see how it works.
When you want to access your router from inside the network; all you have to do is type in the router’s IP address in the web browser. Similarly, to access your router from outside, you need to type in your public IP address followed by remote control port number, i.e., 8080. For example, if your network’s public IP address is 74.12.168.14, you’ll have to type 74.12.168.14:8080 in the web browser.
But that poses two problems:
1. Security: As a part of security measure, every router, by default has this remote management feature turned Off. So, you have to enable it on the router manually.
2. Dynamic IP address: Most home users are assigned a dynamic IP address. That means, every time you restart the router, your public IP changes. So, we need to figure out a way to bypass the dynamic IP address problem. And for that, we’ll use Dynamic DNS services like Dyn DNS or No-IP.
Since every router is different, the steps to enable remote management and setup dynamic DNS will be somewhat different. However, the basic principle remains the same. In this article, I’ll show you the steps on Netgear Nighthawk R7000 running DD-WRT custom firmware. Let’s begin.
Here’s How You Can Access Your Router Remotely
Step 1: Turn On Remote Sharing
Routers often have remote sharing (also dubbed as remote management) to let technicians or other IT experts access and fix in case of issues. To access your router from anywhere, you’ll need to turn on remote sharing or management. First, type the router IP or default gateway address in the web browser to access the router’s web interface. Next, enter your username and password for the router.
When you are in the router’s web interface, look for the Remote Management option. Some routers label it as Remote Access and it’s usually found under Advanced Settings.
In Netgear router, you can find this option under Settings > Remote Management.
In Dlink router, look for Tools > Adminstation > Enable Remote Management.
In Linksys router, go to Administration > Remote Management.
In TP-Link router, you can find this option under Security > Remote Management.
In ASUS router, you’ll find it under Administration > System > Remote Access Config.
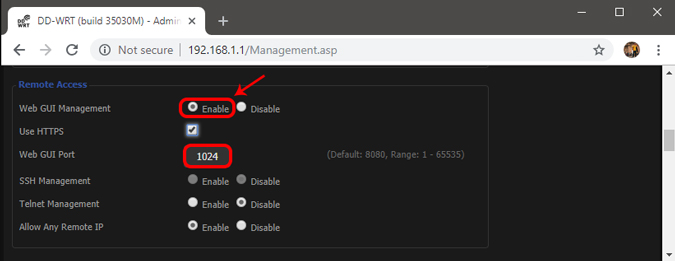
Since you’ll open your router’s web interface remotely, it’s a good security practice to change its default port number from 8080 to something else. Also, make sure you don’t use default login credentials of your router. Change it to something complex. Otherwise, any can try to figure out those details with brute force attack method.
Step 2: Set up Dynamic DNS
Since most internet server providers assign dynamic public IP address to home connections, it changes after a few days. That makes it difficult find a specific IP address to access your router remotely. However, you can remedy that by setting up Dynamic DNS. First, you need to understand what is Dynamic DNS or DDNS.
Typically, you’d have to remember the IP assigned to your network connection to open it from anywhere. However, Dynamic DNS handles the part of tracking that dynamically changing IP from the Internet Service Provider. Also, it lets you access your device (in this case a router), through a simple and easy to remember domain name.
That means, instead of remembering an IP like 100.39.2.89, you can simply bookmark or remember domain name like – yourname.domain.com instead. The Dynamic DNS service providers will keep updating your dynamic IP address in the background and link it to that domain.
There are many dynamic DNS providers out there – some free, most paid. By default, all modern routers show a list of services supported. Of course, there will be an option to set up a custom service. Follow these steps:
1. Login to your router from a web browser and head to DDNS settings in there router’s interface.
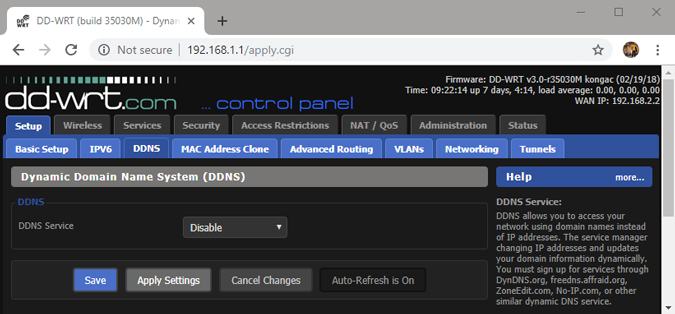
Most modern routers come with the DDNS option usually under Administration or WAN settings of the router interface.
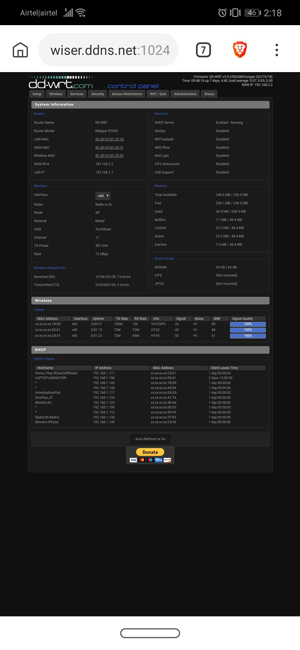
Note that our Netgear router runs a custom firmware called DD-WRT and hence the interface looks different in the screenshot. By default, DD-WRT firmware interface also supports No-IP service under DDNS section.
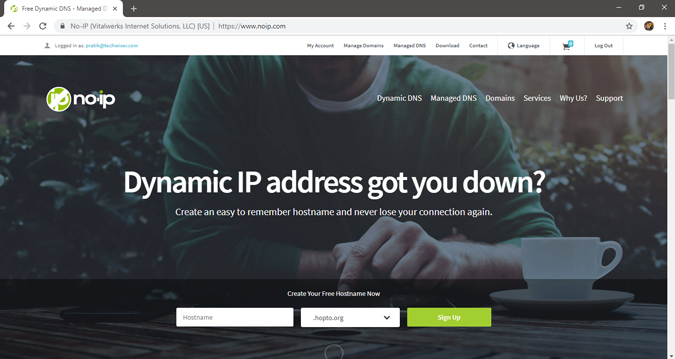
For this guide, we will opt for No-IP service. After that, all I need is a domain name with username and password. Read on to get it from No-IP.
2. Head to the No-IP website and create a free account using the link below.
3. After you create an account, go to the Dashboard. Head to Dynamic DNS section in the left sidebar and select No-IP Hostnames. Next, Click on Create Hostname button. When a new pop up opens, write a Hostname of your choice under the Hostname box and choose a Domain from a drop-down option. When done, hit Create Hostname button at the bottom-right corner.

4. Type out the domain name in the Hostname section of your router settings. Also, type in the username and password you used to sign up with No-IP service and save changes.
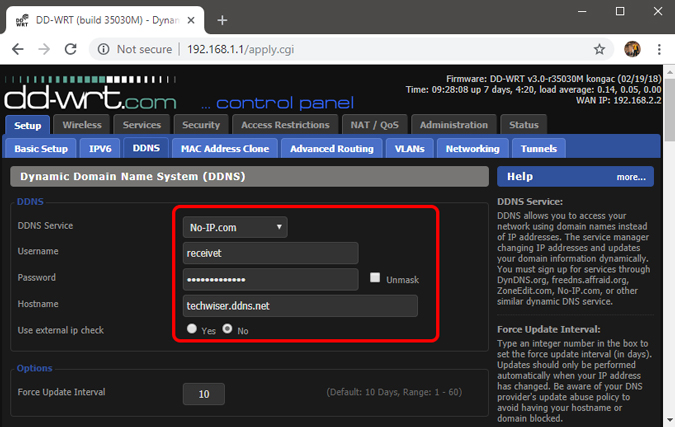
5. To access your home router from a remote location, type in your domain name followed by the port number. For example, techwiser.ddns.net:8080. If your setup is correct, you’ll see the login screen of your router.
View and Control Your Network Remotely
After you have set up Dynamic DNS and remote access on your router, you can access it from anywhere over the Internet. Of course, we recommend that you use strong password for the Dynamic DNS service so that it’s not easily guessable.
If you have an old router here are some tips on how to boost network on your old Wi-Fi.
