Whether you want to contribute and help people or you want to promote your business on Google Maps, Google allows users to upload photos and videos and help the world navigate better. Previously, you can only upload the photos to any location by adding a review to it. Now you have a direct option to just upload photos & videos. But before getting started, here are a few things to know.
Table of Contents
Things to Note Before Uploading Photos/Videos to Google Maps
- You can only upload photos of public places or businesses,. You cannot upload photos of your home or any location that isn’t available on Google Maps or is private in nature.
- Once uploaded, your photos go through a review process and can take few hours to appear on Google Maps.
- Screenshots, GIFs, stock photos, irrelevant or blurred photos will not be uploaded along with other probitted images like spam, terrorism, offensive, sexually explicit content, etc.
- People can look at your Google username, other photos you have uploaded and reviews you have given on the platform once they find your photo.
- Finally, take a look at the photo and video guidelines to make your photos look good on Google Maps.
That being said, here’s how you can upload photos to Google Maps on Mobile and Web.
How to Add Photos to Google Maps on Android or iOS
1. First, open Google Maps app on your Android or iPhone. Now select a place on the map that you want to add photos of. This will open the overview of your location with related info like name, address, directions, website, reviews, etc. Now scroll down until you find an option called Add Photos. Tap on it.

2. This will display images in your gallery with an option to take a photo or video right from there. Google Maps also show relevant photos that are taken at that location under the suggested section to make the selection process easy. You can select multiple photos if you want to upload photos in bulk.

3. Once selected, tap on the Post button at the top right corner. This will upload the photos to Google Maps. As mentioned, photos will go through a review process at Google before they appear in a search. This can take up to a few hours and you will be notified by email when your photos are successfully published.

Alternatively, you can open the Contribute option in the bottom bar of Google Maps and then tap on Add Photo. Just like before, select the photos and videos that you want to add. Then select the location for which you want to upload the photos. Once done, click on the Post button at the top right corner to upload the photos.
How to Add Photos to Google Maps on the Web
1. First, open the Google Maps website and select the location that you want to add photos of.
2. This will open the overview page of that specific location with related info like name, address, directions, website, reviews, etc.

3. Here scroll down in the sidebar to the Photos section. Then click on Add a Photo option. If there are no prior photos added to the location, you will find this option under Add missing information section.

4. This will let you upload photos from your device or will show photos from your Google Photos. Once done, click on Select.

Again, as you know, once photos are uploaded, they go through a review process, it can take a few hours to appear on Google Maps. Google Maps will notify you with an email when it’s done.
How to Upload Photos to your Business on the Web
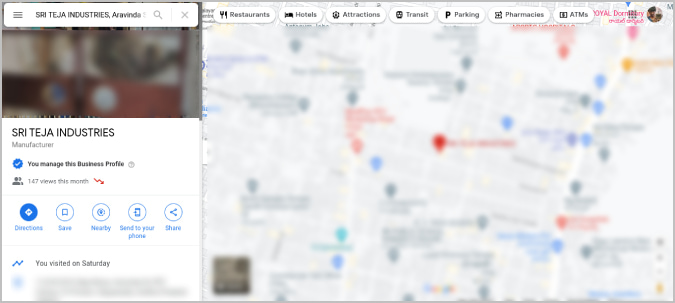
Apart from photos and videos, as a business owner, you may have other types of photos to upload like logo, cover picture, promo video, etc. Also, you get the option to categorize the photos as interior, exterior, product, team, at work, etc. This will provide more visual info to the customer who’s looking for your company. But before that, your business has to be already listed on Google Maps and you need to be the owner of it. You can do that from the Google My Business service.
To add photos to your business,
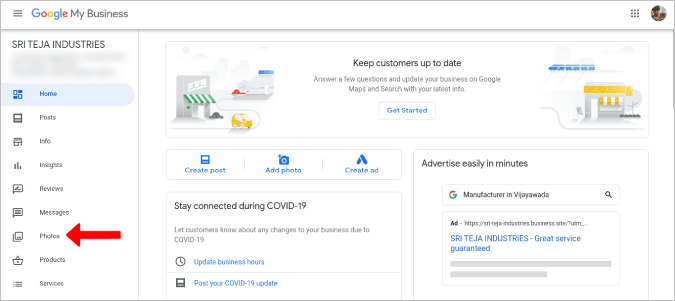
1. Open Google My Business website, if you have multiple businesses, select the business account that you want to add photos.
2. Then select the Photos option in the left sidebar.

3. Here you get the option to upload a business Logo, Cover photo, and promo Video. Click on them to add media.

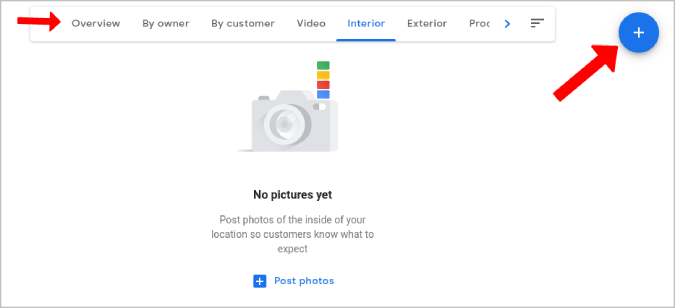
4. To categorize the photos, select the option in the top carousel menu and then click on the + icon on the right to add the image from your device. For example, to add interior photos, just select the interior option on the menu and then click on the + icon.

5. Once uploaded, click on Select. It will upload the photo to Google Maps after the review process is done.

Although Google My Business app is available for smartphones, it doesn’t provide any additional benefits like categorizing or uploading a cover photo, etc. So if you are on your smartphone, open the Google Maps app, select your business and upload photos. As you are the owner of that business, it will show it as posted by the owner. But for any additional functionality, you will need to rely on the web app.
FAQs
How to Check All Photos That We Uploaded to Google Maps?
On Android or iOS, go to Contribute tab and then select View your profile option at the top. This will show all your contributions from reviews, Q&As to even photos. Just tap on the See all photos option under photos to check out all your photos. On Google Maps web page, click on the three-dot menu at the top left then select the Your Contributions option. Now open the Photos tab to check out all the photos you have uploaded.
How to Delete Any Uploaded Photo on Google Maps?
To navigate to the pic you have uploaded, use the Your Contributions option or open that location to check photos. On the web, you can see the three-dot menu on the pic, click on it, and then select Delete this photo. On Phone, you can open the pic and tap on the Delete icon at the top right corner.
Image and Video File Types Supported by Google Maps?
Google Maps support a wide variety of file types but the recommended ones are JPG and PNG for photos. It is also recommended to keep the file size below 5MB. Whereas you can upload videos up to 75MB in 720p format. Along with that, you also have the option to upload 360 degrees photos.
What Do You Earn for Contributing?
By contributing, you promote your business on Google Maps and make it easy for your customers to reach you. For uploading to other locations, you get points that will improve your level as a local guide and also help others discover and explore the world.
How to Become a Local Guide?
There isn’t a sign-up process, just upload photos, reviews, edits, Q&As, facts, etc. in Google Maps and reach 250 points to get the local guide badge. You can go a step further by opening local guides connect. Here you can connect with other local guides, attend meet-ups, publish posts, etc.
Can You Rotate Photos ones Uploaded?
Sometimes photos may need to rotate. But unfortunately, you don’t have any option to edit or even rotate the image that’s already uploaded. Most of the time, the photos that need to be rotated will automatically get rotated in the review process or will not get verified at all.
Wrap Up – Add Photos and Videos to Google Maps
As Google Maps is the most used maps service, you not only can help people but also promote your business on it. It works with a wide variety of photo and video file formats except for GIFs. You just have to follow a few guidelines that help to maintain the quality of the service.
Also Read: