While YouTube provides auto-generated subtitles for videos, other platforms like Instagram and Facebook don’t have such an option. So, if you are making these subtitles within post-production, here are four easy ways to get subtitles for your videos.
Automatic Subtitle Generator
1. Live Captions in Google Pixel
In case you have a Google Pixel device, the job gets tremendously easier. Pixel devices have an inbuilt feature called Live Captions, which lets you generate automatic subtitles for any video. However, if you don’t have a Pixel phone, but have access to a rooted Android phone, you can still get this feature with this Magisk modules.
To turn on Live Captions on Pixel devices, head over to Settings > Search “Live Caption.” Once you are on the menu, you can turn on Live Captions.

Alternatively, you can also toggle on/off Live Captions through the Volume menu. You can change the size and placement of the Live Captions by dragging it around the screen. Moreover, you can also pinch to zoom in and increase the font size of the captions.
Now, that you have live captions running, push the video to full-screen and record the screen with any screen recording app. This way, you would have a video with automatic subtitles.
Google Pixel Live Captions works offline, meaning it doesn’t upload your video or speech to the cloud. And yet, it works for both offline as well as online videos. As of now, Live Captions only supports the English language, but future updates may support other languages.
Pros:
- Works completely offline and doesn’t upload data to the server
- Works with both offline and online videos
Cons:
- Limited to Pixel devices
- Captions use on-device machine learning and hence, improve over time.
2. Android App
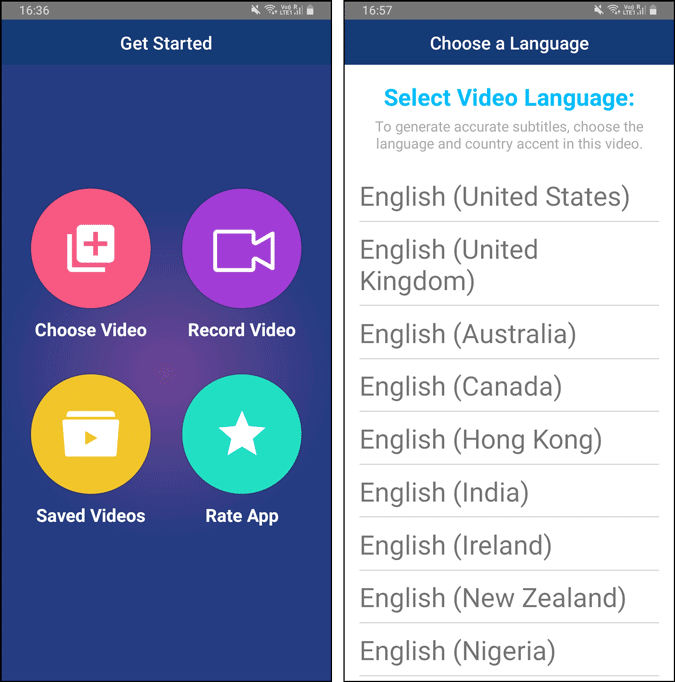
For other Android device owners, we can always use third-party Android apps. Here’s an app called Kaptioned that automatically generates subtitles for your video. All you have to do is upload the video to Kaptioned, let the app process, select the caption language. In my case, the language is English.
The first video conversion is free on Kaptioned. Post that, it is a subscription or pay-per-video.
Once the app is done processing, it’ll present the captions along with a video timeline. You can correct the subtitles by editing the captions. Kaptioned also provides you the option to customize the subtitle color, font size, font family, etc. Post the changes, click on the “Done” button at the top-right corner to export the video.

In case you are wondering, Kaptioned doesn’t have a video time limit. To test that, I tried uploading an hour-long video clip, and the app crashed. So, the sweet spot is 7-10 mins long video.
Kaptioned supports quite a few languages except English, like Spanish, French, German, Portuguese, etc. Compared to Google Pixel Live Captions, Kaptioned had better accuracy. Although I couldn’t find a mention of the API Kaptioned uses, most probably it’s Google’s own Speech-to-Text Cloud API.
Another caveat with the Kaptioned app is that it is paid. The first video conversion is free, and after that, you have to pay are $2/video or $10.99/month. Surprisingly, Kaptioned doesn’t require you to register using your email ID, and hence, if you reinstall the app, you get one free video export every time. Hope, they patch this soon. You can also snatch a 7-day free trial from the Kaptioned web app.
Pros:
- Works better than Pixel’s Live Captions
- Ability to customize subtitle style and font and even correct subtitles
- Supports multiple languages like German, French, Spanish, etc
- Every reinstall gives you one free video export.
Cons:
- Longer videos cause the app to crash.
Download Kaptioned (Android | iOS | Web App)
3. Upload Video to YouTube
The simplest way to get subtitles on your videos is via YouTube. Upload your video to YouTube and it’ll auto-generate captions for your videos. Here’s how.
Foremost, upload your video to YouTube. Once you have done that, play it, and you would see a “CC” icon, the bottom-right corner of the video player. Click on it to turn on auto-subtitles. YouTube uses machine learning to process speech to text. Next, when you have the “CC” button on, it’ll start presenting subtitles. You can make your video full-screen and screen-record the entire clip.
There are also YouTube downloaders like 4k Video downloader that let you download YouTube videos with embedded captions. However, in my testing, they have been more of a miss rather than hit.

YouTube Subtitle Customization
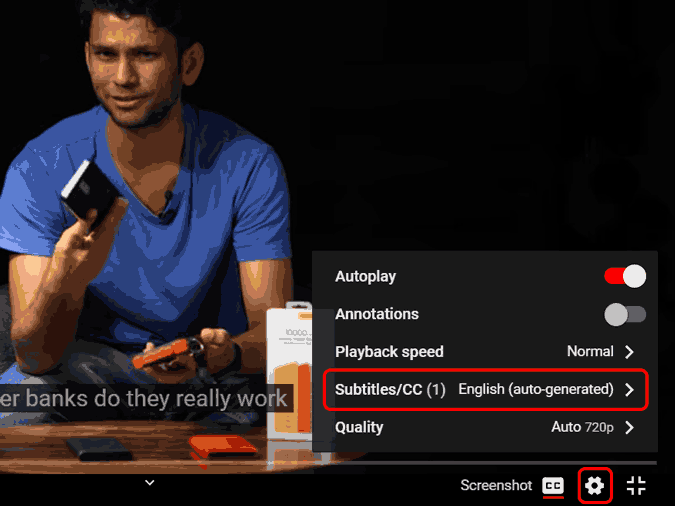
YouTube also provides options to change the language, font size, background of the subtitles within Caption preferences. To do that, click on the gear icon beside the CC icon, and next, click on the “Subtitles/CC” option.
Next, click on the “Options” link right beside the “Subtitles/CC” label.

On the Captions options menu, you can change the opacity, background, font color, etc. It lets you customize the preview of the subtitles.

Pros:
- Supports multiple languages
- Free of cost
Cons:
- Requires uploading video to YouTube
- Not the most accurate
4. The Lengthy way
The problem with the above method is that YouTube isn’t good with subtitles if you are not a native English speaker. There’s no way to edit the subtitles as well. Hence, another workaround is to extract the subtitles from YouTube, edit it, and embed it back to the video. This is a 4-step process.
- Upload the video to YouTube and wait for the video to process
- Extract the captions(.srt) file from YouTube via a third-party website like SaveSubs
- Edit the SRT file for errors in Notepad
- Upload the SRT file and video to a web app like HappyScribe, and it will combine both of them.
In case you are wondering, SRT stands for SubRip Text files. These files contain the subtitles along with the timestamp. Let’s start with this process.
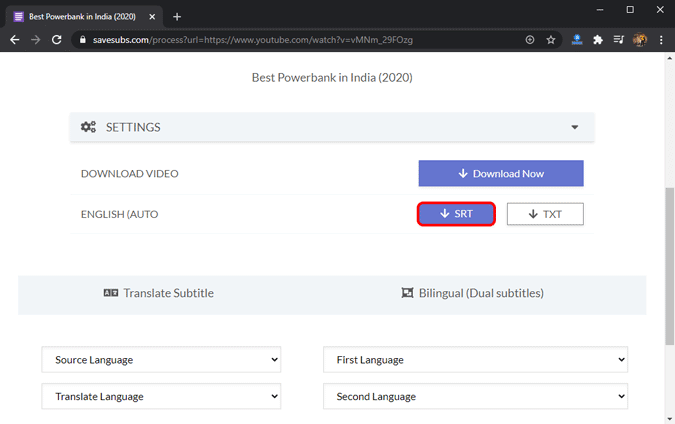
Foremost, upload your video to YouTube and make sure it is public. At least, we need it public until we can extract the auto-generated subtitle files. Once you have the video uploaded to YouTube, head over to the “SaveSubs” web app. Paste the YouTube video link in the textbox and click on the “Extract & Download” button.

After the web app has extracted the subtitles, scroll a bit down and you will find the button to download the SRT file. The SRT file will contain all the dialogues with timestamps. Here, you can change the subtitles by opening it in Notepad.
Also: How to Live Stream With 2+ People on YouTube for Free (It’s Easy)
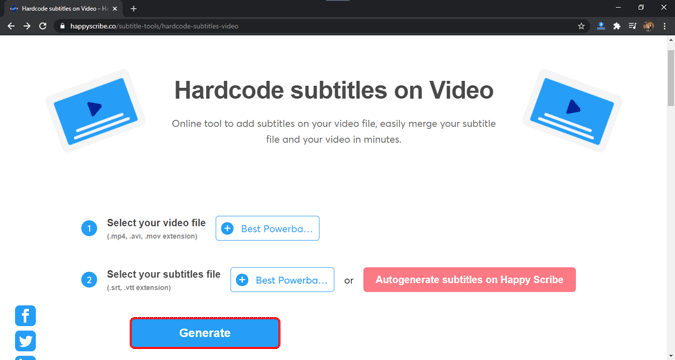
With the SRT file and video, head over to the HappyScribe web app. Upload the SRT and video file by clicking on the “Select File” button, respectively.
Once you are done uploading the files, click on the “Generate” button. The web app will take a while to upload and process the video. Go, get a coffee, meanwhile.
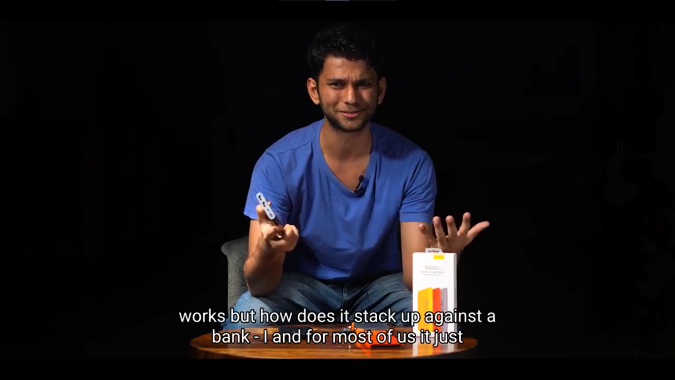
The final video output will be aligned right as per the timestamps described in the SRT file.
Pros:
- Allows manually modifying the subtitles
- Works well in case of longer videos
Cons:
- Lengthy process
Closing Words
I found the Kaptioned app worth investing the money if you deal with a lot of videos. For a one-off use case or bigger videos, the last method is quite useful and tested. For more issues or queries, let me know in the comments below.
Also Read: How To Download Your Own YouTube Videos in 4K