The name of your computer is how other devices on the same network, LAN, Wi-Fi, or Bluetooth connection recognize it. Sometimes, you may want to change the computer name in Windows 10 and now 11. Maybe you bought a new Windows PC and it was named something generic like PC-AHSKDKSDO? Maybe your computer guy named it without asking you first when he/she installed Windows 11? Either way, you have a Windows PC name that you dislike and want to be changed.
But renaming your Windows computer may have some implications as we will discuss below along with a complete step-by-step guide on how to do it.
Let’s begin.
Table of Contents
Why Rename Windows Computer
Here are a few reasons why users may wish to change their Windows PC name.
- It was named something that’s cannot be pronounce – random alphabets and digits
- It is named something generic making it difficult to recognize among a sea of computers in the same network
- You don’t like the given name and want it to reflect your identity, thoughts, or profile
- You want others to easily identify and remotely connect to your computer
Windows Computer Name vs Hostname
A computer name, in the traditional sense, is the name of the local device that you are probably reading this article on. Name of the computer using which Wi-Fi, Bluetooth, and other devices search and connect to it in the household. A local computer name that no one except the user knows about.
A hostname (AKA nodename) is another name for a computer name but has a larger role to play. If your Windows computer is part of a network, a hostname will be assigned to its IP address, to help other computers that are also part of the network identify it. So, it acts as a network identifier.
That said, Windows PC name and hostname can be the same or different, depending on what you want to do. Usually, they are kept the same by admins to reduce confusion and make it easier for others to identify and connect to the host computer.
For most ordinary users, home computer users, for example, you don’t have to worry about hostname. It is good to know but no required. Worry about it if you are an admin.
Windows Computer Naming Conventions
Microsoft has a long and detailed page on what you can and cannot include while naming your Windows computer. Whether it is hostname, NetBIOS, or domain names. For the purpose of this guide, we will focus on just the computer name.
The minimum character limit is 2 while the max is 63. Previously it was 15 characters only and on closer look, Windows still generates and uses 15 characters names at some places. Again, for most users, a smaller name should be good enough but if you are feeling adventurous, try something longer.
Then there are some special characters that can’t be part of the name like a dollar sign or tilde. Name cannot contain blank space and certain names like -TAC, -GATEWAY are reserved.
In short, a combination of alphabets a to z, A to Z, numbers 0 to 9, and hyphen (-) are allowed. We recommend using a name that’s easy to read, write, pronounce or speak, and understand so there is less confusion when you are in the office/cafe/hall with hundreds of computers around.
The command to check your Windows computer hostname is easy. Just open Command Prompt (CMD) with admin rights and give hostname command. By default, it should be the same as your computer name.

How to Change Computer Name in Windows 10 and 11
There are a few ways to do this. Let’s take a quick look at two of the easiest. I will mention which methods work for both Windows 10 and 11 and which only for specific versions. For the most part, settings and options are consistent across both versions of Windows.
1. Change Windows PC Name From Settings (Windows 10 and 11)
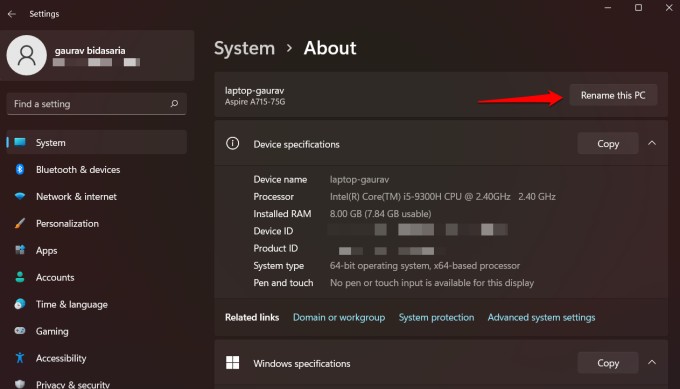
1. Press Windows key+I to open Windows Settings. Go to System > About. Click on Rename this PC in Windows 11 and Rename PC in Windows 10.
2. A blue pop-up window will reveal itself. Type in the new name and press Next. The current PC name should be visible for your perusal.

The name change will take effect only after you reboot the computer. Make sure to save all work before you do so.
In Windows 11, you can change the computer name directly from the Settings homepage. Open Windows Settings and you should find the Rename option right at the top.

2. Change Windows PC Name From System Properties (Windows 10 and 11)
1. Press Windows key+S to open Windows Search and search for sysdm.cpl and open the result. That will open the System Properties window.

2. Under the Computer Name tab, click on Change button.
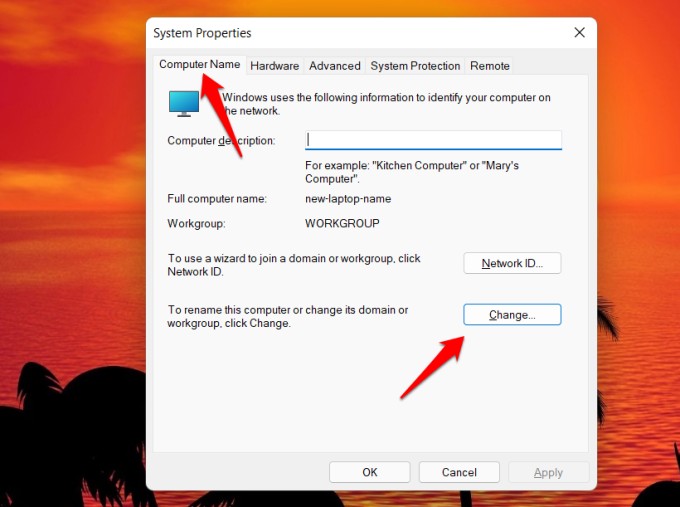
3. In the pop-up that follows, give your computer a new name after deleting the old one. Click OK to save changes and reboot to implement the new Windows computer name change.

Wrap Up: Changing Computer Name in Windows
There are a few other ways too you can change Windows 10 and 11 PC names but these two should be enough. They all have the same effect. Note that renaming Windows computers doesn’t require you to reconnect Bluetooth or any other devices. Similarly, Wi-Fi will continue to work as before with no changes required.
New to Windows 11? Learn how you can customize the Start menu better and 11 features Windows 11 that set it apart.