The PS5 connects with the internet and fetches websites with the help of DNS that’s usually offered by your ISP. Using the default DNS is fine but there are notable advantages of changing the DNS to a third-party DNS such as reliable domain resolution, faster connection (not faster browsing speeds), content filtering, and even bypassing certain geo-restrictions. Here’s a complete guide on how to change PS5 DNS settings in a few easy steps. But before we begin, let’s understand what DNS is and why should you care.
What is DNS and Why Should You Change it on PS5
Domain Name System is responsible for storing the addresses of websites. When we enter the web address of a site, the job of DNS is to resolve it to its IP address which is a series a numbers which is difficult to remember and pronounce.
That being said, there are different variations of DNS that offer different advantages. For example, OpenDNS offers protection from phishing sites and blocks inappropriate websites. For example, Cloudflare offers better connection speeds and privacy and Google DNS offers transparency and reliability.
Apart from these, there are paid DNS services such as Smart DNS Proxy that would offer access to geo-restricted content. So if you’re a parent and wish to limit which websites your child can stumble upon while browsing the internet on PS5, you can change it to OpenDNS and limit the access. If you want reliable connections and your ISP isn’t delivering, you can change to Google DNS, and so on.
Here is a list of DNS servers that we recommend and here are their IP addresses.
- Cloudflare – 1.1.1.1 and 1.0.0.1
- OpenDNS – 208.67.222.222 and 208.67.220.220
- GoogleDNS – 8.8.8.8 and 8.8.4.4
- Smart DNS Proxy DNS – 23.21.43.50 and 169.53.235.135
- Quad9- 9.9.9.9 and 149.112.112.112
- Cisco OpenDNS- 208.67.222.222 and 208.67.220.220
How to Change PS5 DNS Settings
There are two easy ways to change the DNS settings on PS5: changing the DNS on the PS5 itself and changing the DNS on the router itself. I’ve listed the steps for each method and you can use any one of those at your discretion. It won’t affect how the DNS functions.
1. Change DNS Settings on PS5
Unlike how you change DNS settings on PS4, the steps to change DNS settings on PS5 are a little different.
1: Power your PS5 and log in and when on the home screen, use the controller to scroll to the Settings icon on the top right corner. Press X to open the Settings page.
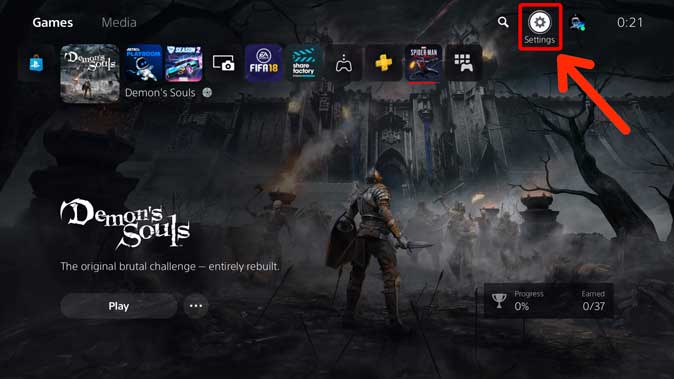
2: On the Settings app page, scroll down to find the Network Settings on the list. Press X to open the Settings.

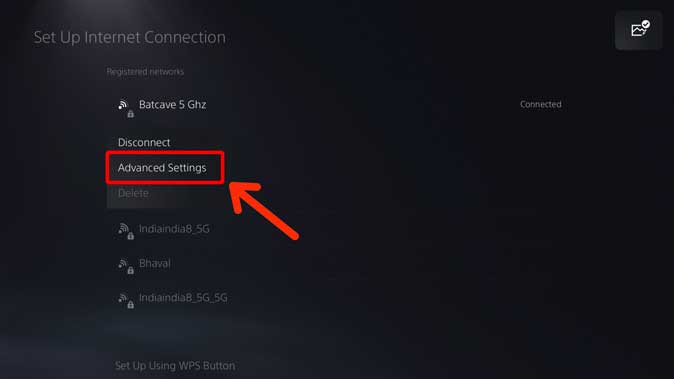
3: Select Settings option on the left and open Set Up Internet Connection by pressing X.

If you’re connected to Wi-Fi, you’d find your Wi-Fi network under Registered Networks. Select the network and press X to bring up the pop-up menu and choose Advanced Settings.
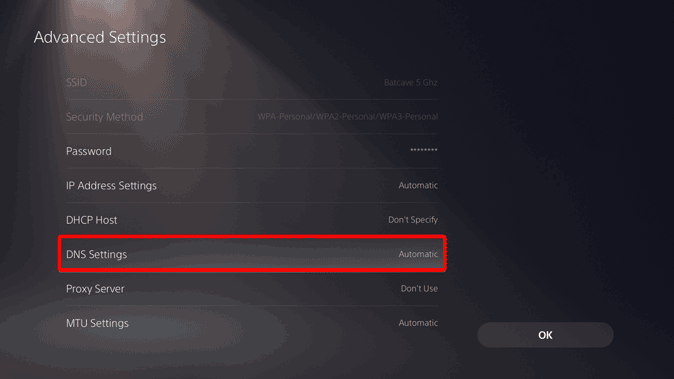
Here we can change the settings such as DNS, IP address, DHCP, Proxy, MTU, etc. Choose DNS and select Manual from the pop-up menu. It would show two additional fields: primary and secondary DNS.
Add two different DNS in primary DNS and secondary DNS fields. Enter the DNS of your choice and press OK.
2. Change DNS for PS5 from the Router
In my opinion, changing the PS 5 DNS settings through the router is better as it applies to every device in your house that connects with the router. The method to change the DNS on any router is roughly the same whether you use a computer, iPad, or even a smartphone. I used Huawei’s HG8145V5 to list the steps to change the DNS on the router.
1: Grab a computer or a smartphone and find the IP address of the router. If you’re unsure, it is to find the IP address of your router on any device.
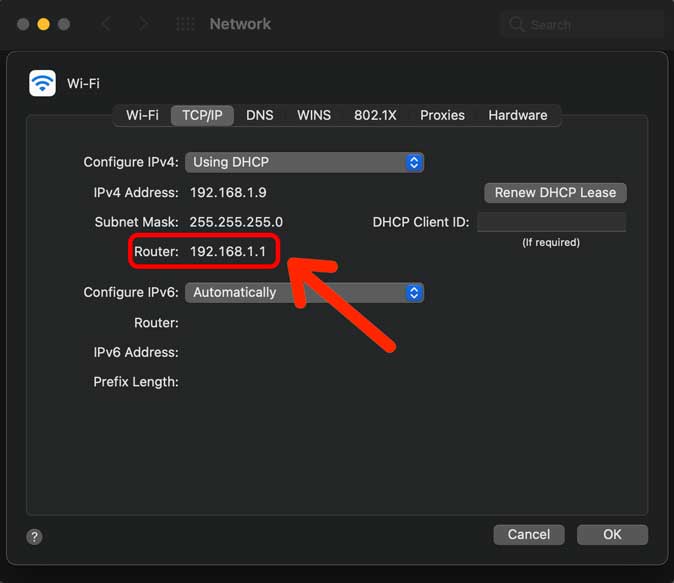
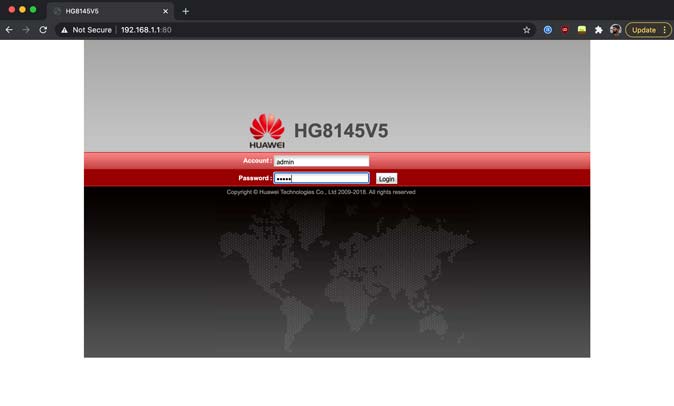
2: Once you have the router’s IP address, type it in the URL bar of the web browser of your choice. I used the Mac to change the DNS on the router. Enter the username and password to log in. If you’re not sure about the login credentials, look at the back of the router or call your ISP.
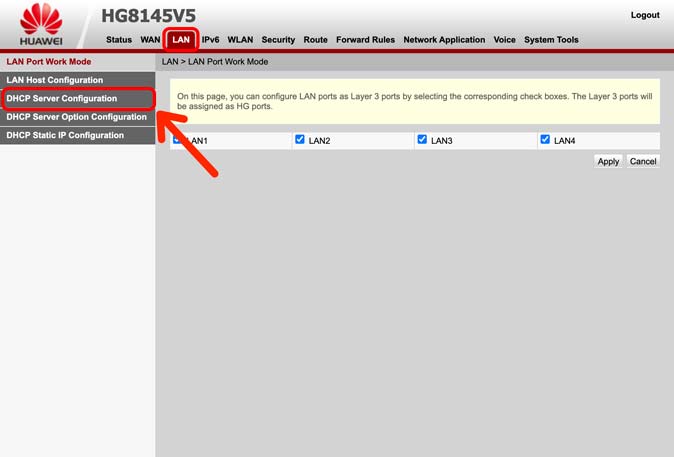
3: After successfully logging in, select LAN from the list of options on the top row. Find the DHCP Server Configuration option and click to expand it.
4: You’d find primary and secondary DNS and some IP address written next to it, probably given by your ISP.
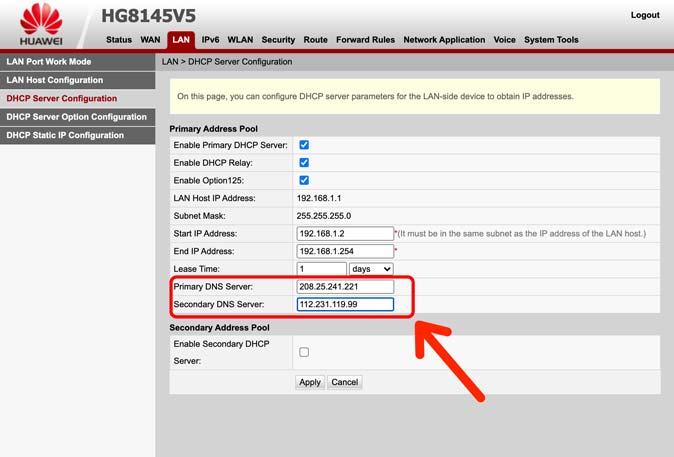
Click the text field next to Primary and Secondary DNS and enter the DNS address of your choice.
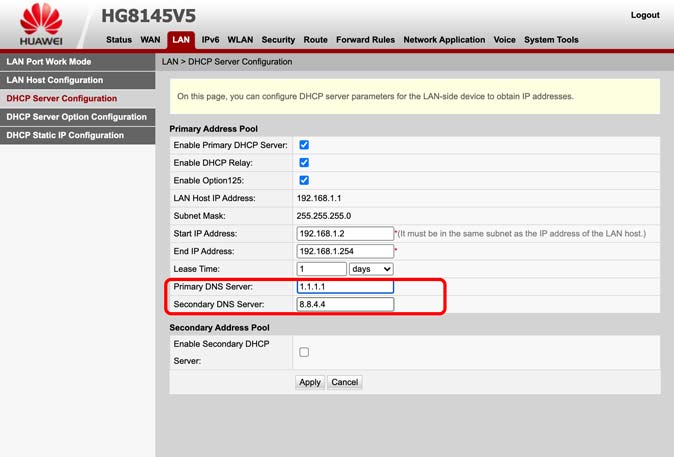
That’s it. The changes would be saved automatically. If you see a Save changes button at the bottom of the page, try that and restart your router.
Closing Words: Change PS5 DNS Settings
These were the two methods that you can use to change the DNS settings on PS5. The first method is the direct way where we change the DNS settings on the PS5 itself. However, if you want the advantages of a custom DNS on all the devices connected to the Wi-Fi in the house, then changing it from the router is better. What do you think? Let me know on Twitter.
Also Read: How to Use PS4 Controller on PS5 – Complete Guide