If you are getting started in packet analysis and penetration testing, the most important step is to determine whether your Wi-Fi card supports promiscuous or monitor mode. Generally, the monitor mode is disabled on the built-in Wi-Fi card provided by the desktop or laptop manufacturer. But, before you rush in and spend 30$ on a Wi-Fi USB adapter, just check whether the existing one supports monitor mode. On that note, here is how to check your WiFi card supports monitor mode on Windows, Ubuntu, and macOS.
Check If Wireless Adapter Supports Monitor Mode
1. Windows
In Windows, there is no direct command to check or turn on monitor mode on your Wi-Fi Card. Hence, we would need to resort to a tool called Microsoft Network Monitor. It’s an official tool developed by Microsoft but currently is in the archival state. However, it is fully compatible to run on Windows 10 machine.
Download and install the MS Network Monitor tool. Once done, you need to reboot the system for the tool to detect the network cards. Next, launch the app and on the Start page, click on “New Capture”.

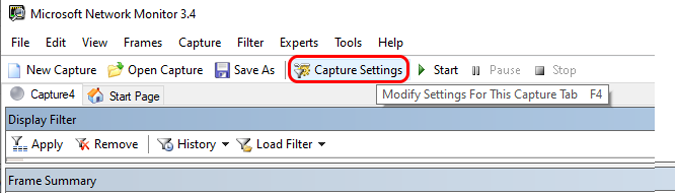
On the New Capture tab, we want only the Wi-Fi card to listen to the packets. To do that, click on the “Capture Settings” option on the top toolbar.
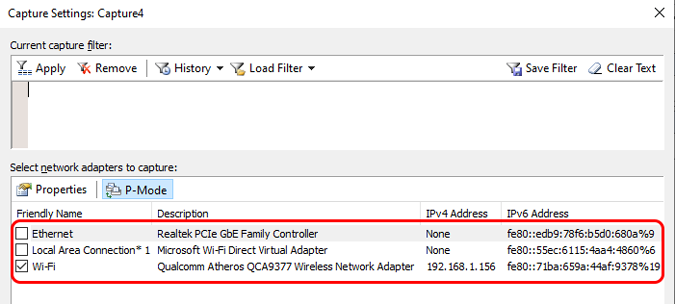
On the settings dialogue box, uncheck everything else apart from Wi-Fi and click on the Close button. This is to ensure that the Wi-Fi card only listens to network traffic.
Post the setup, click on the “Start” button to start capturing the packets.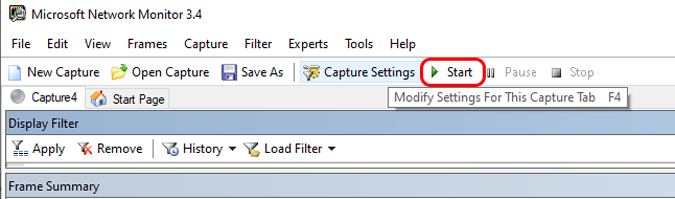
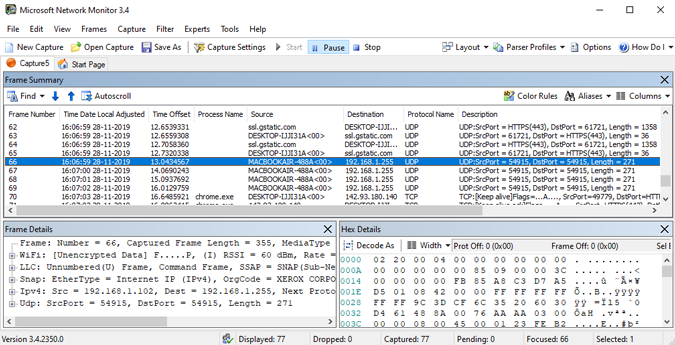
In case you get an error popping up, it means your Wi-Fi card doesn’t support monitor mode. Whilst, if packets are being successfully captured, it means that your Wi-Fi card supports monitor mode.
Alternatively, you can also do the same using the Wireshark network monitoring tool.
Download Microsoft Network Monitor
2. macOS
For macOS, you can check for the Wi-Fi card’s monitor mode via the terminal using the tcpdump tool. However, the process is a bit tedious so we will go the GUI way. To do that, run the Wireless Diagnostics tool from the Spotlight search.
Alternatively, you can click the Wi-fi icon in the toolbar while holding down the option key, and select Open Wireless Diagnostics from the drop-down menu. 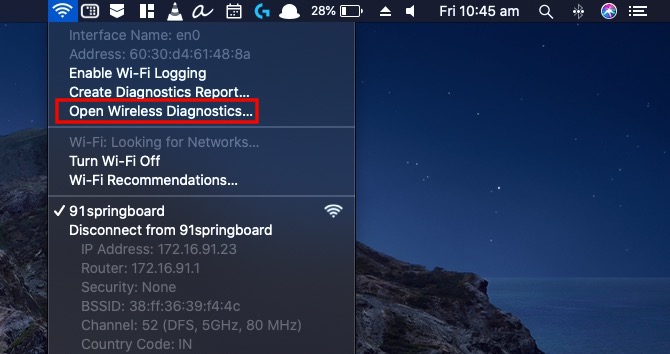
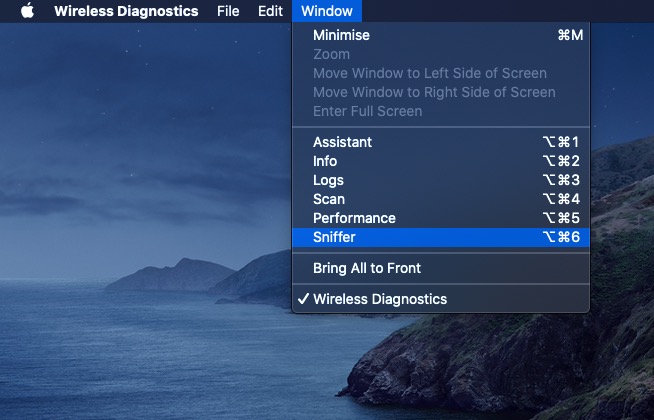
Once you have the Wireless Diagnostics tool launched, hit ⌘ +⌥ +6 to launch the Sniffer window. Alternatively, you can also do the same by clicking on the Window menu on the toolbar and click on “Sniffer”.
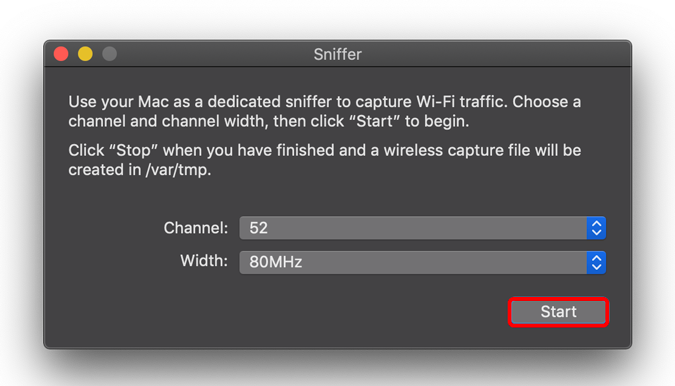
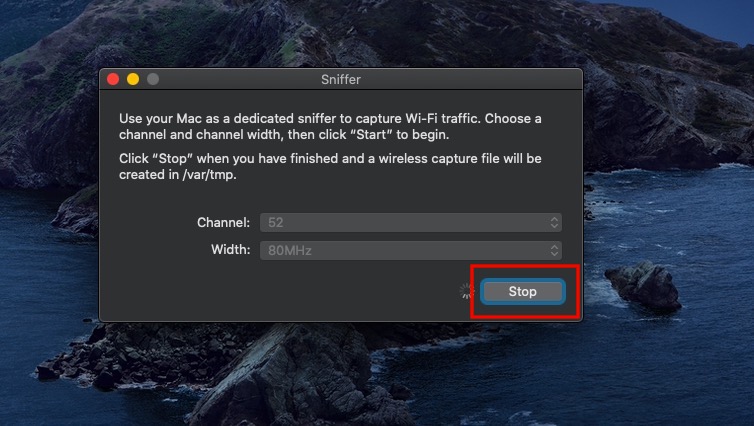
On the Sniffer window pop-up, you will see Channels and Channel Width option. As of now, we will go with the default options. Click on the Start button for the Sniffer tool to start scanning. Depending on your settings, you might have to enter your login Mac’s login credentials for authentication.
Read: 6 Best Wireshark Alternatives for Windows and macOS
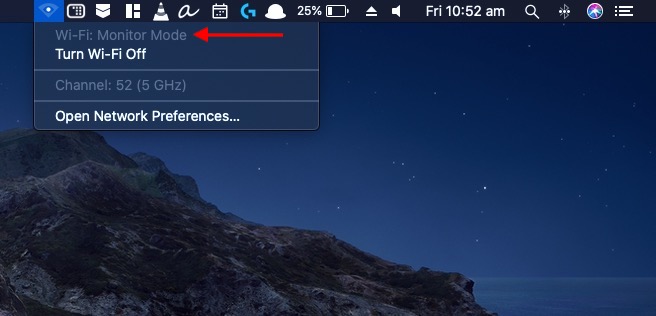
If the sniffer tool runs successfully, you will see your Wi-Fi down. If you click on the Wi-Fi icon at the top-right corner, you will see that your Wi-Fi is in monitor mode. This means that your Wi-Fi supports monitor mode. In case the sniffer tool throws an error, it means your Wi-Fi doesn’t support monitor mode.
When the Wi-Fi is in monitor mode, you won’t be connected to the Internet. To access the Internet, stop the Sniffer tool.
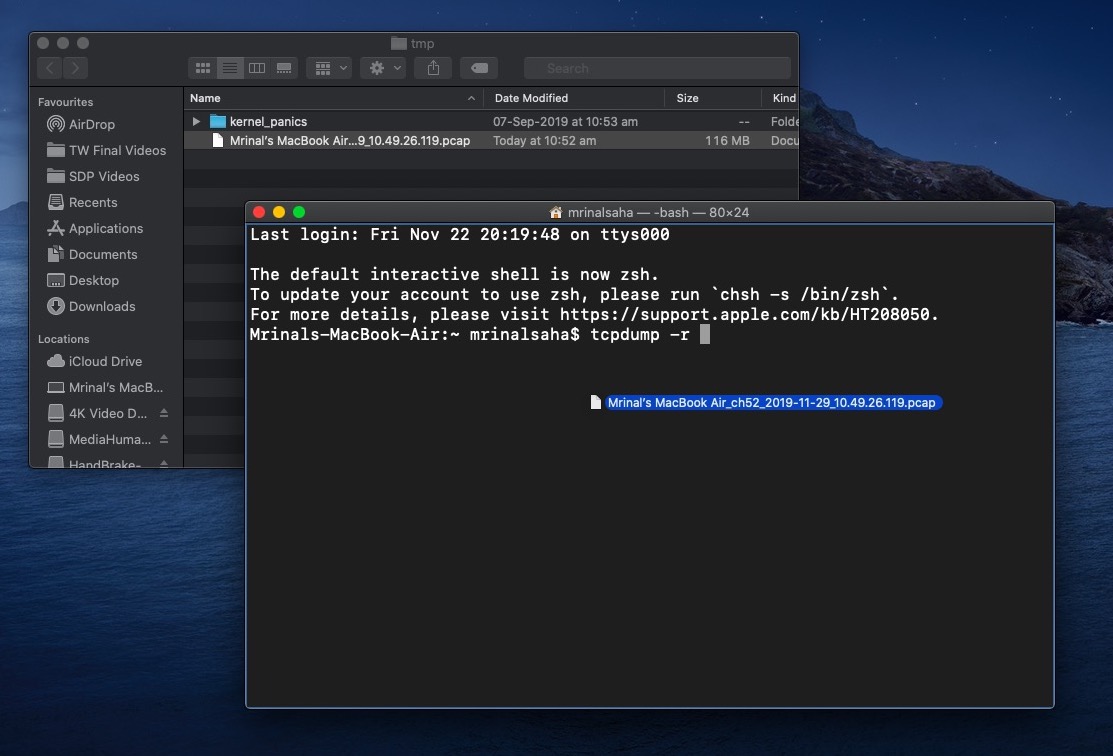
When you end the Sniffer tool, it creates a “.pcap” file at /var/tmp location with all the recorded packets in the meantime. You can view the file by using the following command.
3. Ubuntu
In Ubuntu, the process is quite simple and doesn’t require installing any additional tools. Foremost, we need to find the interface name of the Wi-Fi adapter. To do that, use the following command
ip a
This command will display all the network interfaces on your system. Since I am connected to the internet via Wi-Fi, you can see the IP address and the state is UP. So, my Wi-Fi interface name is “wlp3s0”.

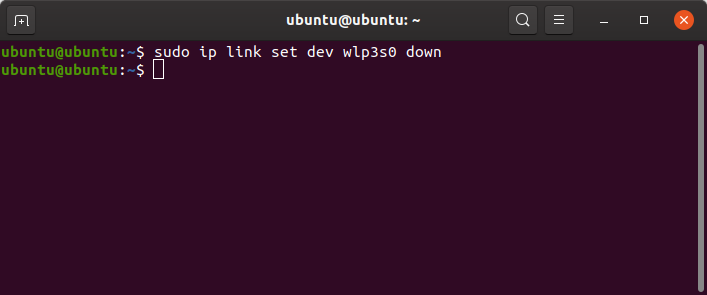
Once we have the interface name, we need to turn the Wi-Fi down. Use the following command to do that.
sudo ip link set dev wlp3s0 down
Replace wlp3s0 with your Wi-Fi interface name.
Now that we have the interface down, we can turn the Wi-Fi card to monitor mode. To do that, run the following command
sudo iwconfig wlp3s0 mode monitor
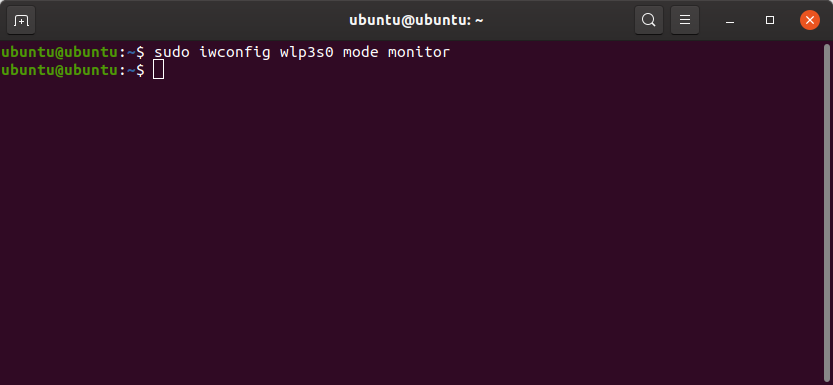
Since my Wi-Fi card supports monitor mode, the command completed successfully. In case you don’t have monitor mode on your Wi-Fi card, the command will end with an error. To double-check, hit the following command.
iwconfig

If the last command was successful, the Wi-Fi card should be in monitor mode. Else, your Wi-Fi card will show up in “Managed mode” and it doesn’t support monitor mode.
While your Wi-Fi is in monitor mode, it will be turned off and you won’t be able to access the Internet. To put it back in managed mode and turn it on, use the following command.
sudo iwconfig wlp3s0 mode managed
sudo ip link set dev wlp3s0 up
Wrapping Up
After you have checked whether your Wi-Fi supports monitor mode, you can go ahead with further network analysis and testing. We have a dedicated article on best open source network monitoring tools for Windows and Linux, do check that out. On a side note, Windows 10 and macOS are not built to be used as a network server or security analyzer. So eventually you would have to switch to Kali Linux or Parrot OS.
If the above methods don’t work for you, it means your Wi-Fi card doesn’t support monitor mode. In such a case you can get a Wi-Fi USB adapter for around 30$. I would recommend the Alfa AWUSO36NH, Alfa AWUS036NHA, or Realtek RTL8812AU.
Most Android smartphones support monitor mode right out of the box, however, you need root access and apps like zAnti or cSploit to sniff data packets on the network. Here is a good article that will get you started.
iPhone on the other hand most likely does not support monitor mode, even after jailbreak. So the best you can do is capturing traffic to and from yourself and not from other devices on the network.
Meanwhile, in Ubuntu, you can do an advanced level of analysis and testing by installing terminal-based networking tools like Aircrack-ng, hcxtools, etc. For more queries or issues, let me know in the comments below.
Also Read: 5 Best Network Monitoring Tools for Windows