I own an iPhone and Mac that make my life so much easy but I also own a Windows laptop. So how do you connect and sync an iPhone to a Windows computer? There are a few ways to do this, some obvious while others not so much. In this post, we will take a look at all the ways you can connect an iPhone with Windows 11 and sync data, and use other features on the laptop.
Let’s begin.
Table of Contents
1. Connect iPhone to Windows 11 Using Data Cable
This is probably the oldest and most widely used method. Just use a USB cable that came with your iPhone and plug it into the Windows computer. It should detect the media storage folder immediately.
Pre-requisites – one USB Type C or A to lightning cable to plug iPhone to Windows computer.
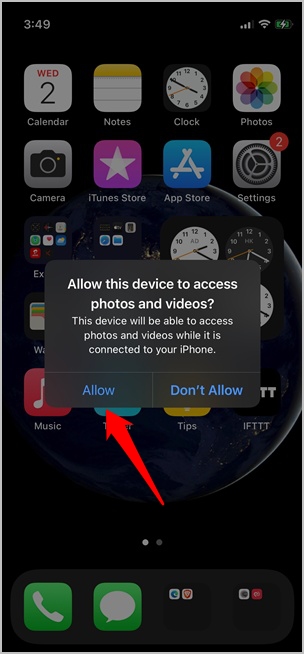
When you connect for the first time, you will see a pop-up on your iPhone asking for pairing permissions. You will view a similar pop-up on Windows. Tap on Allow on iPhone and Windows too.
Now, when you open This PC or My Computer on Windows (press Windows+E to launch File Explorer), you should see iPhone drive along with other drives.

Note that you can only access photos and video folders here. All other files and folders including system files are protected and cannot be accessed on Windows. You can also use his method to quickly transfer media files to your iPhone from Windows and vice versa.
Another way to take a quick backup of everything, that is all media files, on your iPhone to your Windows computer is to right-click on the Apple iPhone drive and select Import pictures and videos.
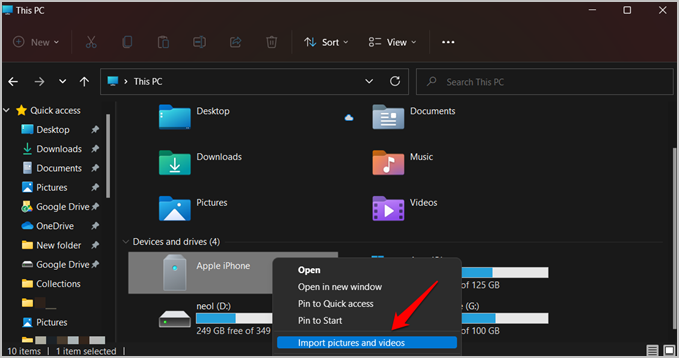
This will save you the trouble of manually hunting down all the images and videos on the smartphone to sync or back up.
Pros:
- Quick way to back up media files
- Charge iPhone while transferring files
Cons:
- Restricted access to files and folders
2. Connect and Sync iPhone to Windows 11 Using iTunes
iTunes was developed by Apple to help iPhones sync data and manage their backups on computers. It is available for both Windows and macOS. You can do a lot more on Windows using iTunes like play media files, stream content, and manage apps.
Pre-requisites: iTunes app from Apple or Microsoft Store.
1. Launch iTunes once you have downloaded and installed the app. Sign in using the same Apple ID that you use on iPhone from the Account > Sign in.

You will be asked to enter 2FA code that should appear on your iPhone screen if you have enabled that.
2. Connect your iPhone using the USB cable and give necessary permissions on your smartphone and computer when the pop-up appears. If connecting for the first time, you will be asked to Trust This Computer. Tap on Trust and enter the 2FA code that appears on the iPhone screen in the iTunes app on Windows.

You should see the iPhone logo appear on iTunes upon successful connection. Wait a few moments for the sync process to complete.

You can now view your media collection that includes any purchased and downloaded music and movies.
3. Click on the iPhone icon to view a summary of the device along with key stats. Here, scroll a little to find backup options that include iCloud and Computer. Data that is backed up to iCloud is encrypted automatically while you have the option to manually encrypt data that is backed up to the computer locally.

4. In the left sidebar, you will find different media file types like books, music, movies, etc. Click on individual items to view and play them on your computer.
Under the Summary tab, you will find Sync button at the bottom with a detailed breakdown of data storage available and consumed. Here’s a quick look at a few notable options and what they mean:
- Automatically sync when this iPhone is connected – All your iPhone data will be synced and backed up to either iCloud or computer when you connect iPhone to Windows and launch iTunes.
- Sync with this iPhone over Wi-Fi – All your data on iPhone will be backed up and synced to the Windows computer over Wi-Fi. Eliminates the need to connect via cable just to take local backups. Note that the sync will initiate when the iPhone is connected to a power source and both the devices are on the same Wi-Fi network.
Pros:
- Access all types of user files
- Different options to take backups
- Sync options
- Insights on key stats
- Configuration options
Cons:
- Can’t access system files like on Android
3. Connect iPhone to Windows 11 Using Microsoft Edge
Taking a leaf out of Apple’s playbook, Microsoft released an app called Your Phone for Windows, Your Phone Companion for Android. However, the app is still not available on iOS. Instead, Microsoft released a companion app called Continue to PC which has since been discontinued and features integrated with Edge – Microsoft’s answer to Chrome and Safari.
If you have Edge browser installed on both Windows and iPhone, you can open a page on iPhone and then open the same on your Windows computer without having to type the URL again. Simply tap the bottom menu button and select Send to Devices.

Finally, select the computer you want to share the link with, and then tap on Send.

Window to iPhone World
As you may have noted, there is not a single comprehensive solution to the problem. You can connect and sync iPhone with Windows using three different ways. Each has its merits and demerits.
The Edge browser is useful if you want to quickly share links from the smartphone to the computer. USB cable is the fastest way to backup media files. And iTunes is an overall good way to view stats, manage files, take backups, play media, and sync data. We recommend a combination of iTunes and Edge browser for your daily needs.