It might not be everyday occurrence but there will be times when you need to convert PSD to JPG. If you have Photoshop installed on your system, then it is just a matter of selecting the “Save As” option from the “File” menu. However, if you don’t have Photoshop installed then it can be quite tricky to convert PSD files to JPG or PNG. In this post, I will show you how to convert PSD to JPG on Windows, MacOS, Android and using a platform independent web app that can be accessed from any browser. Let’s get started.
Related: 10 Best Ways to Open and Edit PSD files without Photoshop
Table of Contents
Convert PSD Files to JPG or PNG
1. On Windows
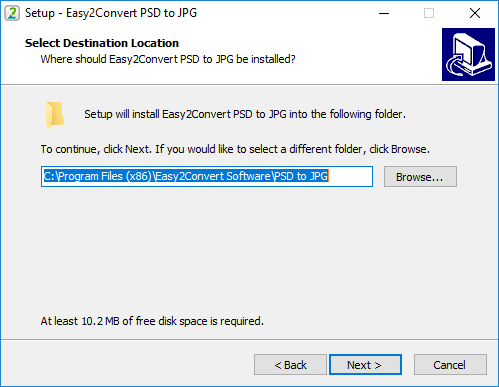
Unless you have Photoshop installed on your system, Windows doesn’t directly support .psd files. In fact, you can’t even preview PSD files within the File Explorer or using the built-in Photos app in Windows 10 or Photos Viewer in older Windows versions. As such, we need to use a free and third-party app to convert PSD files to JPG in Windows. So, head over to the official website, download PSD 2 JPG converter and install it like any other Windows software.
As the name suggest the app only support PSD to JPG, however if you want to extract PNG file from a PSD, get Easy2Convert PSD to IMAGE. It supports (.psd) to various image formats (.jpg, .bmp, .gif, .png, etc.)
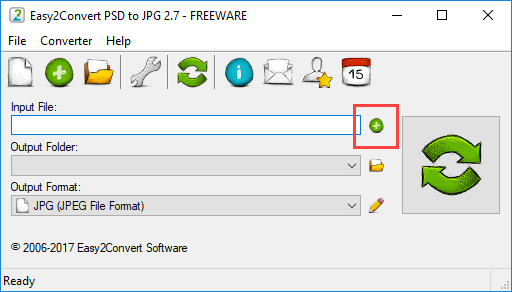
After installing, launch the software by searching it for in the start menu or using the desktop shortcut. The user interface looks a bit shabby but it does get the job done. On the main screen, click on the “+” icon appearing next to the Input field. This action will open the browse window. Select the PSD file you want to convert and click on the “Open” button.
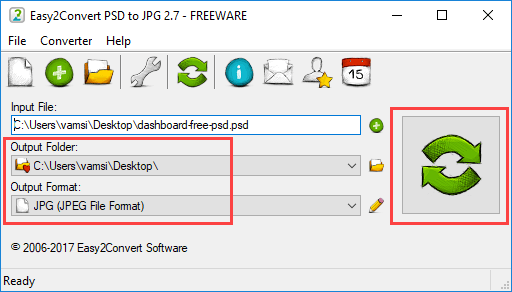
As soon as you select the PSD file, the software will automatically choose the same folder where you stored the PSD file as the destination folder. If you want to change that, click on the Folder icon next to the Output field. In my case, I’m letting the defaults be. Since the software only supports conversion from PSD to JPG, you don’t have to modify any settings under Output Format.
Once you are satisfied with settings, click on the “Convert” icon and the image will be instantly converted.
The converted image will be saved to the destination folder that you chose earlier.
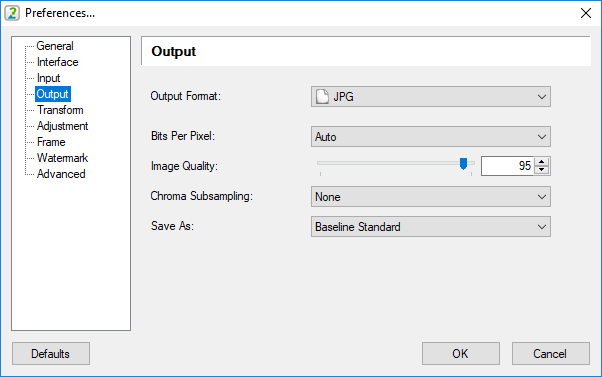
By default, the Easy2Convert software will set the image quality to 95% and uses no Chroma Subsampling. If you want to change those settings, you can do so by clicking on the “Settings” icon (wrench icon) appearing on the top navigation bar and then selecting “Output” from the left sidebar.
The cool thing about this app is that it also allows you to convert PSD to JPG in shell/cmd as a .bat-script or service, supplying appropriate command-line parameters. To do so just follow this simple syntax: psd2jpg.exe -i <input file> -o <output folder>
Batch convert PSD to JPG or PNG
If you want to convert psd to jpg in batch, you need to get the PSD to JPG PRO, which cost $19.
A better alternative is IrfanView with the PSD plugin. It is free and much faster than Photoshop and can do batch resize, crop, convert and all kinds of other features too.
2. On macOS
Unlike in Windows, the conversion process is way simpler in macOS. This is because macOS actually lets you preview PSD files even without having Photoshop installed. Moreover, you can even export PSD files in any of the supported formats like JPG, PNG, etc., thanks to the built-in app Preview. Let me show you how to do it on macOS.
To start off, right-click on the PSD file and select the option “Open with” and then “Preview (default)”.

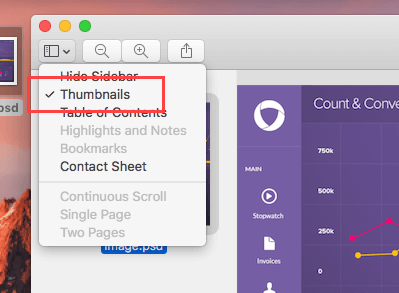
The above action will open the PSD file in Preview. Here, make sure that the Thumbnails option is enabled as it lets you easily export the image. To enable the sidebar, click on the “Options” icon and then select the option “Thumbnails.”
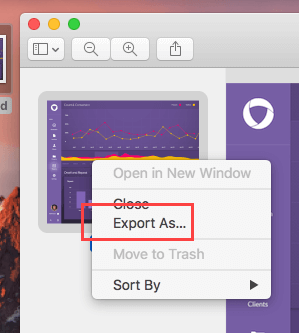
Now, right-click on the PSD thumbnail appearing on the sidebar and select the option “Export As.”
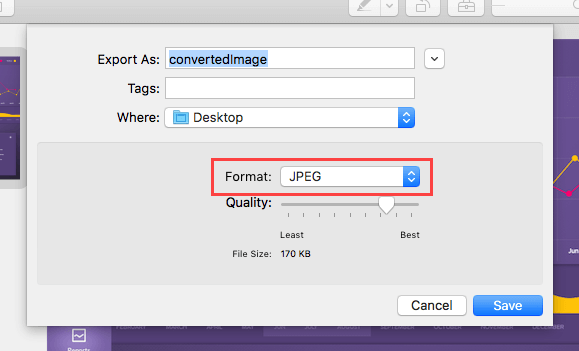
In the Export window, enter the file name, choose the destination, select the format as “JPEG” from the drop-down menu next to “Format,” select the quality by dragging the slider next to “Quality” and click on the “Save” button. Do mind that the higher the quality, the higher the file size.
That’s it, the file will be instantly saved to the chosen destination folder.
Batch convert PSD to JPG or PNG on macOS
Guess what, your Preview app also supports Batch image conversion. The process is similar to converting one image with preview. Simply, select a group of images and open them all with Preview, once the images are opened in Preview, click within the preview pane on the left side and then Select All images by hitting Command+A. Next go to the File menu and choose “Export Selected Images”. And that’s pretty much it.
3. On Android
Just like with Windows, though Android doesn’t support PSD files by default, you can easily convert PSD to JPG using a simple, free, and aptly named app called Image Converter. This free app lets you convert images from and to different formats like JPEG, BMP, GIF, PDF, PSD, PNG, TIFF, etc.
So, download and install Image Converter from Play Store. Once installed, launch it from the menu.
The app’s user interface is not the best and may even confuse the first time users. But it is very simple to use and does the job with just a few taps. On the main screen, tap on the “Add” icon.
Read: 10 Best Photo Editing Apps for Android
![]()
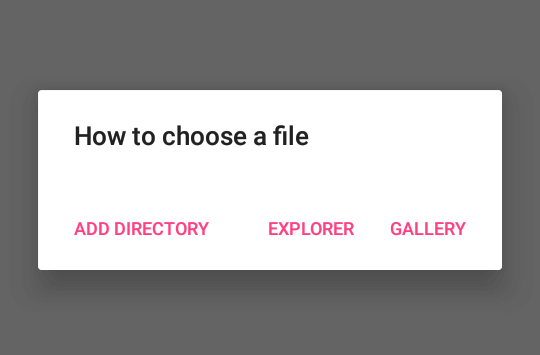
The above action will display “How to choose a file” pop-up. Since we need to add the PSD file, select the option “Explorer.”
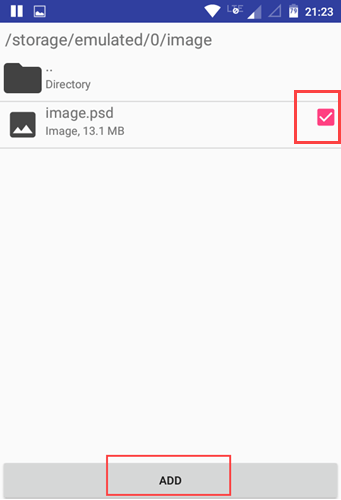
In the file explorer, navigate to where you’ve stored the PSD file, select the file and tap on the button “Add.”
After selecting the file, swipe right to navigate to the “Converting” tab. Here, choose “JPG” as the output format. If you want to, you can change the destination directory by tapping on the button “Change Destination Directory.” You can change other settings like image quality, depth, etc., by tapping on the “Settings Format” button.
Once you are done with the settings, tap on the button “Convert” to start the conversion process.

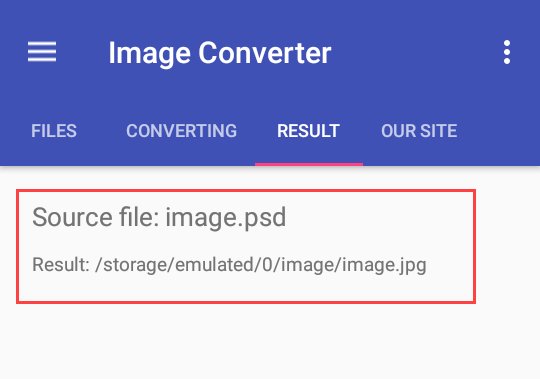
After the conversion process has been completed, you will see the result in the “Result” tab. It will also show you the directory path where the output file has been stored. You can use any of your favorite file manager or image viewer to access that file.
That’s all there is to do and it is that simple to convert PSD to JPG in Android.
4. Using Online Web App
If you are looking for a platform independent way to convert PSD files to JPG images then there are many web apps that can help you achieve that. One such web app is Convertio. Using this web app, you can not only convert images but you can convert other files like videos, documents, ebooks, audio, archives, etc.
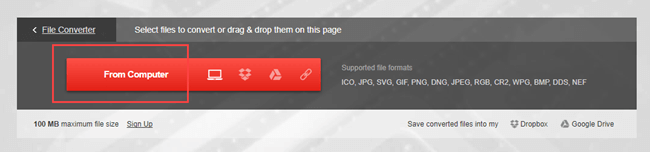
To get started, open Convertio website. On the main page, click on the “From Computer” button and add the PSD files you want to convert. If you’ve stored your PSD file in Google Drive or Dropbox, click on the relevant icon next to the button. You can also upload the image by the URL by clicking on the “Link” icon.
Read: Top 5 Free Online Image Editor Like Photoshop
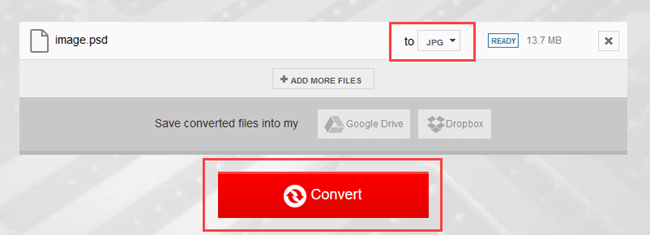
After adding the images, select “JPG” from the drop-down menu and click on the “Convert” button to start the conversion.
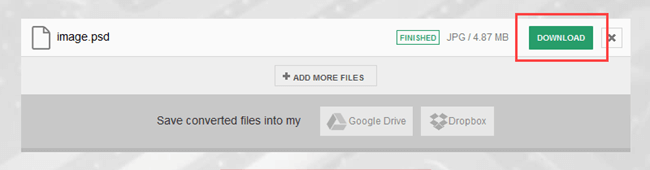
Depending on the PSD file size, it might take some time to convert and it may appear stuck. Just don’t close the window and give it a couple of minutes to complete the conversion. After converting, you can download the converted image by clicking on the “Download” button. If you want to, you can even upload the converted image directly to “Google Drive” or “Dropbox” by clicking on the relevant button.
That’s all there is to do and it is that simple to convert PSD to JPG. Do comment below sharing your thoughts and experiences about using the above methods to convert PSD files to JPG.
Also Read: Detect if the Image is Photoshop Fake or Not