If you’ve ever used the location history feature on Google Maps, you’d know how useful it is. Whether you forgot the name of the barter shop you visited last month or want to relive the memories of your last summer trip, location history can be quite useful in such cases. But you know what’s even cooler? Utilizing that location history data to create a heat map of all the places you’ve been to. There are plenty of third-party tools and APIs available that can create a heat map using Google Maps data in a few simple steps.
But before we start, it’s only fair to say that since we’ll be using a third-party website to create a heat map, we’ll be sharing our location history data with that website. This might sound risky to some privacy-concerned folks out there. But if you’re comfortable doing that and want the thrill that comes with viewing your own heat map, here’s how to do it.
Also Read: How to Create a Map With Multiple Pins in Google Maps
Download Location History Using Google Takeout
Google Takeout is a handy service offered by Google through which you can download or transfer all of your data associated with your Google account including contacts, photos, Google Keep notes, Gmail, location history, and more.
To create a heat map, first, we’ll be downloading our location history data via Google Takeout. Here’s how to do it.
1. Head over to the Google Takeout page and sign in with your Google account.
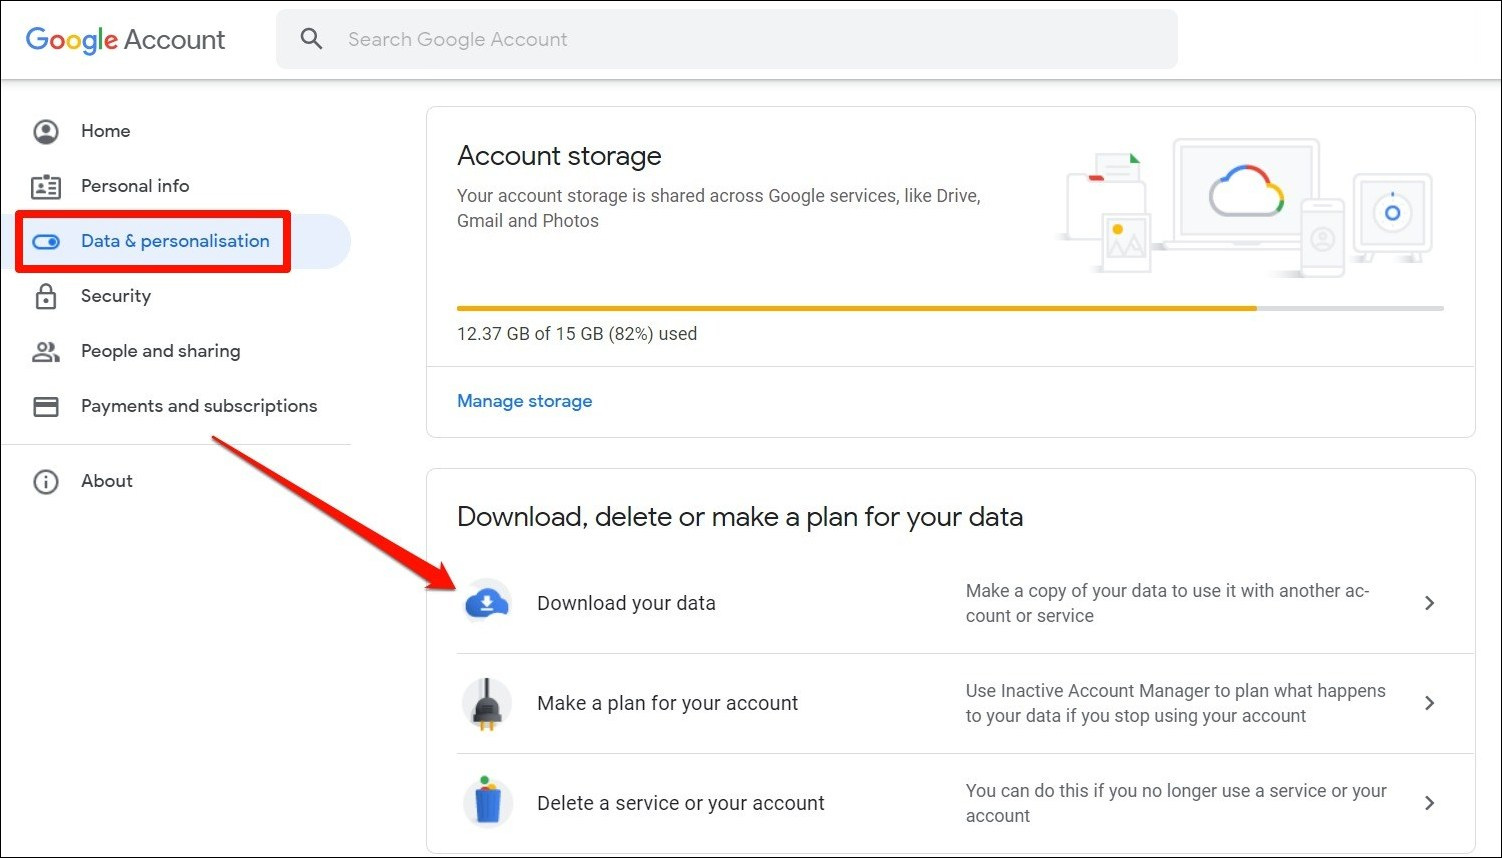
2. In there, switch to the Data & personalization tab on your left and scroll down to click on the Download your data.
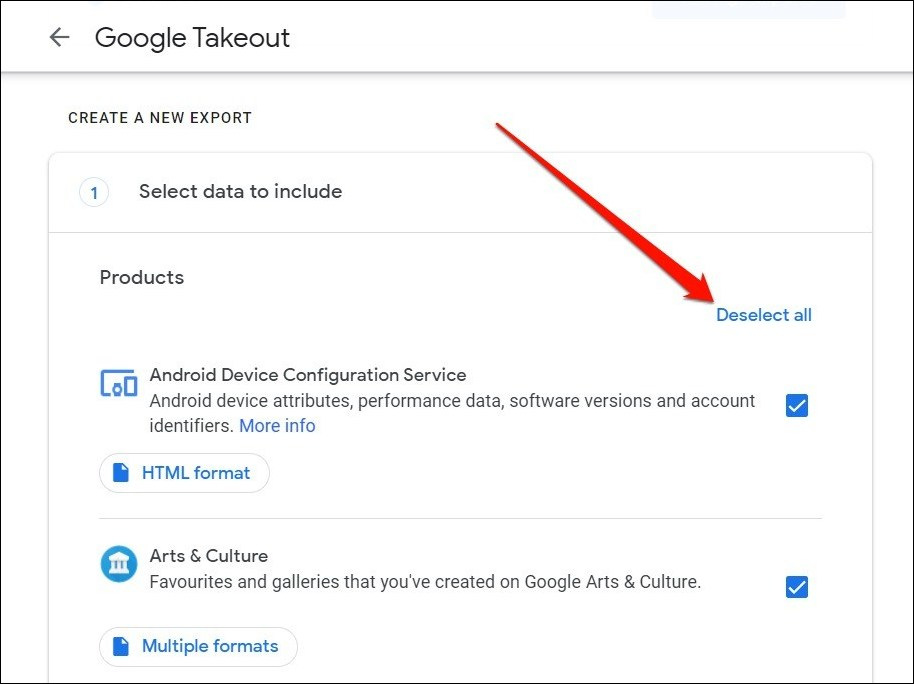
3. Here you’ll find a list of all the data associated with your Google account. Click on the Deselect all button under Products.
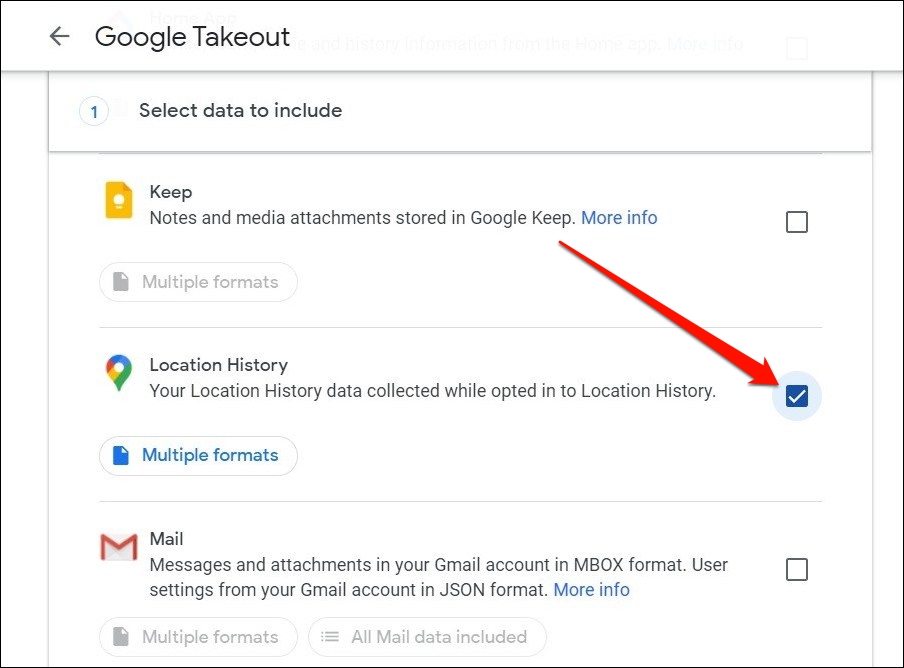
4. Now scroll to find and select the Location History option. Again, scroll down and click on the Next step button.
5. In the next step, you can choose your preferred delivery method. You can choose to get the download link via email or add it to your cloud storage directly.
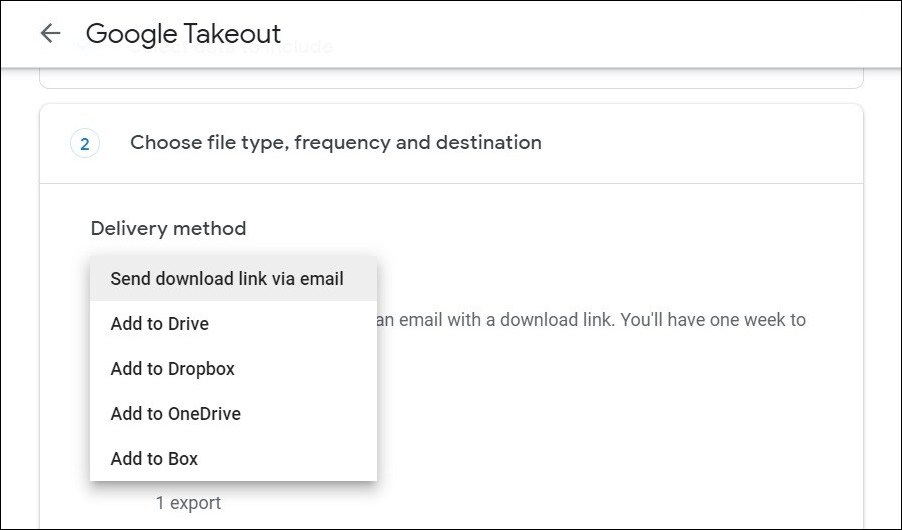
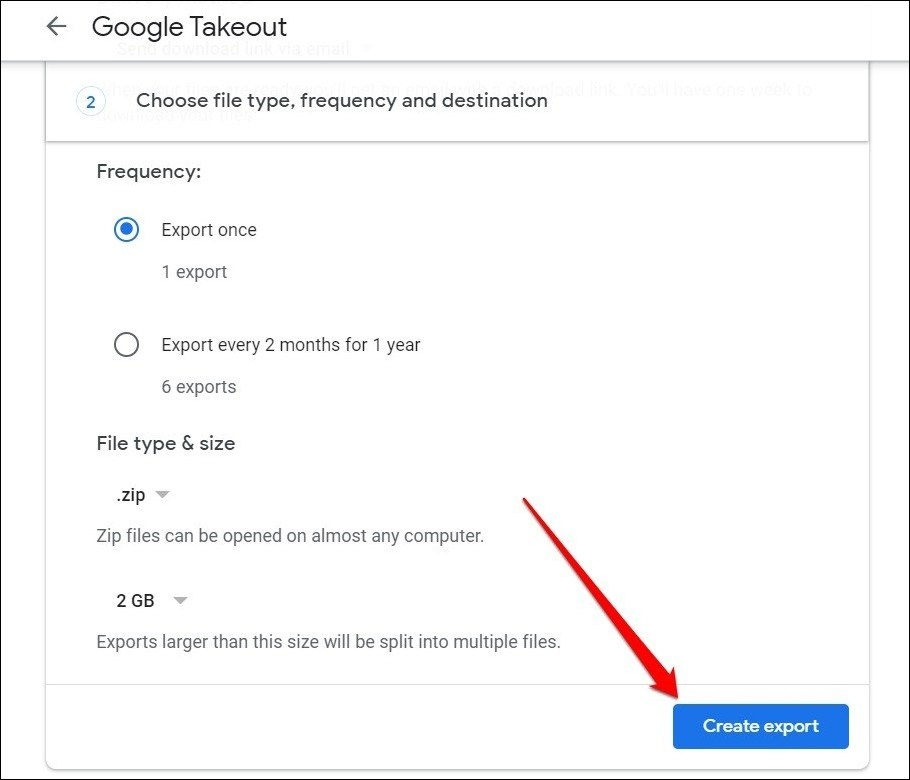
6. Additionally, you can select the frequency and file type & size of the export as well. When done, click on the Create export button and wait for the export to complete. After that, download the export created from your email or cloud storage.
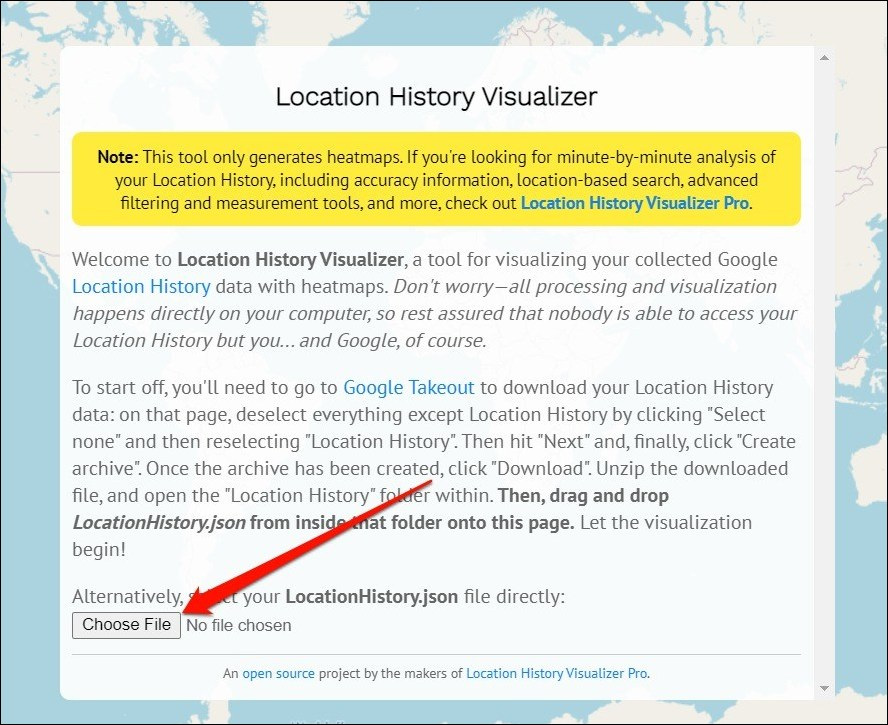
7. Unzip the downloaded zip file to extract the Location History.json file inside it. Now you’re all set to create your heat map using a website like Location History Visualizer.
Create a Heat Map Using Google Maps Location History
Once you have your location history downloaded, you can easily create a heat map with it using any third-party API or tool like Location History Visualizer. Here’s how.
To create a heat map, go to the Location History Visualizer website. Upload the Location History.json file downloaded earlier. The rendering process should start automatically.
Note: Depending upon the size of your location history data, this can take a while.
Wait for the process to finish and then click on the Launch Heatmap button.
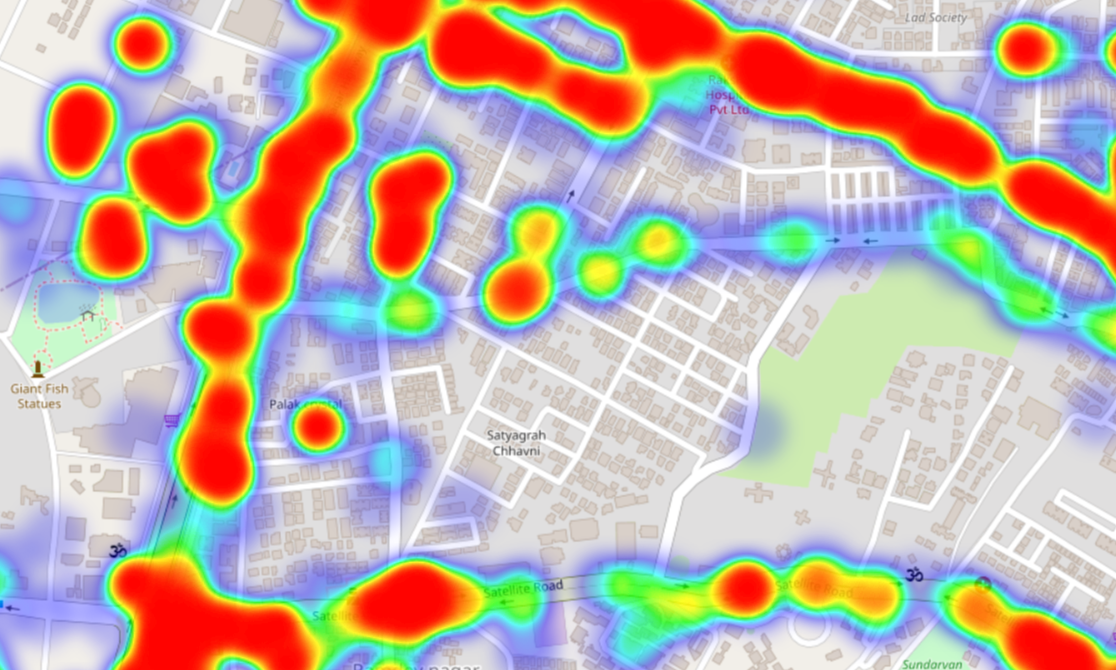
And there you have it. Your own heat map made up of your location history. How cool is that? You can interact with this map just like Google Maps. The places that are visited often will be in red whereas green represents places visited rarely. You can interact with this map like Google Maps and take screenshots as well.
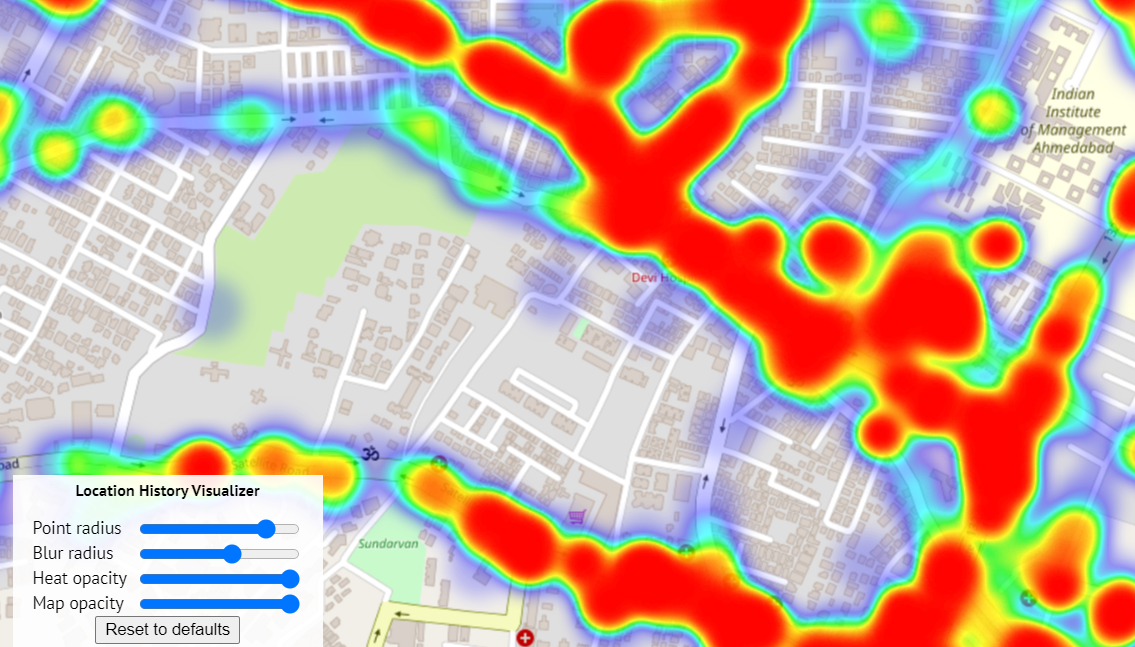
Aside from the above, there are a bunch of additional control in the bottom left to tweak heat, point, and blur radius. You can also zoom in and out using the buttons in the top left.
Closing Remarks: Create a Heat Map Using Google Maps Data
Creating heat maps using Google Maps data is quick and simple. With it, you can do anything you like. For instance, you can create a heat map of places visited during your vacation to keep it as a memory or gift it to someone.
Also Read: Use Google Maps’ Plus Codes to Share Your Location Easily