Are you working on a confidential document in Microsoft Word? You can password-protect the Word file or even better, apply a custom ‘Confidential’ or ‘Private’ watermark to it. By doing so, you can ensure that other team members notice the watermark and handle the document with care. Read along to learn how to apply a watermark in Microsoft Word and how to create a template out of it for easy access in the future.
Create a Watermark in Microsoft Word
Microsoft offers a built-in tool to create and add a watermark to a document. One can also integrate a picture as a watermark and create a personalized document.
Apply a Text as Watermark in Microsoft Word
We have created a sample document in Microsoft Word and we will use the ‘Confidential’ watermark in the Word document. Follow the steps below to apply a watermark in Microsoft Word.
1. Open Microsoft Word.
2. Open a document on which you want to add a watermark or create one from scratch.
3. Go to the Design tab in the Word menu bar.
4. Select Watermark from the following sliding menu.

5. You have two options to choose from – Picture and Text.
6. Click on Text.
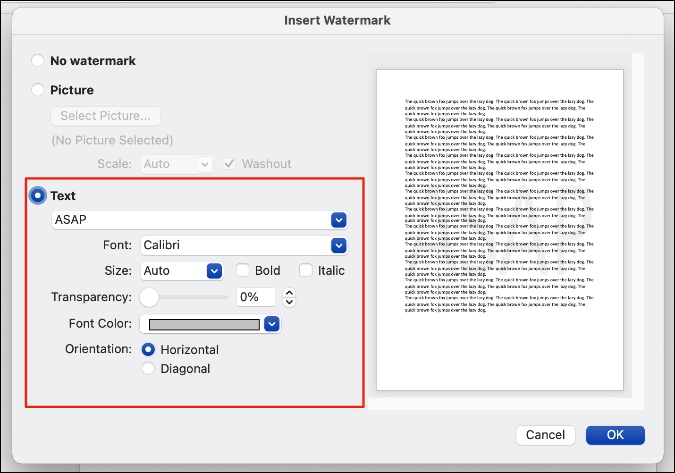
7. By default, the text area shows ‘ASAP’. Click on the drop-down menu next to Text and it will showcase the built-in words to add as a watermark.

8. One can also add a custom text as a watermark in the Word document. Click on the default text and add a custom text as a watermark.
As for the editing options, you have the option to change the font style, size, color, and orientation of the watermark. You can also play with the bold and italic options.

If the added watermark is interfering with the document text, you should play down the watermark effect with the built-in transparency option. Either adjust the transparency percentage or use the up/down arrow to change the transparency of the watermark.
By default, the transparency is set at 0%. In short, users have total control over the look, feel, size, and position of the watermark in Word document.
Add Picture or Logo as Watermark
Using the same trick above, one can apply a company logo or brand identity as a watermark in Microsoft Word too.
1. From the same Watermark menu in Microsoft Word, select Picture instead of text.
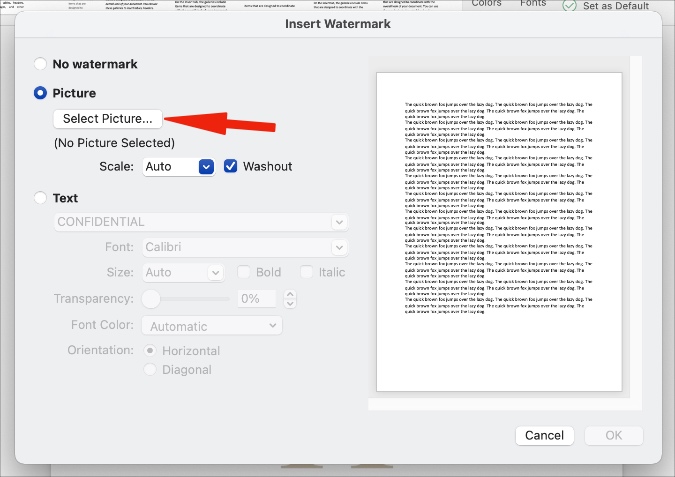
2. Click on Select Picture and add a picture or logo from the device.
3. You can play with the scaling and washout option and see a live preview of the watermark from the right side.
By default, the applied watermark is set right in the middle of a Word page. If you want to resize it or place it in a corner, you need to edit the watermark. Here’s how to do it.
Edit Watermark’s Size and Position
You need to use the Header & Footer menu to edit the watermark’s size and position. Go through the steps below to make changes.
1. Select Insert in the menu bar.
2. Go to Header > Edit Header.

3. It will open the editing interface to make changes.
4. Right-click on the watermark and select Size and Position.

5. From the following menu, you can change the watermark’s height, width, rotate it to a degree, and play with the scaling option.
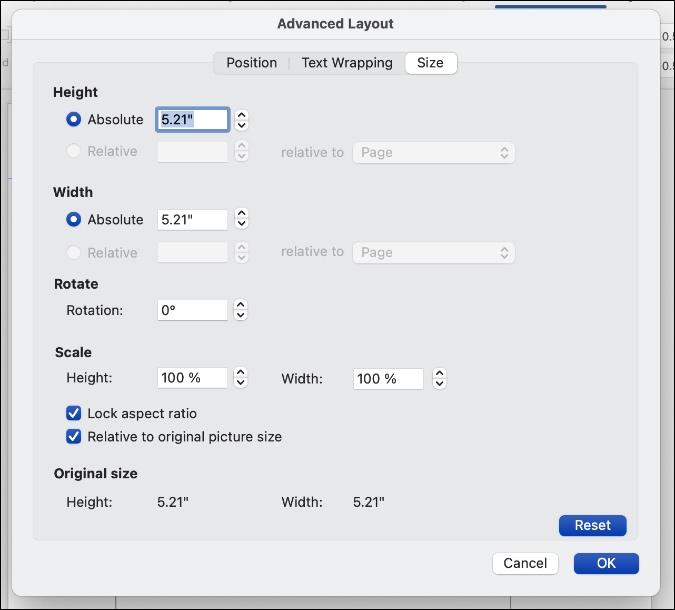
6. Make relevant changes and you are good to go.

Now you can simply drag and drop the watermark to a desired place on the page. Most people keep it at the bottom right corner of the page. The same watermark size and position change will apply to all the pages on the Word document.
How to Remove Watermark
Do you no longer need the watermark on a Word document? You can easily remove it by following the steps below.
1. Open the Word document and go to the Design > Watermark menu.
2. Select No Watermark option from the following menu and hit Ok at the bottom.
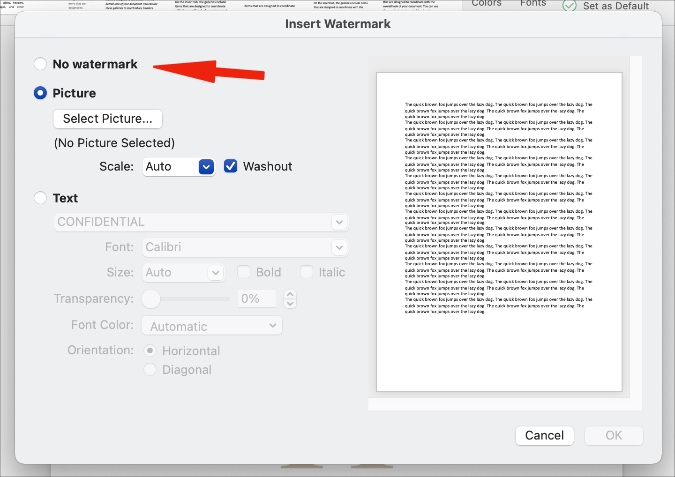
That’s it. You have successfully removed the watermark from a Word document.
Save Watermark as Template
Do you frequently need to use a specific watermark on Word documents? Instead of going through lengthy steps to add and edit watermarks on every Word document, you can save the document as a template. Here is how to do it.
1. Make all the relevant changes to a document, apply a watermark, change its color, size, and position as noted in the above steps.
2. Click on File option in the menu bar and select Save as Template.

3. Give it a relevant name and hit Ok at the bottom.
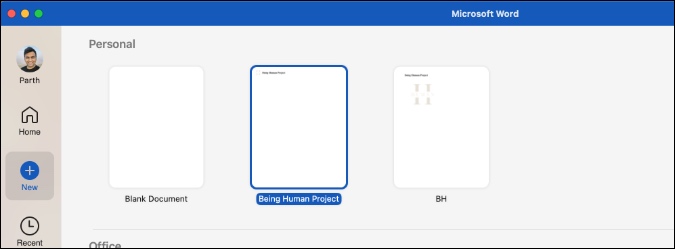
From now on, whenever you want to use the same watermark, simply open the templates gallery and search for the created template. You will see the watermark-ready Word document to use.
Wrapping Up: Personalize Microsoft Word Document With Watermark
Go through the steps above and add a watermark to a Word document. If you need to use the same watermark frequently than ever, don’t forget to save it as a template in the Word gallery. The TechWiser team mostly uses the company logo as a watermark in a Microsoft Word document.