Lithophanes are pieces of an etched sheet that looks ordinary but contains an image that can only be seen clearly when you shine a light behind it. If you have a 3D printer then you can print all sorts of lithophanes and in this article, I’ll walk you through all the ways of creating a Lithophane in easy steps. Here, we are using Ender 3 Pro 3D Printer, however, any 3D printer should work. Let’s begin.
Generally, lithophanes are created with the help of CNC machines and chipping away material from a sheet of ceramic or plastic but if you have a decent 3D printer then you can create a personalized lithophane without much effort. You would need a 3D printer to build your own lithophanes but if you want to skip the hassle and order one, a simple google search would give you plenty of places that can deliver a custom lithophane to your doorstep.
Prerequisites
It would be really helpful if you own a 3D printer and have a basic knowledge of how to slice STL files in slicing software.
1. 3DP.Rocks
This online tool is the easiest way to create a lithophane STL file. You just upload an image and it instantly shows you a preview of how the lithophane would look.
Start by opening 3dp.rocks website and clicking the Images button on the webpage and upload an image. Once the image has been uploaded, it will generate a lithophane model. You can create a few different types of lithophanes such as a picture frame, lampshade, dome night light cover, and heart. I just printed a small picture frame to test the quality of the print.
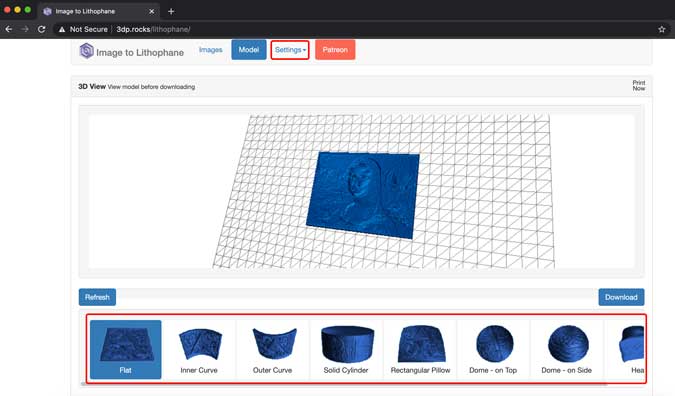
You can customize the size of the lithophane model, on the Settings page. This would ensure that the print comes out to your preferred dimensions.

Once, you’re happy with the design, click refresh and hit download. It would generate an STL file and begin the download on your computer.

Open the STL files in a slicer( I used IdeaMaker) and generate the g-code. Just make sure you print the print upright instead of laying down so that you get a better resolution. If you want a clearer picture, reduce the printing speed for the model while slicing.

I printed a portrait of Monalisa and as you can see it doesn’t look like anything until you turn on the lights. Pretty cool right?
2. It’s Litho
The previous tool was great for creating simple lithophanes that can replace your existing picture frame or lampshade. However, if you want to take your lithophanes to the next level then maybe try this tool. You can create a lithophane in the shape of a plane, sphere, cylinder, arc, vase, or even a pumpkin. Open the tool on a web browser by clicking this link and upload an image.

After the image is uploaded, you can edit it so that it would look better as a lithophane. Adjusting the sliders would show you the changes in real-time. Once you’re happy with the image, proceed to create a model.

Now, you can change all the lithophane settings to create a truly custom lithophane. Start by selecting the shape of your lithophane, adjust the size, increase or decrease the details, and enable attributes. After that click the download button to save the model as an STL and you’re ready to print.

After slicing the model in the Slicer, start printing the model and it should show a detailed image under the light.

3. Lithophanemaker.com
I use this tool because you can create a lithophane box with 4 different images and use it as a night light. Although you can print 10 different types of lithophanes such as a globe, a nightlight, ceiling light, Christmas lights, etc, I chose the lightbox for variety. Go to the lithophane maker website and select Lithophane LightBox Maker.

The interface is not as intuitive as other tools but it is still simple enough and creates good enough results. Start uploading images to the page and adjust the size of your lightbox model. You can even customize the light bulb diameter, just measure the size of your bulb holder and enter the value on this page.

After adding all the images, you would see a preview of how it would look on the box. Adjust the position of the images and download the STL files.

I printed the box and it took around 22 hours but the results are totally worth it.

Here’s another angle of the lightbox with a bulb fitted inside.

4. Make your Own Lithophane with Photoshop
Photoshop is probably the most complicated option to create a lithophane but it is also highly customizable and you can control every aspect of the model and create anything you want (only if you know what you’re doing).
Download This Actions file on your computer and add it to your Photoshop. Open an image in Photoshop.
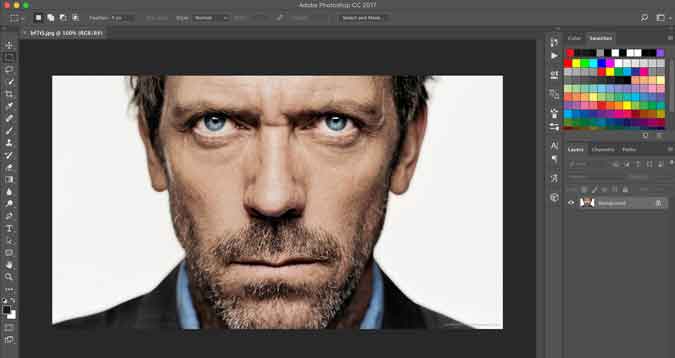
Run this action from the Actions menu. It will be titled “Make Lithophane”. If you don’t’ see the Play button on the right pane, you can manually open it under Window> Actions. It would take a few seconds to generate a 3D model of your image so be patient.

Once it is done, you’ll see the 3D preview of the Lithophane model. To generate an STL file, click the print button as shown in the image below.

Click the Export button to save the STL files on your computer. Now, simply slice the STL file and start printing your Lithophane.

This is how the Lithophane looks when held under a light.

These were some of the tools to print lithophanes. Surely every method listed here can achieve decent results but every tool is best for creating a unique design. For example, 3DP.Rocks lets you print good quality picture frames, Its Litho lets you print entire lampshades that can be installed over your existing lamp. LithophaneMaker is great for printing Lightbox with multiple images and Photoshop gives you control over the quality of the lithophane. Which image are you going to print with your 3D printer, let me know in the comments below?