The redesigned Start Menu of Windows 11 is quite handy as it shows exactly what you want to be shown. From pre-installed apps to most/recently opened files, you can find almost everything included in the Start Menu. The best thing about the new Start Menu is that you can customize everything as per your requirements. Therefore, if you have upgraded to Windows 11, here are some customization tips and tricks to help customize the Start Menu.
Table of Contents
1. How to Pin or Unpin an App in Start Menu
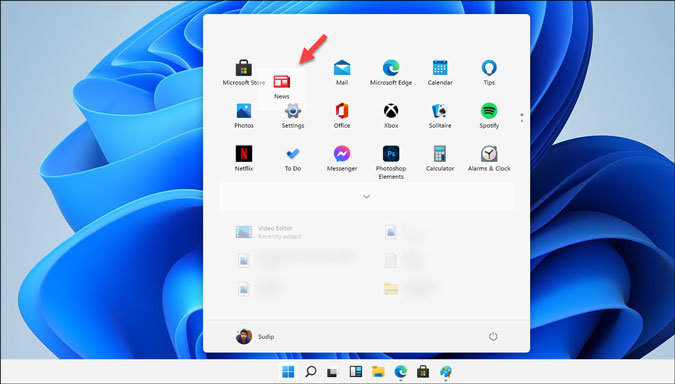
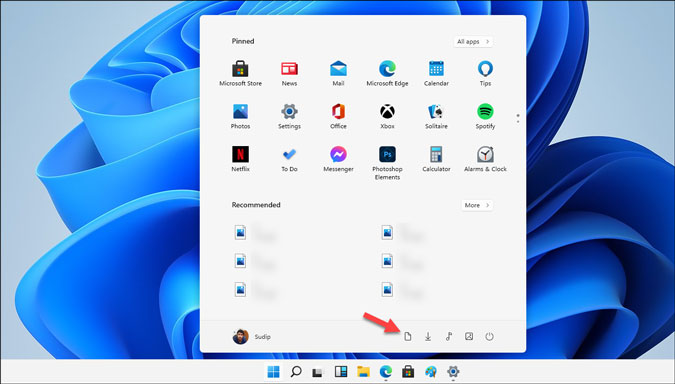
When you click the Start Menu, a list of apps appears under the title Pinned. It includes some useful pre-installed apps such as Microsoft Edge, Calculator, Mail, Microsoft Store, etc. However, if you do not use all the pinned apps frequently and want to hide some of them, here is how you can do that.
1. Click on the Start Menu to expand it completely.
2. Right-click on a pinned app and select the Unpin from Start option.

On the other hand, it is possible to pin an app that you want to see in the Start Menu. For that, click on the All apps button and choose an app that you want to pin to the Taskbar.
Right-click on it and select the Pin to Start option.

2. How to Move an App to the Top or Rearrange Icons
At times, you might not like the default arrangement of pinned apps and may want to rearrange them. For example, let’s say you want to pin Calendar on the top to check the schedules frequently but do not want to see Solitaire next to it.
There are two things you should know about rearranging icons. First, you can change the position as per your requirements – you have a free hand. Second, you can use the context menu option that lets you move only one app to the Top position.
To move an app to the top, right-click on a pinned app and select the Move to top option.

However, if you want to change other apps’ positions, click on an app. Click and hold the app using mouse pointer and move the app to the desired position.
3. How to Show/Hide Recently Installed and Most Used Apps
Like Windows 10, Windows 11 shows recently installed and most-used apps, allowing users to find an app quickly. At times, you might not want to display your recently installed or most used apps in the Start Menu but instead, you want to show it as you set things up. In such situations, the following steps would help:
1. Press Win+I to open the Windows Settings.
2. Go to Personalization > Start.
3. Toggle the Show recently added apps and Show most used apps buttons.
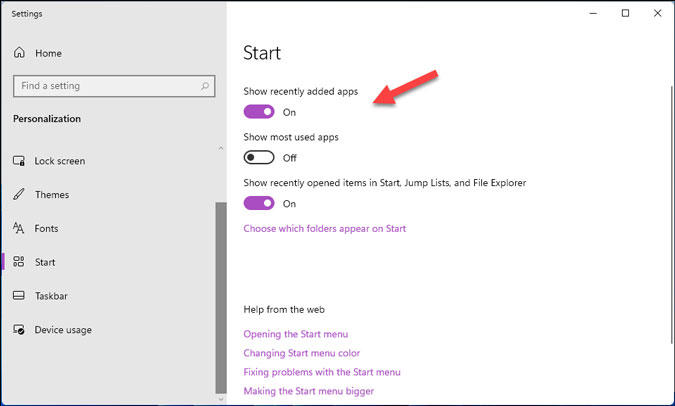
Now you won’t find these two things in the Windows 11 Start Menu.
4. How to Show Library Folders in Start Menu
By default, the Start Menu shows the power button. However, you can include more options such as Library folder (Documents, Music, Videos), Network, Personal folder, etc.
1. Press Win+I to open the Windows Settings.
2. Navigate to Personalization > Start.
3. Click on the Choose which folders appear on Start option.

4. Toggle the respective button that you want to show in the Start Menu.
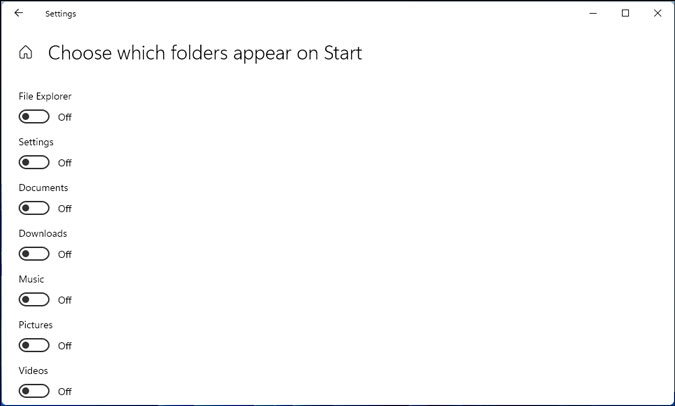
Once it is done, you will view the folders like this:
5. How to Move Start Menu to the Left Instead of Middle
The biggest change you will notice after installing Windows 11 is the Start Menu and Taskbar icons that are now aligned center. If you like Windows 10’s left-aligned Start Menu and don’t want that to change, you can move the Start Menu towards the left.
1. Right-click on your Taskbar and select the Taskbar settings option.
2. Expand the Taskbar alignment drop-down list and select Center.
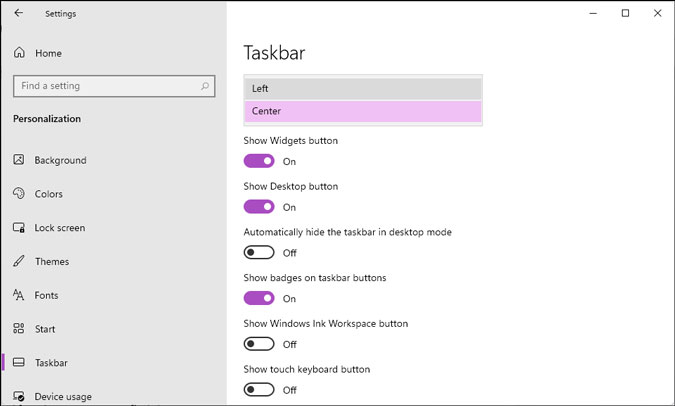
This change moves all the Taskbar icons, including Start Menu, to the left like in Windows 10.
6. How to Uninstall Pre-Installed Apps From Start Menu
The biggest problem with Windows 10 is that there are a lot of pre-installed apps that you might never use. For example, you can see Netflix, Messenger, Microsoft To Do, Photoshop Elements, and so on. If you want to uninstall those apps, here is how you can do that.
1. Right-click on an app that you want to uninstall.
2. Choose the Uninstall option.
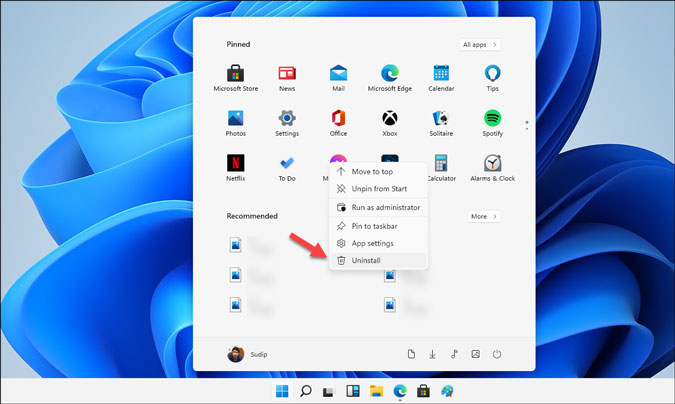
3. It asks you to confirm the removal. To do that, click on the Uninstall button on the popup window.

After that, you cannot find the app anymore.
7. How to Enable Dark Mode in Start Menu
If you have seen the Windows 11 features list, you might have noticed that the dark mode is more enhanced than before. Even if you haven’t activated your copy of Windows 11, you can still change the theme and switch between dark and light modes. However, the following steps are for those who have an activated copy of Windows 11.
1. Press Windows key+I to open the Windows Settings.
2. Go to Personalization > Colors.
3. Expand the Choose your color list, and select Dark.

It will enable the dark theme in Windows 11 Start Menu. The only problem with this method is that it turns on dark theme system-wide.
However, you can choose dark theme/color for Start Menu, Taskbar, and Action Center only.
1. Choose Custom from the Choose your color list.
2. Select the Dark option from the Choose your default Windows mode option.

8. How to Make Start Menu Transparent In Windows 11
Transparent window or Start Menu background enhances the overall appearance to some point. The good news is that you can apply the transparency effect on your Start Menu in Windows 11. Here’s how:
1. Press Windows key+I to open the Windows Settings panel.
2. Go to Personalization > Colors.
3. Toggle the Transparency effects button.

That’s all! This setting changes the opacity level of the Start Menu, Taskbar, Action Center, Title bar, etc.
Wrap Up: Customize Start Menu in Windows 11
As of now, a few things are missing or deprecated that were available in Windows 10. For instance, you cannot enable the full-screen Start Menu and live tiles are gone. However, the existing options are still handy when you want to add or remove a few things from the Start Menu.
Also Read: 15 Best Start Menu Customizations for Windows 10