Changing the DNS on your devices can have a number of positive effects such as accessing geo-restricted content, better speed, and removing ads among other things. Just like most devices that connect to the Internet, you can also change the DNS on your Samsung Smart TV running Tizen OS. Let’s see how.
Change DNS on your Samsung Smart TV
By default, we use the DNS provided by the ISP, however, there are plenty of DNS servers that offer better security and speed. You can read more about all the best DNS servers here. Following is the list of some of the most popular public DNS servers.
- Cloudflare – 1.1.1.1 and 1.0.0.1
- OpenDNS – 208.67.222.222 and 208.67.220.220
- GoogleDNS – 8.8.8.8 and 8.8.4.4
If you are setting up a private DNS server (like Smart DNS Proxy), you will have to go through an extra step of activating your IP address on the service provider’s server. You can contact their support for more details. With that out of the way, here is how to change the DNS on your Samsung Smart TV running Tizen OS.
Step 1: Turn on the TV and open the Settings window by pressing the Settings button on the TV remote.
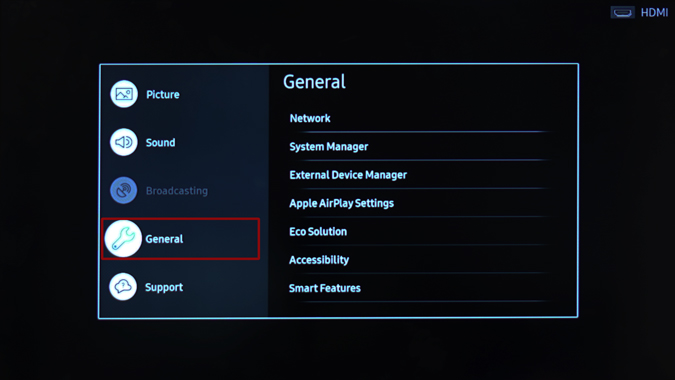
Step 2: Go to the General tab and select Network from the list of options.
Step 3: You can see if the TV is connected to the Internet under Network Status.
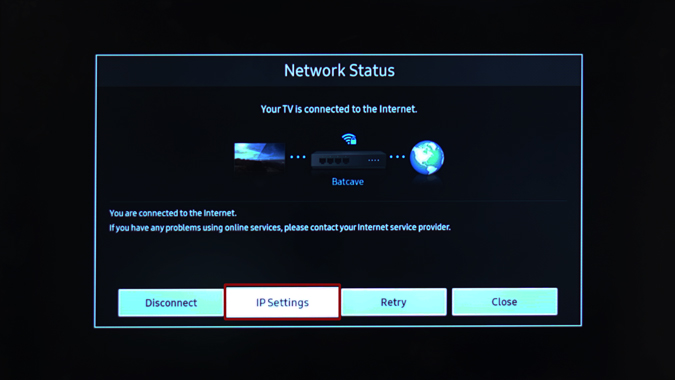
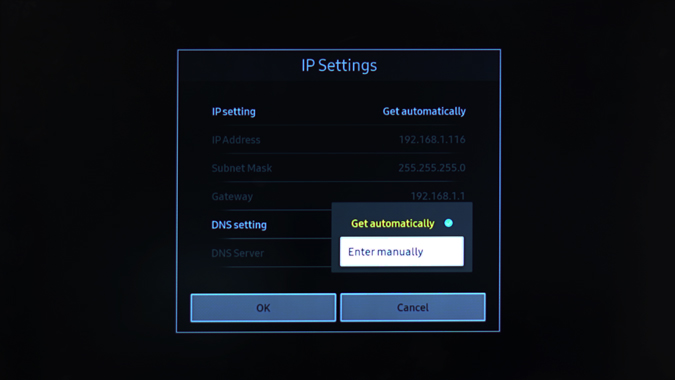
Step 4: Select IP Settings and navigate to DNS Setting.
Step 5: Change the DNS Setting to Enter Manually.
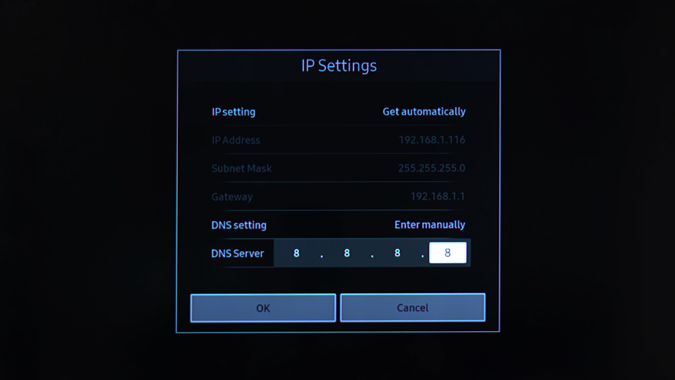
Step 6: Below the DNS Setting, you’ll see the DNS Server, Enter the DNS server of your choice and press OK.
There you go, you’ve successfully changed the DNS of your Smart TV. To verify that your DNS has been successfully updated, go to whatsmydns.net or if you have set up Cloudflare DNS you can check out their help page. Similarly, if you are setting up Open DNS, you can check this page.
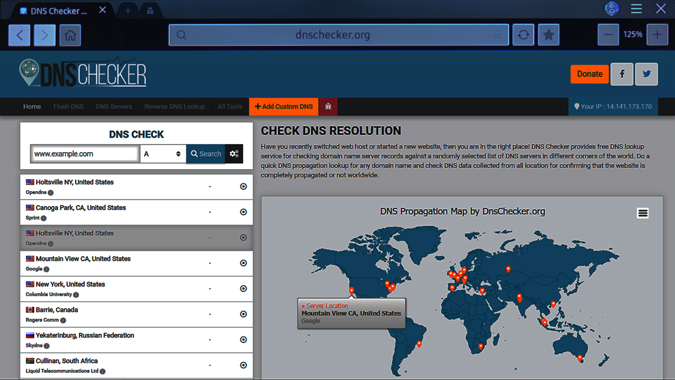
You can also check out our in-depth guide on how to check your DNS server here. The exact steps can differ based on the model of your Smart TV but it would be similar and easy to find if you follow these steps. If you face any problem while setting it up, let me know in the comments below.