The online backup services often lack the tools to edit photos directly within them. One needs to download the pictures first and then edit them in a third-party app or service. That was the case with Microsoft’s OneDrive too. However, thankfully, that’s changing. You can now edit pictures directly inside OneDrive. You can crop, rotate, adjust colors, and do much more in OneDrive. Let’s understand how to edit photos in OneDrive on PC and mobile in more detail.
Table of Contents
How to Edit Pictures in OneDrive
At the time of writing, there are certain limitations when it comes to editing photos in OneDrive. Firstly, photo editing features are available only on the OneDrive Android app and web version. The desktop app has been left out for now. Also, these features will work on OneDrive personal accounts only and not on Work or Student accounts. Lastly, OneDrive only supports editing of JPEG and PNG image formats.
How to Enable Editing in OneDrive
To edit a picture on the OneDrive web version, open a photo and click on the Edit button at the top.

Similarly, open the photo in the OneDrive Android app and tap on the Edit button. You will find all the below-mentioned image editing features inside the Edit option.

Crop Photo in OneDrive
When you click on the Edit button, OneDrive will automatically open the Crop tool. You can crop the picture freely or choose from standard sizes such as 16:9, 4:5, 9:16, etc. To crop freely, drag the white image border to adjust the picture size according to your requirement.

To choose from any standard size, click on the Free button at the bottom. Then choose an image size of your choice.

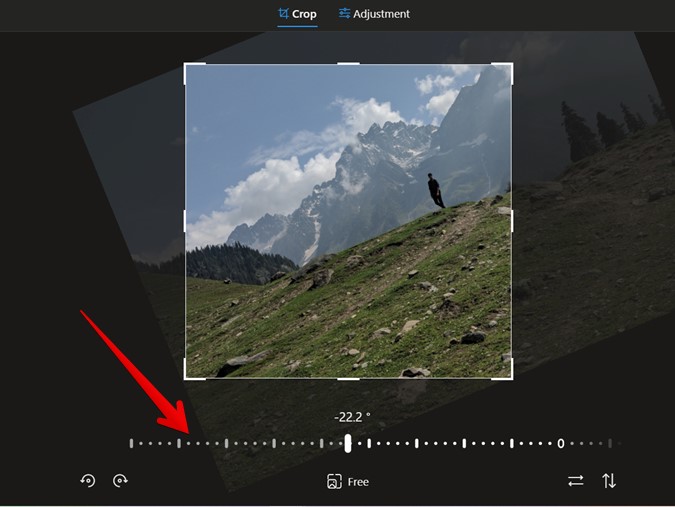
Straighten Pictures in OneDrive
Inside the Crop tool, you will find a slider at the bottom that can be used to straighten and change the perspective of photos.
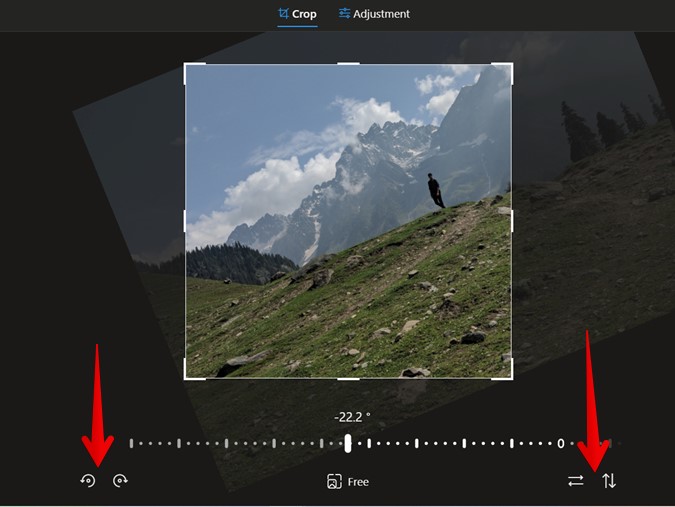
Rotate and Flip Photos in OneDrive
Rotate and Flip tools are also available inside the Crop tool. You will find the Rotate icons on the bottom-left side and Flip icons on the bottom-right side. Click/tap on the tool that you want to use. Interestingly, OneDrive supports both horizontal and vertical flip tools.
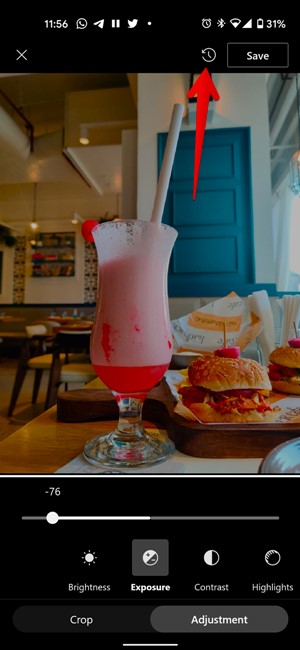
Adjust Light and Color
Right next to the Crop tab, you have the Adjustment tab. You will find it at the top in case of the web version. Click on it. A number of light and color adjustment tools will appear such as brightness, contrast, shadows, saturation, etc. Use the sliders to adjust the value of available options.

Similarly, in the Android app, you have the Adjustment tab at the bottom. Tap on it and then select any tool to activate and adjust it using the slider that shows up.

View Original Image
At any point, while editing your photo, you can compare the edited photo with the original version. That would help in understanding how much you have edited the photo.
To view the original photo on the web, simply press the Spacebar key on your keyboard. Alternatively, keep the left mouse button pressed. On mobile, touch and hold anywhere on the picture to view the original image.
Revert to Original Image
While editing a picture, if you feel that the original image was better, you don’t need to manually revert all the changes to go back to the original picture. You can reset your image with one click. Simply, click on the Reset button at the top. That will remove all the changes you have made to your picture. Quite handy, right?
Save Edited Photos in OneDrive
OneDrive offers two ways to save your edited pictures. You can either overwrite the original image or save the edited photo as a separate copy. Using the latter, the original copy remains untouched and you can share or use both of them. That doesn’t happen when you overwrite the image where you have access to only edited photo. However, you can revert to original image even if you overwrite the photo (more on that below).
To save edited photos in OneDrive, click on the Save button at the top. Then choose the required option from the menu – Save or Save as copy.

How to Recover Original Image From Edit Photo
As mentioned above, even if you overwrite the original picture by using the Save option instead of Save as copy, you can easily recover it in OneDrive. For that, you will have to take the help of the Version history feature, which is available on the OneDrive web version.
Open the edited photo on the OneDrive website. Do not click on the Edit button. Just stay on the page where you see the full-screen view of the photo. Click on the Version history option at the top. If you don’t see it, click on the three-dot icon at the top and choose Version history.

A window will slide open listing various versions of the photo. Click on the three-dot icon next to the version that you want to revert to and choose Restore.

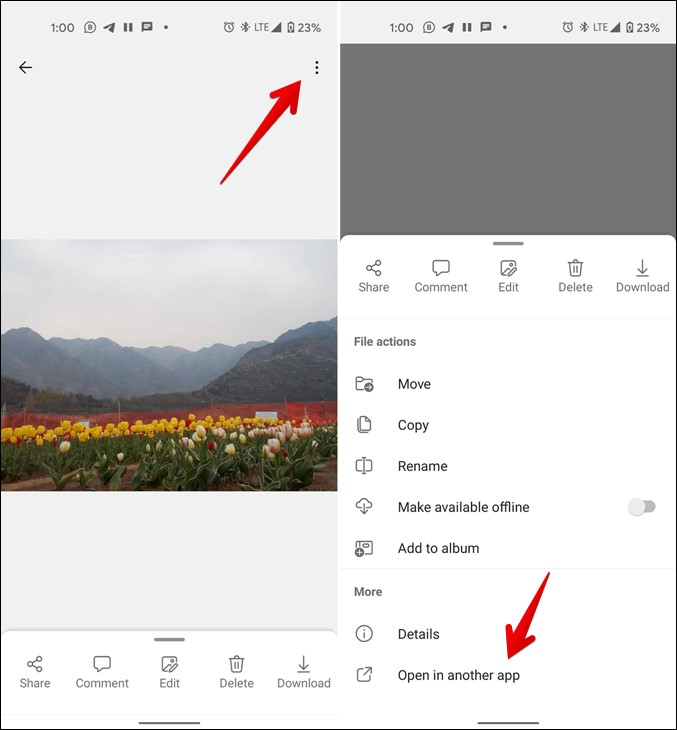
Open in Another App (Mobile Only)
If you don’t like the editing features offered by the OneDrive app, you can directly open the photos in some other photo-editing app on your phone. To do so, open the photo in the OneDrive app first. Tap on the three-dot icon at the top and choose Open in another app from the menu.
Edit Photos Perfectly
Those were all the amazing photo-editing features available in the OneDrive web and mobile app. With these features, OneDrive becomes a good competitor to Google Photos. We have done a detailed post on how OneDrive fares against Google Photos too. Do check it out. And if you are interested, you can transfer your Google Drive data to OneDrive too.