With constant improvements and a seamless browsing experience, Chrome is arguably the best web browser available today. But that doesn’t make it entirely immune from bugs or glitches. One such peculiar issue is when Chrome is not connecting to the internet, despite a solid data connection. In this post, we’ve rounded some of the best troubleshooting tips that can help with the issue. So, let’s get right to it.
Table of Contents
1. Check for Data Packet Loss
Even if your internet seems fine on the surface, you should check if there is any packet loss or not. This will help verify if the issue indeed lies with Chrome.
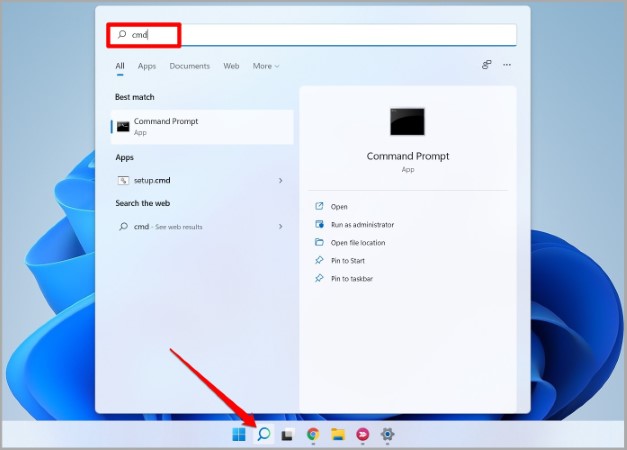
1. Open Windows Search, type in cmd, and press Enter.
2. In the command prompt window, type in the command given below and press Enter.
ping google.com
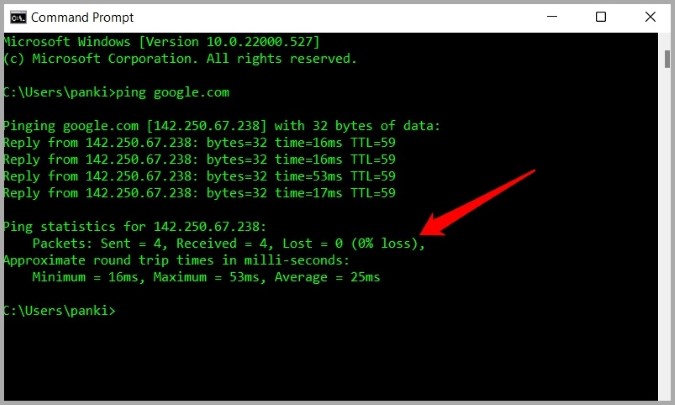
You’ll see the results under Ping statistics. If the packet loss is 0%, then there’s no issue with your internet and you can move on to other solutions below.
2. Disable Chrome Extensions
While Chrome supports a wide variety of third-party extensions, not all of them are reliable. Some of them are not even actively maintained by the developers. One of those extensions could be interfering with Chrome.
To verify this, try using Chrome in incognito mode. If it’s working fine, then it’s definitely one of the extensions that are causing the issue.
To disable extensions in Chrome, type in chrome://extensions in the address bar and press Enter.
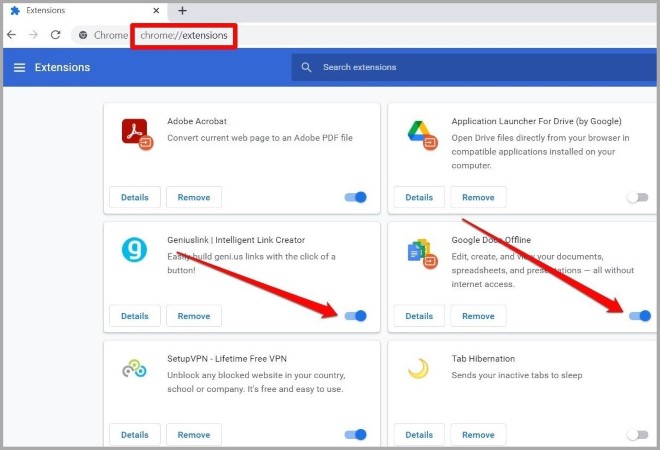
Once disabled, enable extensions one by one to isolate the culprit.
3. Clear Cache and Cookies
Similar to most browsers, Chrome also collects cache data as you surf the internet. But if that data has become corrupted or inaccessible, then Chrome will run into all kinds of issues. You can try clearing the existing cache and cookies to see if that helps.
1. Open Google Chrome and press Ctrl + Shift + Del on your keyboard to open the Clear Browsing Data panel.
2. Under Time range, select All time. Mark the checkboxes that read Cookies and other site data and Cached images and files.
Then hit Clear data.

After that, check to see if Chrome can connect to the internet now.
4. Disable Antivirus
Sometimes, antivirus programs can get too cautious and end up blocking websites or apps that are otherwise safe. To make sure that isn’t the case, consider turning it off momentarily. Once disabled, try using chrome again.
5. Disable Proxy
Several users reported connection issues on Chrome when using a proxy server. Hence, it’s best to avoid using it.
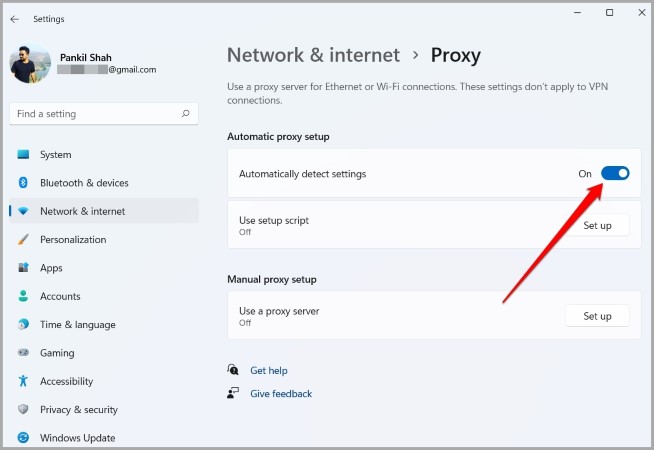
1. Press Windows key + I to launch the Settings app. In the Network and internet tab, select Proxy.
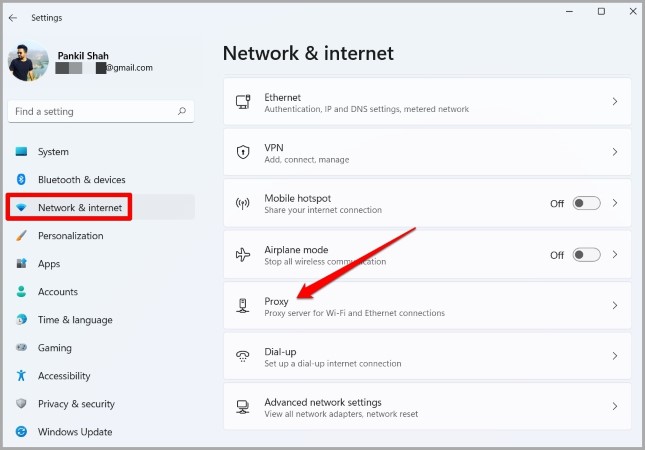
2. Turn on the switch next to Automatically detect settings.
6. Flush DNS Cache
DNS cache contains information about previous DNS lookups. If that data has become corrupted, then Chrome might have trouble loading web pages for you. Thankfully, clearing the DNS cache on Windows is quite simple. Here’s how to do it.
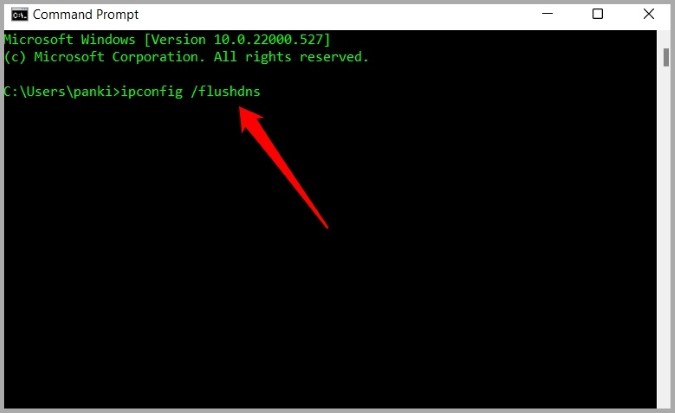
1. Open Windows Search, type in cmd, and press Enter.
2. In the console, paste the command given below and press Enter.
ipconfig /flushdns
Check to see if Chrome can connect to the internet now.
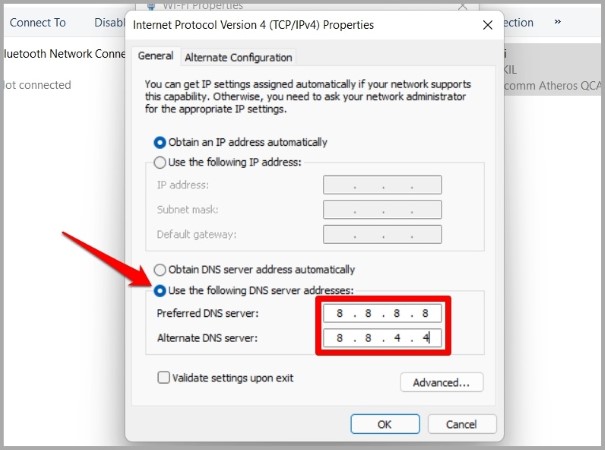
7. Change DNS Server
Similar to DNS cache, issues with your DNS server can prevent Chrome from connecting to the internet. In such cases, using a public DNS server like Google’s might help.
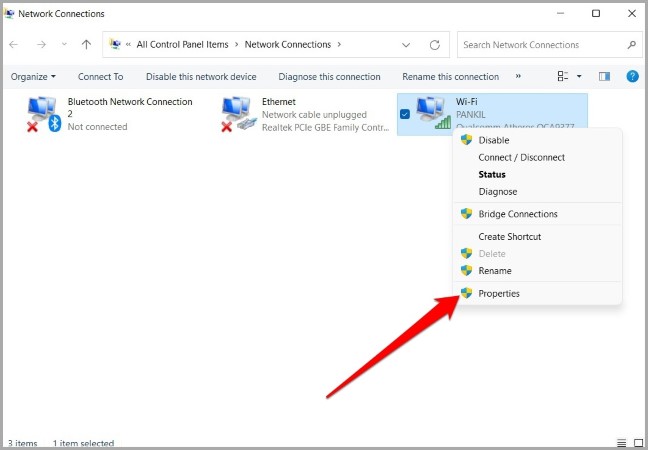
1. Press Windows key + R to launch the Run command, type in ncpa.cpl, and hit Enter.
2. A Network Connections window will appear. Right-click on your internet connection and select Properties.
3. Double-click on the Internet Protocol Version 4 (TCP/IPV4) option to open its Properties.
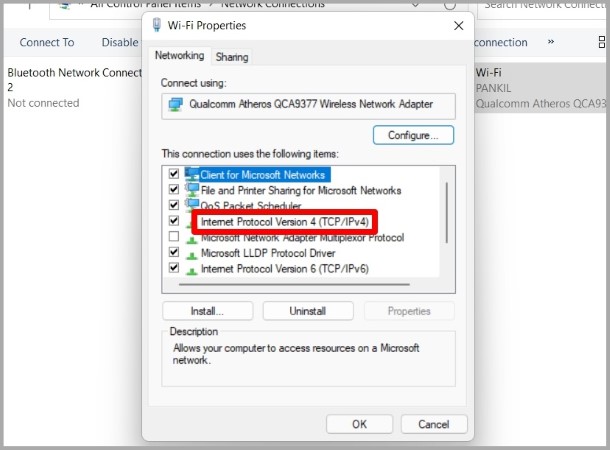
4. Select Use the following DNS server addresses. In the text fields next to Preferred DNS Server and the Alternate DNS Server, enter 8.8.8.8 and 8.8.4.4 respectively.
Then hit OK to save changes.
8. Reset Flags
If you’ve been tinkering with any of the Chrome flags to explore experimental features, then such issues may arise. Thankfully, resetting flags to their default settings isn’t difficult. Read on to learn how.
Type in chrome://flags in the address bar at the top and hit Reset all button.

9. Reset Chrome
If resetting Chrome flags doesn’t work, then it’s time to reset Chrome itself. Do note that this will remove all extensions, cache data, and browser history from Chrome.
1. Launch Google Chrome. Type in chrome://settings/reset in the URL bar and press Enter. Then click on the arrow next to Restore settings to their original defaults.
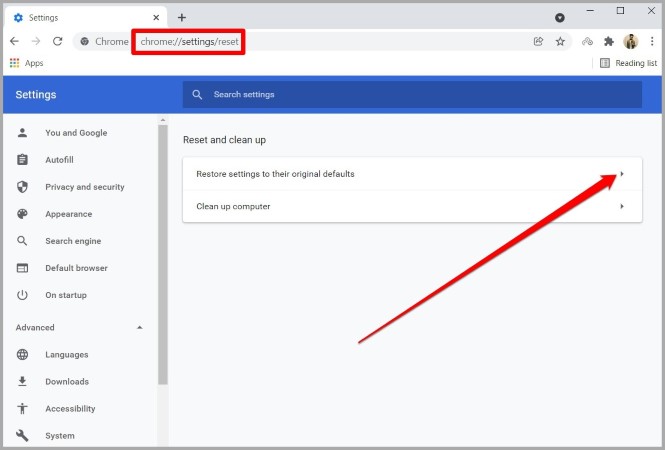
2. Hit Reset Settings to confirm.
Once done, Chrome should be able to connect to the internet now.
10. Reinstall Google Chrome
Lastly, if nothing works, then you’ll have to uninstall Chrome and install it again. This will help clear any associated app data that may have been causing the issue and also update Chrome to its latest version.
Stay Connected
Hopefully, one of the above solutions has helped fix Chrome not connecting to the internet issue and you’re back at exploring the wild web. If not, you can always visit Chrome’s support page if you’re getting a specific error message while loading a webpage.