While I have had a good experience with Discord, for the most part, I face this mic not working issue every now and then on Windows. It does not throw any error message nor has any connectivity issues with the mic, but other people on Discord voice channels cannot hear me at all. After troubleshooting the Discord mic issue on Windows 10 and 11 multiple times in different ways, I was able to finally fix it for good. Here are all the solutions you can use to fix the mic not working problem on Discord.
Table of Contents
Fix Mic Not Working On Discord
One easy way to fix the Discord mic on a Windows PC is to restart the app. You can also try reconnecting the mic cable or reconnecting via Bluetooth. Sometimes, there can be basic connectivity issues with the mic or your Discord app might not work as intended. But in case they don’t or if Discord mic continues to throw errors, here are a few methods that should be able to fix the mic not working issue on Discord.
First, let’s start with checking whether Windows is able to access the microphone in the first place.
1. Check the Microphone Connection to Windows
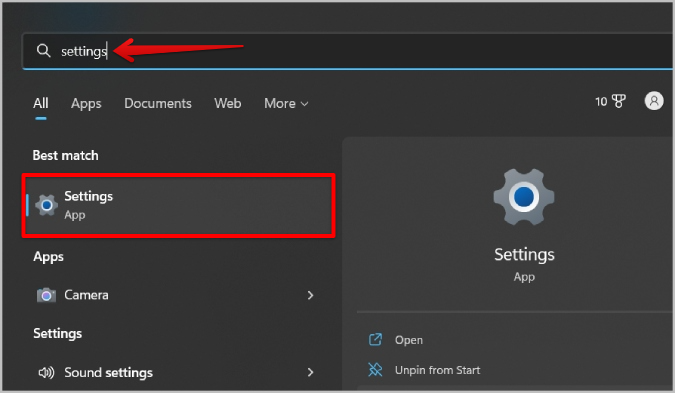
1. If you are on Windows 11 or 10, press the Windows key to open the start menu. Here search for the Settings app, and open it.
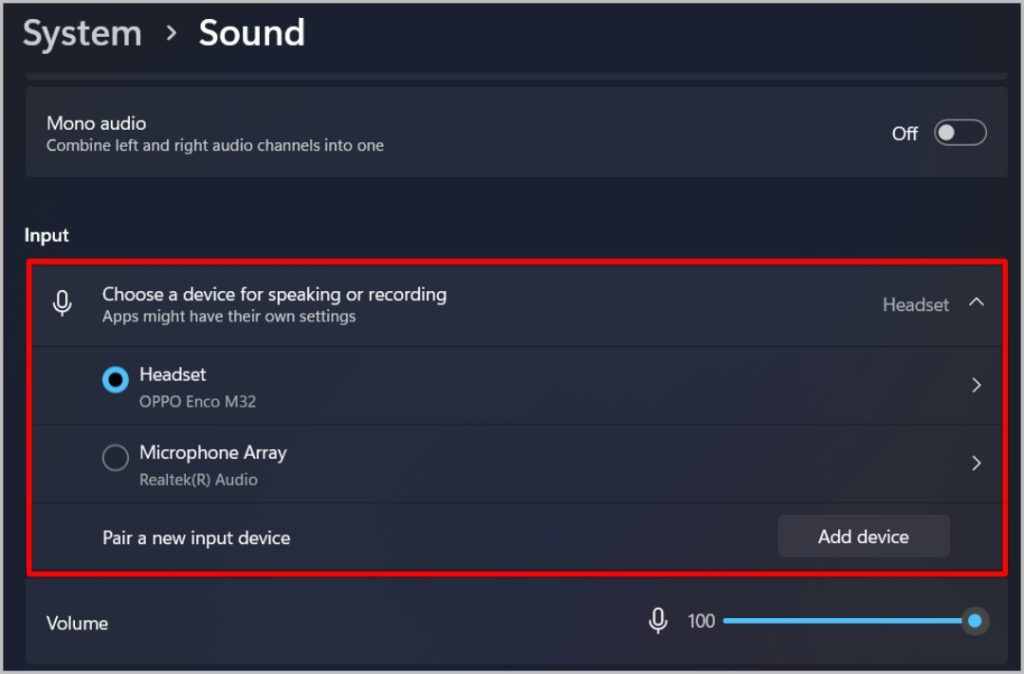
2. In the Settings app, select the System option and then click on the Sound option.

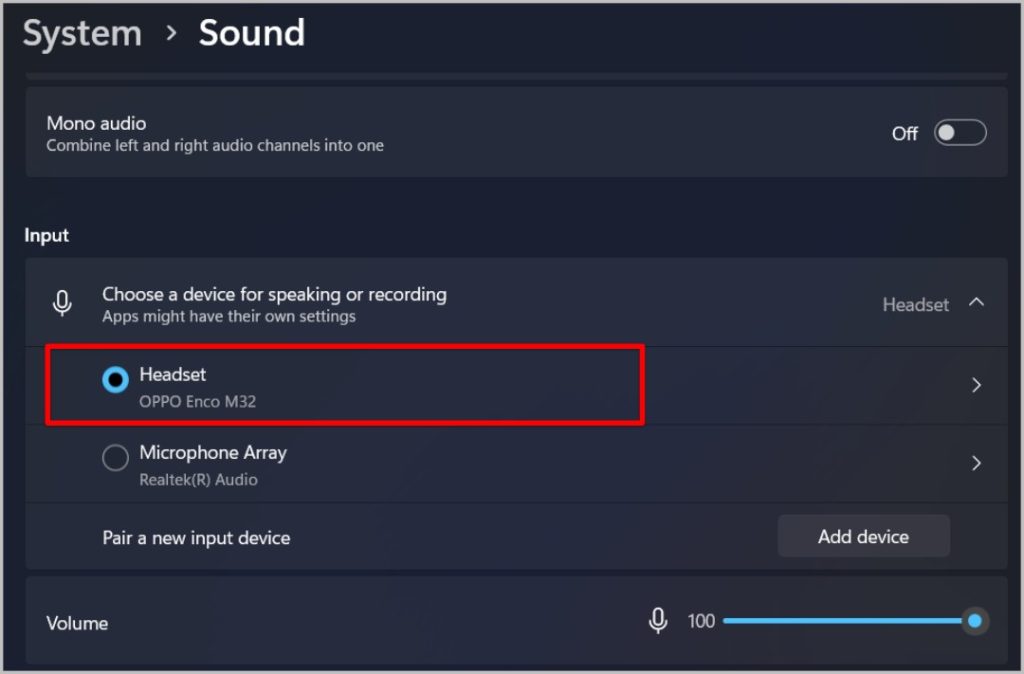
3. On the Sound settings page, scroll down to the Input option and select the microphone that you want to use.
4. If you can’t see your mic in the list, reconnect the mic and try again. If the problem persists, it means your microphone is not connecting to the OS at all. If the mic is listed, then reconnect.
2. Try Using a Different Port or Different Microphone
If your microphone is not showing up in the settings, make sure that you have connected to the correct port on your Windows 10/11 PC or laptop. Some PCs have more than one audio port for speakers, microphones, surround sound, etc. The microphone port should be in blue color on most PCs.
Also, you can try using a different microphone. Even if the new microphone is not working, then the problem might be with the OS itself.
3. Troubleshoot Microphone
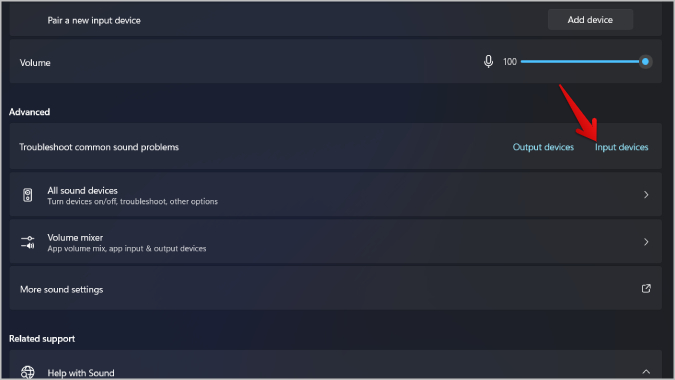
If there is no issue with the port or the microphone, then troubleshooting the microphone settings on Windows will help you resolve this connectivity issue. To troubleshoot, open Settings > System > Sound. Scroll down to the Advanced section, and now click on the Input devices option under the Troubleshoot common sound problems.
The troubleshooting process will run for a couple of minutes. It will resolve any minor errors within its purview.
4. Change Input Volume on Windows
After selecting the mic in Settings, you can check its properties to change the input volume.
1. Open Settings > System > Sound and click on the mic that you have selected to open the Properties page.
2. Under Input Settings, make sure the Input volume is set to 100.

3. Once done, click on the Start test button beside the Test your microphone section. Then talk or play any audio at normal volume for a few seconds. Then click on the Stop test button. It gives you the audio percentage for the sound making sure that it is working perfectly.
5. Update or Install Audio Drivers
If you have connected the microphone, but it’s not working as intended, it might be because of unsupportive or old audio drivers.
Your device might need a specific driver to be updated. Depending on the microphone you are using and the sound drivers it supports, it can be hard to find the specific audio driver that needs to be updated. Anyhow, you can just update all the audio drivers regardless of the microphone you are using.
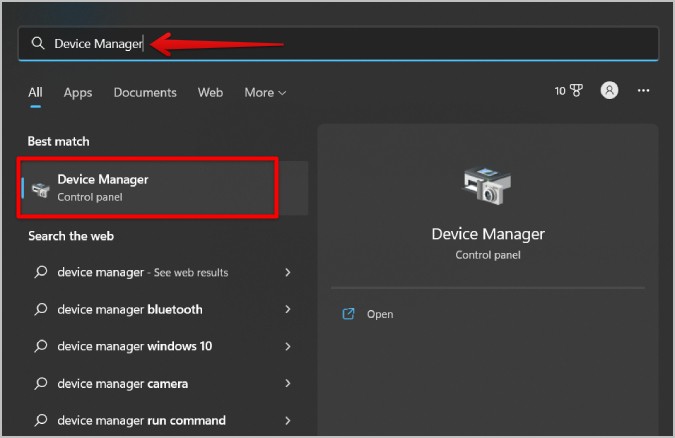
1. Press the Windows key to open the Start menu, search for the Device Manager and open it.
2. Now select the Sound, video, and game controllers options. Then select the mic that you are facing the problem with.
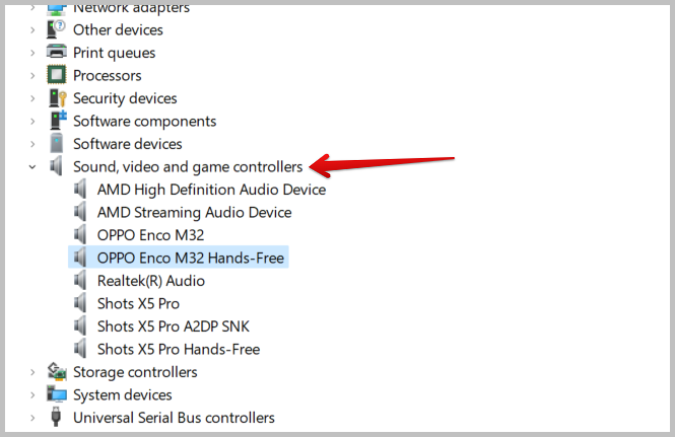
3. It opens a window to change the settings of that specific mic. Click on the Driver tab and then select the Update Driver option.

4. Then select Search automatically for Drivers option in the pop-up Window. It should search for the needed driver and install it from the internet automatically.

6. Try Manually Connecting to your Microphone on Discord Voice Settings
Discord should automatically connect to the microphone you have installed. But in some cases, it might be using the system mic instead of using the mic you have want. So you can manually connect to the microphone that you want to use to solve the issue.
1. Open the Discord mobile or web app, click on the cog icon at the bottom left corner beside the user name to open User Settings.
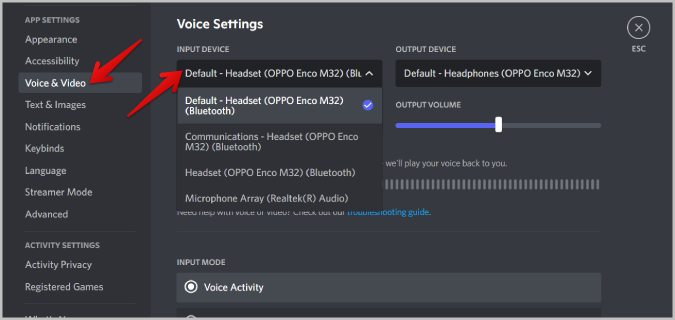
2. On the User Settings page, select the Voice & Video option in the left sidebar.
3. Here you should be able to change the voice settings. Under the Input devices option, select the microphone that you want to use.
4. Once selected, make sure that you increased the input volume. So that your friends can hear you better.
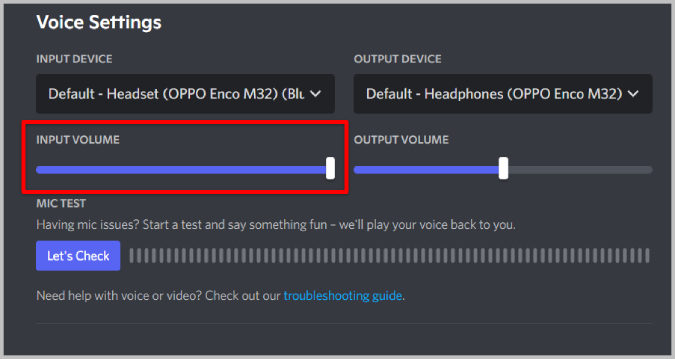
5. Finally, you can do a Mic test. To do that, click on the Let’s check button below the Mic Test option. Discord should represent the input sound in an audio meter.
It can be a problem in most scenarios if Discord is not choosing the right microphone. So manually choosing the mic should get the work done. If the problem still persists even after selecting the mic, proceed with the following steps.
7. Give Microphone Access to Discord on OS
If the microphone works on the system, but not on Discord, then Discord might not have the required permission to access the microphone. We can grant that from the Windows settings.
1. Open Settings > Privacy and security. Here scroll down and select the Microphone option under the App permissions section.

2. Then again scroll down and make sure the toggle beside Let desktop apps access your microphone option is turned on.

Windows doesn’t display app-by-app permissions. By enabling the above toggle, you can use the microphone on all the apps, even third-party installed apps.
8. Give Microphone Access to Discord on Browser
1. If you are using Discord in a browser, make sure that you have enabled the microphone for desktop apps with the previous method. Once done, open the browser and click on the kebab menu (three-dot icon) at the top right corner, then select the Settings option to open browser settings.

2. Now select the Privacy and security option and then select the Site settings option.
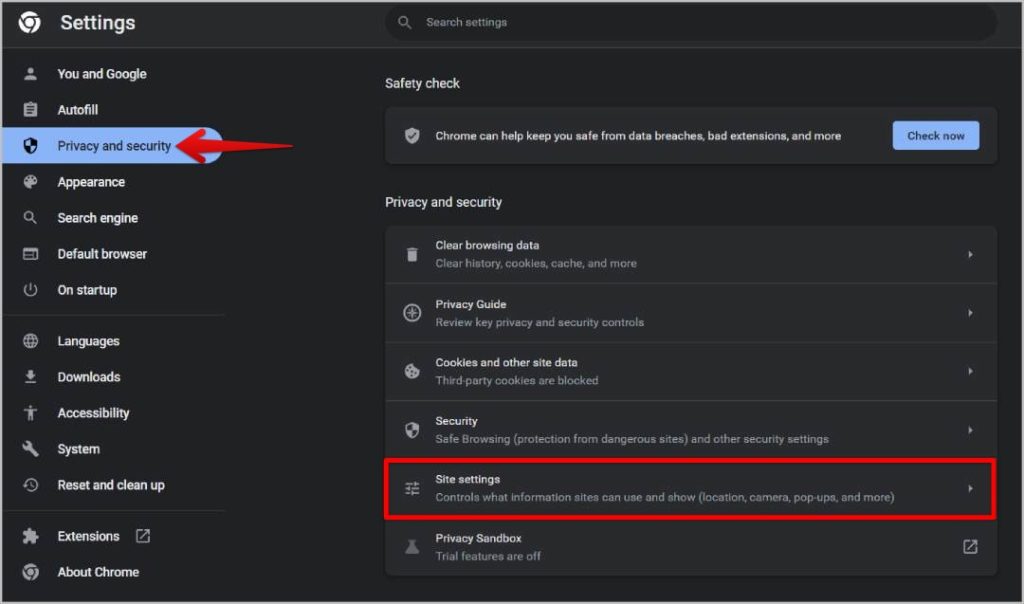
3. Then you can select the Microphone option and then check the radio box beside Sites can ask you to use your microphone.

Once done, check if Discord is not under Not allowed to use your microphone list. If Discord is under it, click on the trash icon beside it. So that you will get a prompt when you access the microphone on Discord.
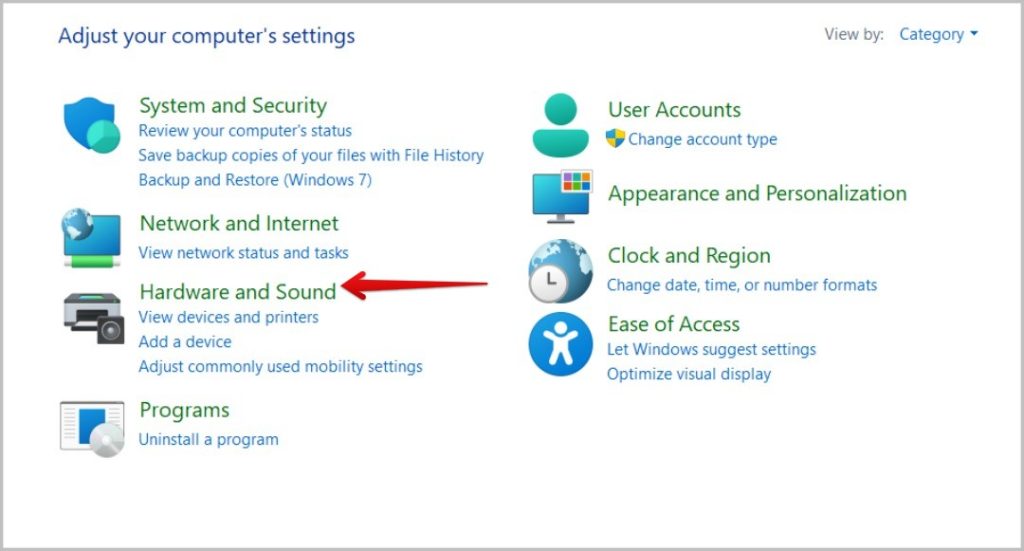
9. Disable Exclusive Mode on Windows
Exclusive mode on Windows will make a single application take control of the entire sound driver. So if there is any application set to priority in the exclusive mode, other apps cannot use the microphone while that application is running and using the microphone.
1. Click on the Windows key, search for the Control Panel in the Windows search and open it.

2. In the Control Panel, select the Hardware and Sound option.
3. Then select the Manage audio devices option under Sound.
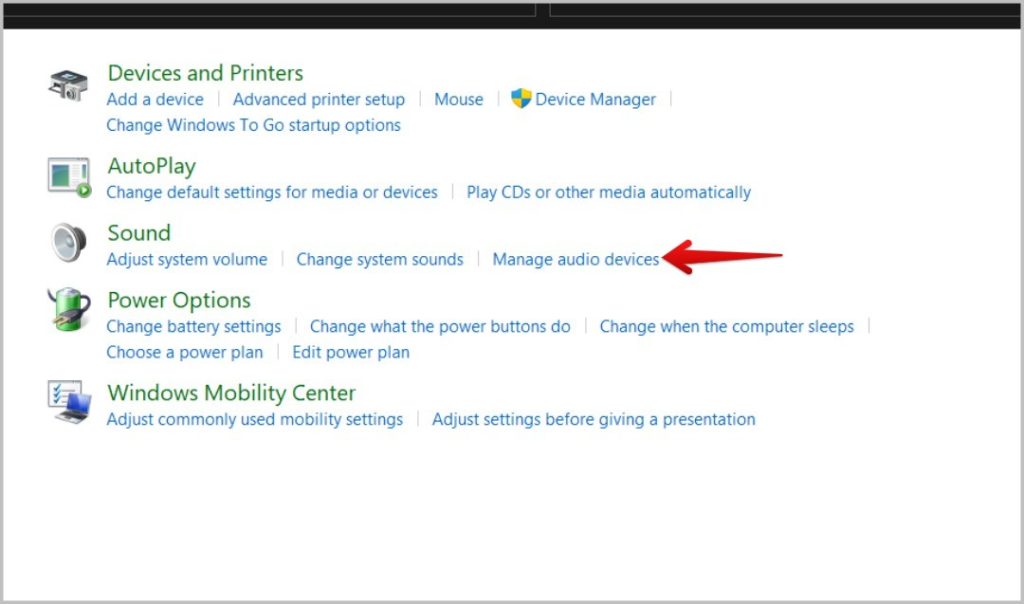
4. In the po-up that follows, select the microphone that you want to use, then click on the Properties button.

5. It opens another window, here select the Advanced tab.
6. Finally, disable the checkbox beside Allow applications to take exclusive control of this device. Once done, click on Apply button to save changes.

Now no app in the background will take control of the device making it non-usable on Discord.
10. Check Input Mode on Discord Voice Settings
Discord has two input modes — Voice Activity and Push to talk. If the input mode is set to voice activity, everything should be working fine. But if you have set it to push to talk, your mic will work only when you press the shortcut assigned.
1. You can change the input mode on the same Discord voice settings page. First, click on the cog icon at the bottom right to open User settings.
2. On the User settings page, open the Voice and Video option, then you can scroll down to find the Input mode option.
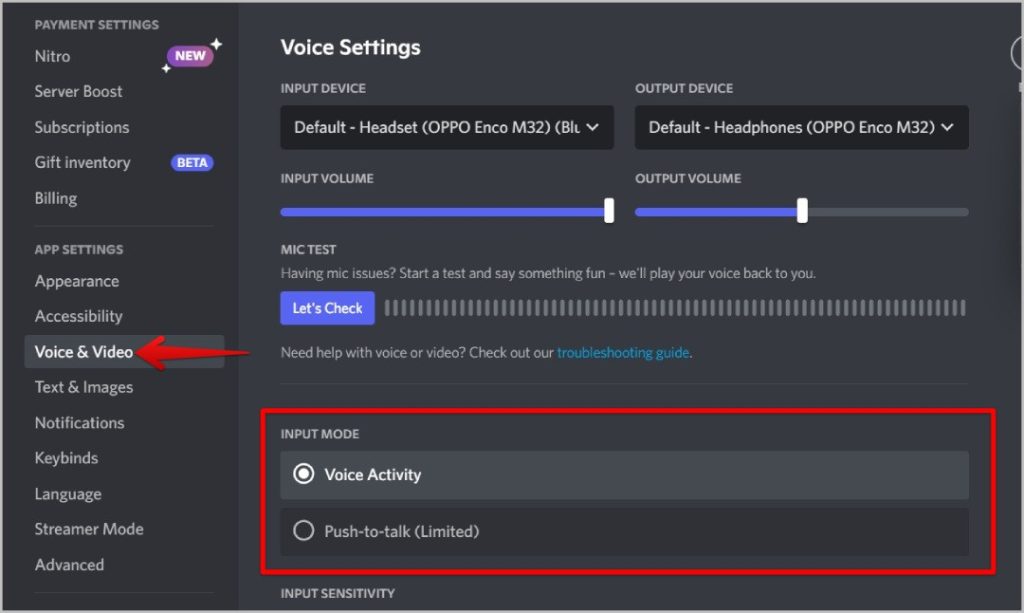
3. In the Input mode, make sure the Voice Activity option is selected. This mode will activate the mic whenever you talk.
4. You can also choose Pust to talk option if you prefer, but your mic will get activated only when you press the shortcut you assigned.
11. Check Voice Processing Settings on Discord
If changing the voice mode didn’t solve the issue, try changing the voice processing settings on the Discord voice settings. These options are used to reduce the noise, echo, etc. While they work great in only reducing the noise, it’s a good idea to check if the problem is caused by these settings for some reason.
1. On the Discord Voice Settings, scroll down even further to find Voice Processing settings. Turn off the toggle beside Echo cancellation and Noise suppression.
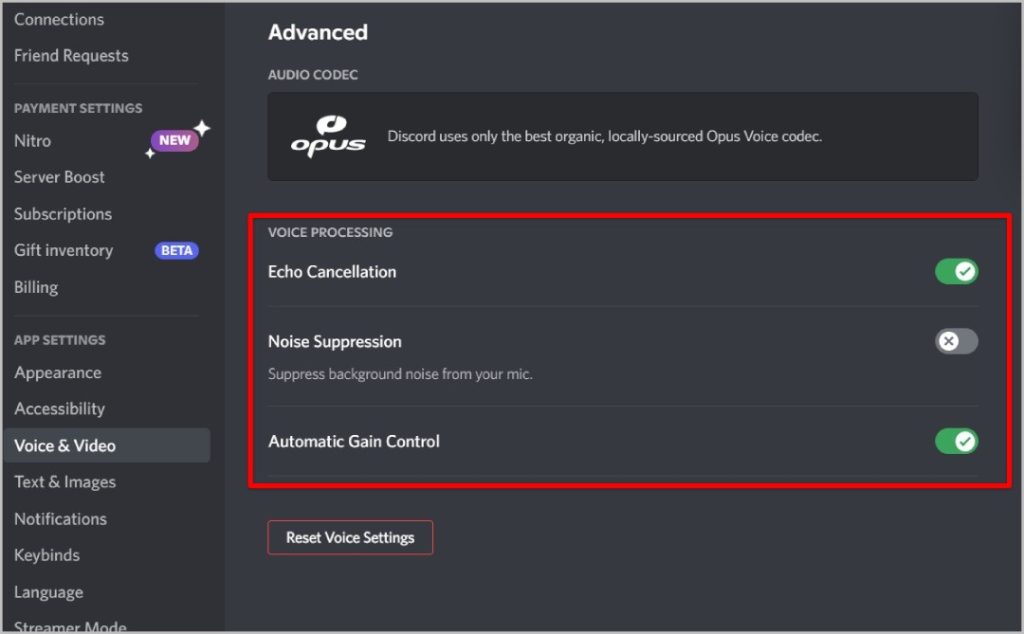
Now check whether mic is working in Discord or not. If not, make sure to turn them on again as they do a really good job for the most part.
12. Reset Discord Voice Settings
Finally, if none of the above methods fixes Discord mic not working error, reset the voice settings so that everything will be back to the default. No matter what changes you have made so far that’s causing mic to malfunction, it will be moved back to their default state. On the Discord Voice settings page, scroll down to the bottom. Here click on the Reset Voice Settings button. In the pop-up window, tap on Okay for confirmation.
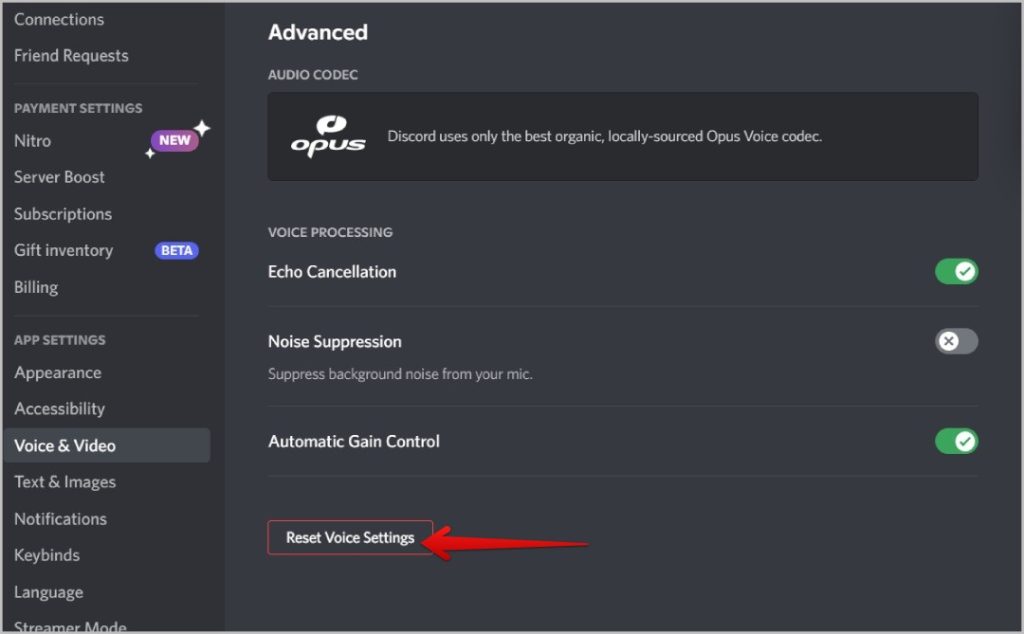
That’s it, you have changed every voice setting to the default which should solve the issue.
Mic Testing, 1, 2, 3…
Whether you are having issues related to the network, Windows, or the Discord app, either of these tips should help to solve mic not working on Discord problem. If none of the solutions worked, reinstall the Discord app on Windows. Also, open the App data on file explorer and delete the Discord data for a clean install.