Whenever a new major version of Windows drops, we recommend avoiding it for a few days. Sometimes, it breaks the basics of the system including Bluetooth, Wi-Fi, or Hotspot, something that we rely on more than ever these days. If you have triggered the download button for Windows 11 and suffering from Wi-Fi dropping or Wi-Fi not working issue, then read along to learn to fix sketchy Wi-Fi connections in Windows 11.
Fix Wi-Fi Not Working in Windows 11
From the brand new Start menu to widgets, and overall OS redesign, there is a lot to like about Windows 11. But Wi-Fi not working following the Windows 11 update might spoil the mood for you. Let’s troubleshoot the issue.
1. Troubleshoot Internet Connection
Windows offers a handy troubleshooting tool to fix internet connection issues on the device. Here’s how to use it in Windows 11.
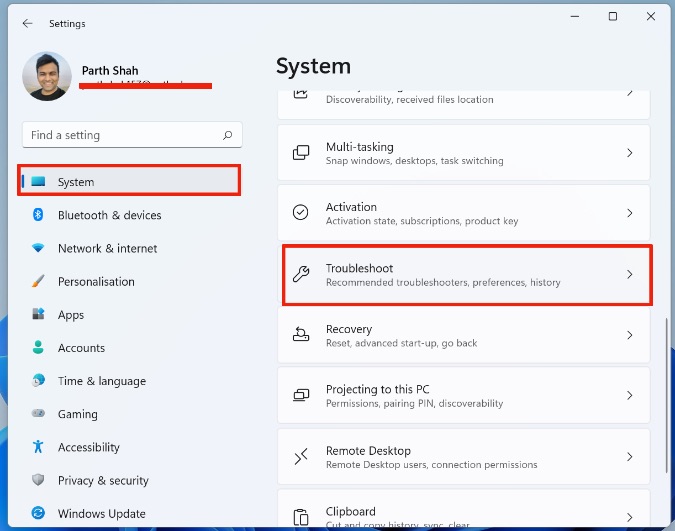
1. Open the Settings app on Windows 11 (Use Windows + I keys).
2. Navigate to System > Troubleshoot > Other troubleshooters.
3. Under the Most frequent menu, find Internet Connections.
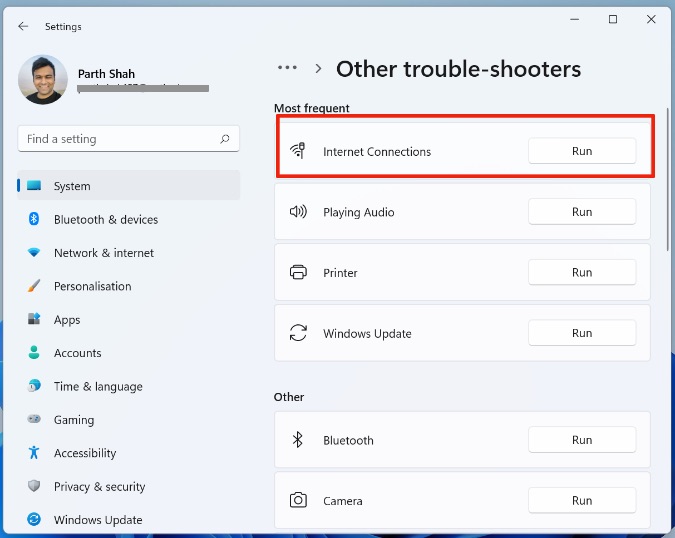
Run the troubleshooter and let Windows fix the issue for you.
2. Reinstall Network Adapter Drivers
Sometimes, your device network adapters might mess up the Wi-Fi settings on your Windows device. Reinstall the network adapter drivers from the Device Manager menu.
1. Press the Windows key and search for Device Manager.
2. Click Enter.
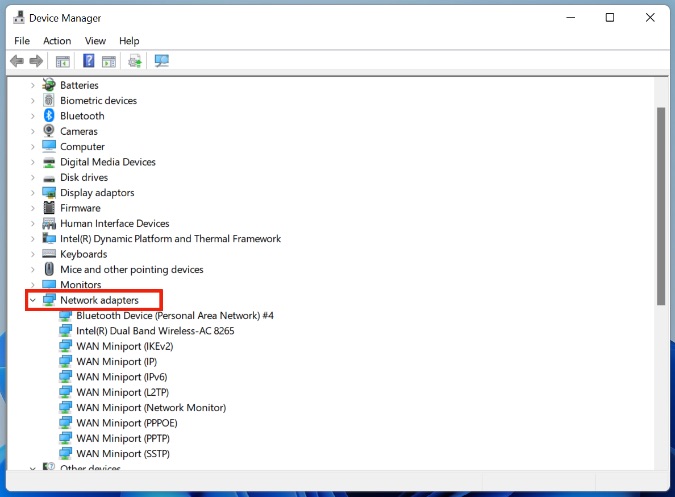
3. Expand the Network adapters menu and find the default wireless drivers. Most users will have Intel ones.
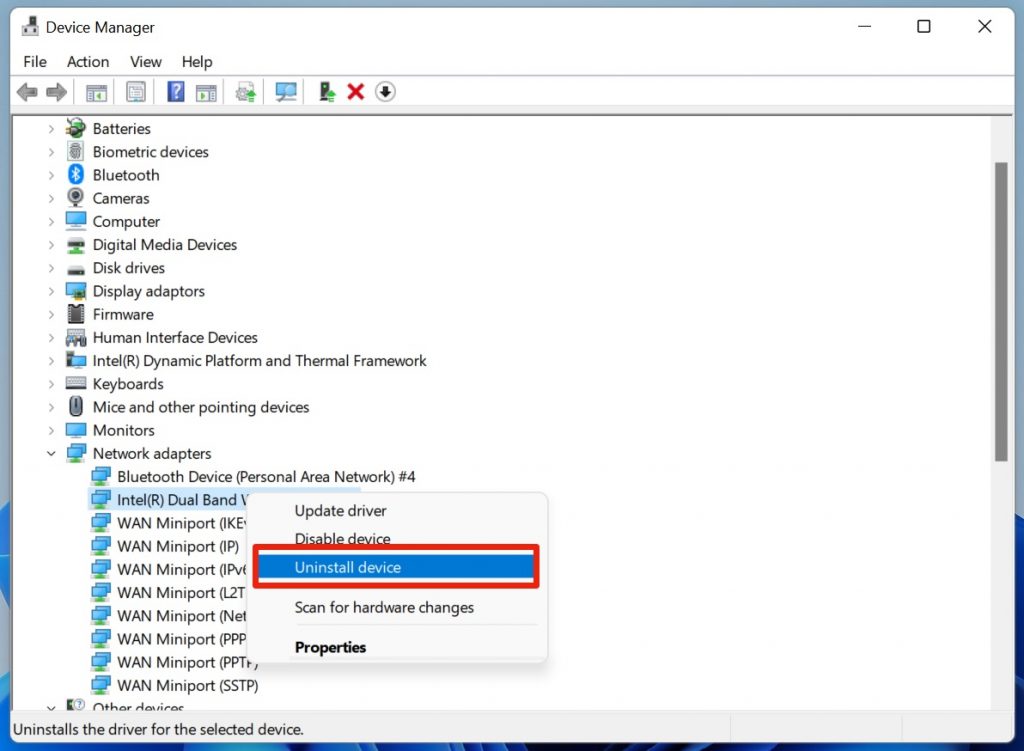
4. Right-click on it and select Uninstall device.
Restart the Windows system and the OS will reinstall them. Try connecting to Wi-Fi again.
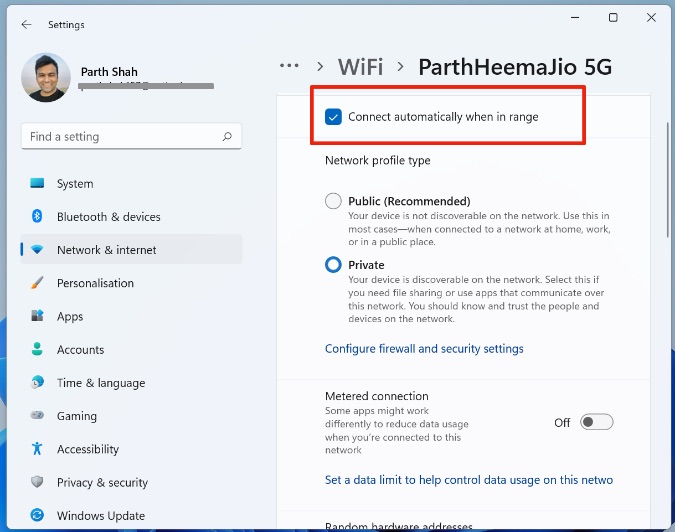
3. Enable Connect Automatically When in Range
If you have disabled Connect automatically when in range toggle for a specific Wi-Fi, the OS won’t connect to the Wi-Fi until you do it yourself.
1. Open the Settings app (Windows + I keys) and go to Network & Internet menu.
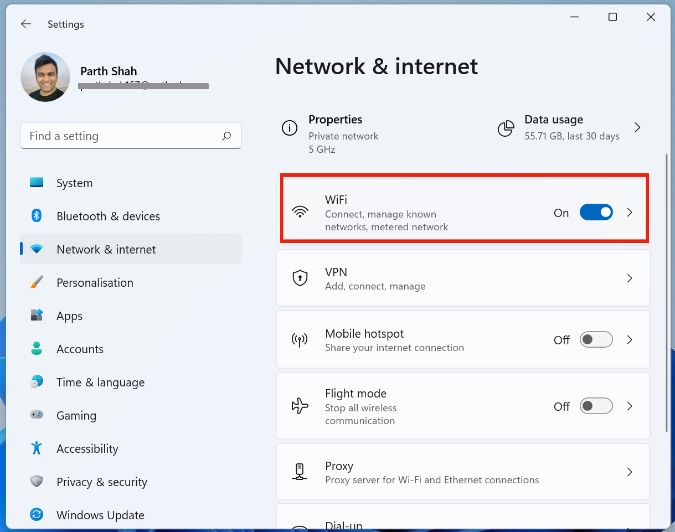
2. Select Wi-Fi > Wi-Fi connection properties and enable Connect automatically when in the range option.
4. Update Wi-Fi Drivers
Windows usually update the Wi-Fi drivers with OS updates. But this step is still worth checking out if the Wi-Fi is not working for you on Windows 11.
1. Open the Device Manager menu on Windows 11.
2. Find the Network adapters from the list and expand the menu.
3. Right-click on the Wi-Fi driver name and click on Update driver.
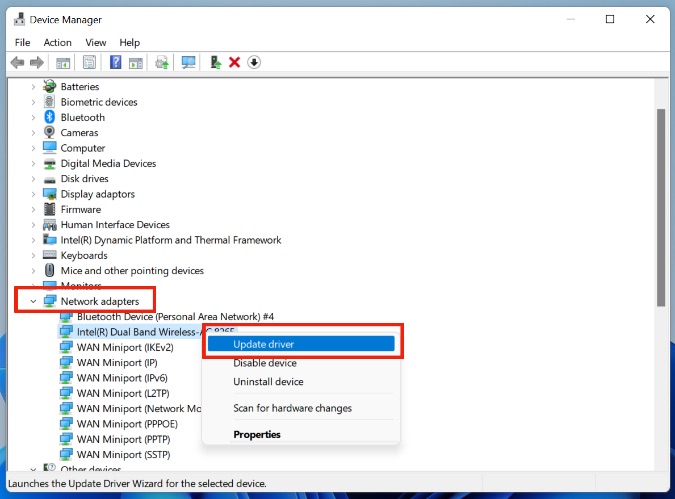
If Windows can’t find the newer version of drivers automatically, you can find it on the manufacturer’s website.
5. Reconnect Wi-Fi
This is yet another trick that has saved many from no Wi-Fi connection on Windows 10. It’s worth trying out on Windows 11 as well.
1. Click on the Wi-Fi icon in the Windows Taskbar.
2. Expand the Wi-Fi menu and right-click on the Wi-Fi name.
3. Select Forget.

4. Try to connect to the same Wi-Fi connection with a password.
6. Check Wi-Fi Power Management
If you notice frequent Wi-Fi dropouts on Windows 11, you should make changes from the network adapter’s power management settings.
1. Open Device Manager and go to Network adapters.
2. Expand the menu and double-click on the Wi-Fi driver.
3. Select Power Management from the Properties menu.
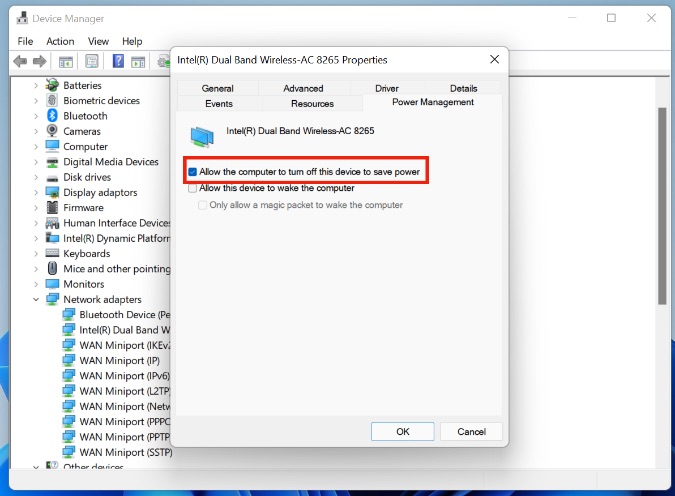
4. Disable Allow the computer to turn off this device to save power.
Try using Wi-Fi on Windows 11 and you won’t notice frequent dropouts.
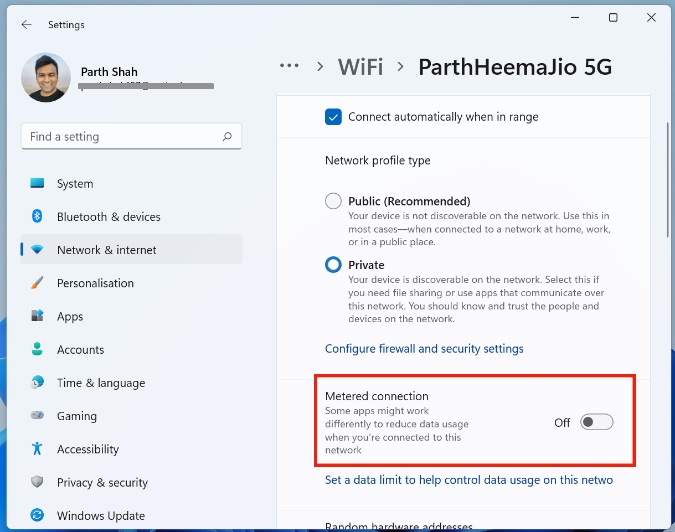
7. Disable Metered Connection
Similar to Data Saver mode on Android OS, Windows too offers something called Metered connection. When a Wi-Fi connection is set as metered connection, you might see slow data speeds to reduce data usage.
Your device’s Wi-Fi is working but it won’t work at desired speeds with the Metered connection.
1. Open Windows Settings > Network & internet > Wi-Fi.
2. Select the Wi-Fi connection that you are trying to connect.
3. Disable Metered connection toggle from the following menu.
8. Use Windows Security
Is your Windows 11 PC infected with malicious files? Some of them might interfere with the Wi-Fi connection on the device. We recommend scanning the PC with Windows Security.
1. Press the Windows key and search for Windows Security.
2. Open the app and go to Virus & threat protection.
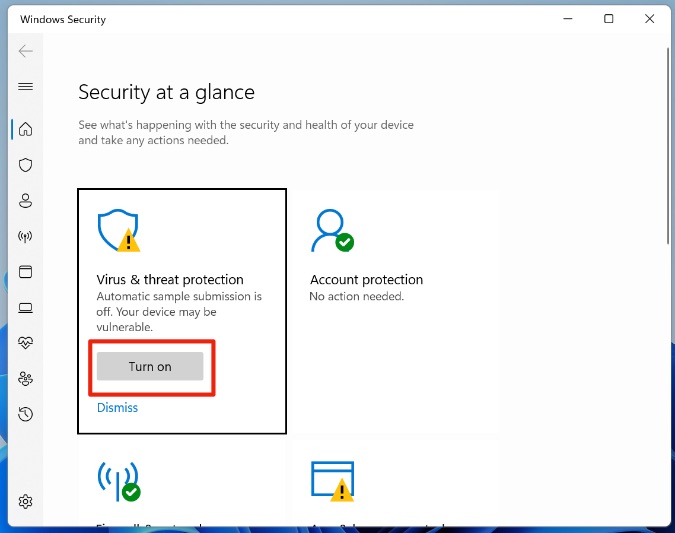
3. Run a Quick scan and let Windows identify and remove harmful files from the device.
Wrapping Up: Start Enjoying Windows 11 OS
Before you go ahead and think of rolling back to Windows 10 for better stability, you should use the tricks above and fix the Wi-Fi issues on Windows 11 with ease. While you are at it, don’t forget to check the router as well. Maybe, the Wi-Fi issues on your PC or Windows 11 laptop might have nothing to do with OS itself.