Microsoft Teams comes preinstalled in Windows 11 and is an integral part of Microsoft Office 365. But when some users try to open the Teams app, they run into the “We’re sorry – We’ve run into an issue” error. As a result, they cannot access their account. If you face the same issue, don’t fret. We will list out eight methods to fix this Teams app error and help you regain access to your account.
Table of Contents
1. Completely Close and Relaunch the App
If the Teams app or its related processes face a glitch while launching, it won’t work properly. So, completely close the app and relaunch it. Here’s how:
1. Press the Ctrl + Shift + Esc keys together to open the Task Manager.
2. Go to the top search bar, type teams, and press Enter.
3. Right-click on the Microsoft Teams process and select the End Task option.

4. Close the Task Manager.
5. Press the Windows key, type Teams, and click on the Run as administrator option.

2. Check Internet Connectivity
Microsoft Teams requires an internet connection to work. You cannot use it in offline mode. So, check your internet connection status by opening a web page. You can also open the Internet section in the Settings app and check the current status of the connection. While you are at it, reboot your router to clear the cache and reconnect your PC to the internet.
3. Clear Caches From Multiple Folders
Many Microsoft users successfully fixed the issue by clearing the Teams app cache. But unlike other apps, you need to clear out the cache from eight different folders for Teams. Also, terminate the Teams app as we demonstrated in method one above before clearing the cache. Here’s how to do it:
1. Press the Windows key + R to open the Run dialog box. Type %appdata%\Microsoft\teams in the text box and press Ctrl + Shift + Enter keys at once.

2. Open the Blob_storage folder and press Ctrl + A to select all files/folders. Now, press Shift + Del keys and click on the Yes button.

3. Similarly, delete all the files present inside the following folders:
%appdata%\Microsoft\teams\application cache\cache
%appdata%\Microsoft\teams\Cache
%appdata%\Microsoft\teams\databases
%appdata%\Microsoft\teams\GPUcache
%appdata%\Microsoft\teams\IndexedDB
%appdata%\Microsoft\teams\Local Storage
%appdata%\Microsoft\teams\tmp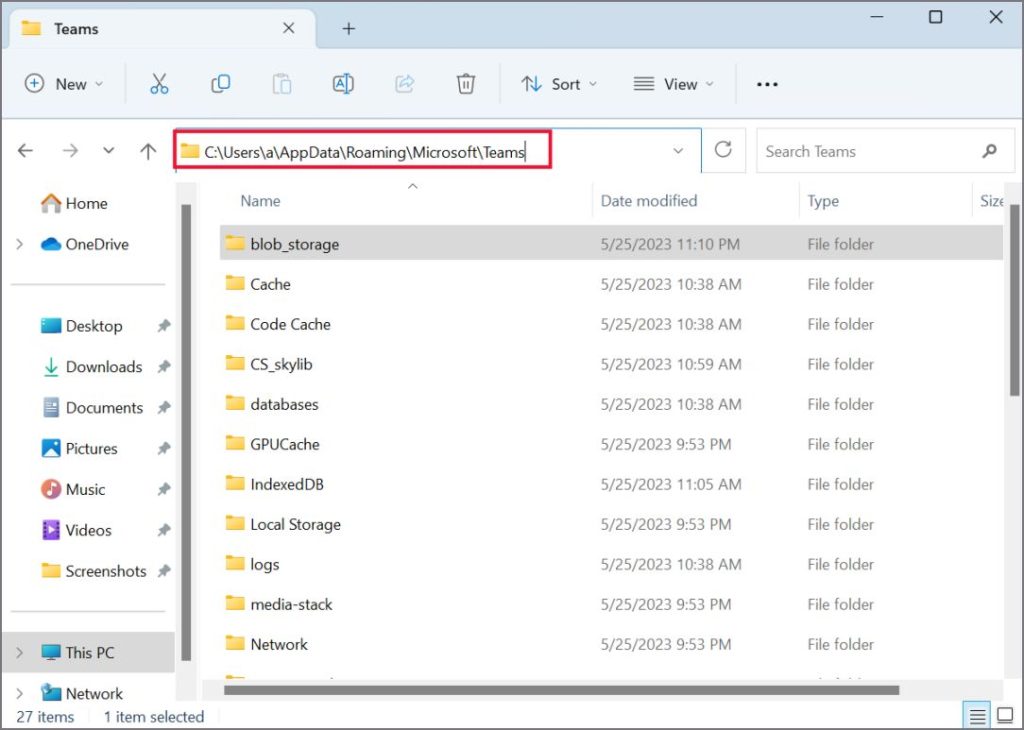
4. Close the AppData folder and relaunch the Teams app.
4. Disconnect and Reconnect Your Account in Settings
A lot of users solved the issue by disconnecting the work or school account in the Settings app. However, this fix only applies if you are using an account that was added by the work or school administrator. Follow the below-mentioned steps:
1. Press the Windows key + I to launch the Settings app.
2. Navigate to Accounts > Access work or school section.
3. Here, click on the arrow icon next to the account you want to remove. Click on the Disconnect button.
4. Restart your system and revisit the Access work or school section. Add your account and launch Teams to check if it works now.

5. Run Teams in Compatibility Mode
If the Teams app still produces the same error, try running it in compatibility mode. You can manually do it or use the Program Compatibility Troubleshooter to identify and suggest methods for you. Here’s how:
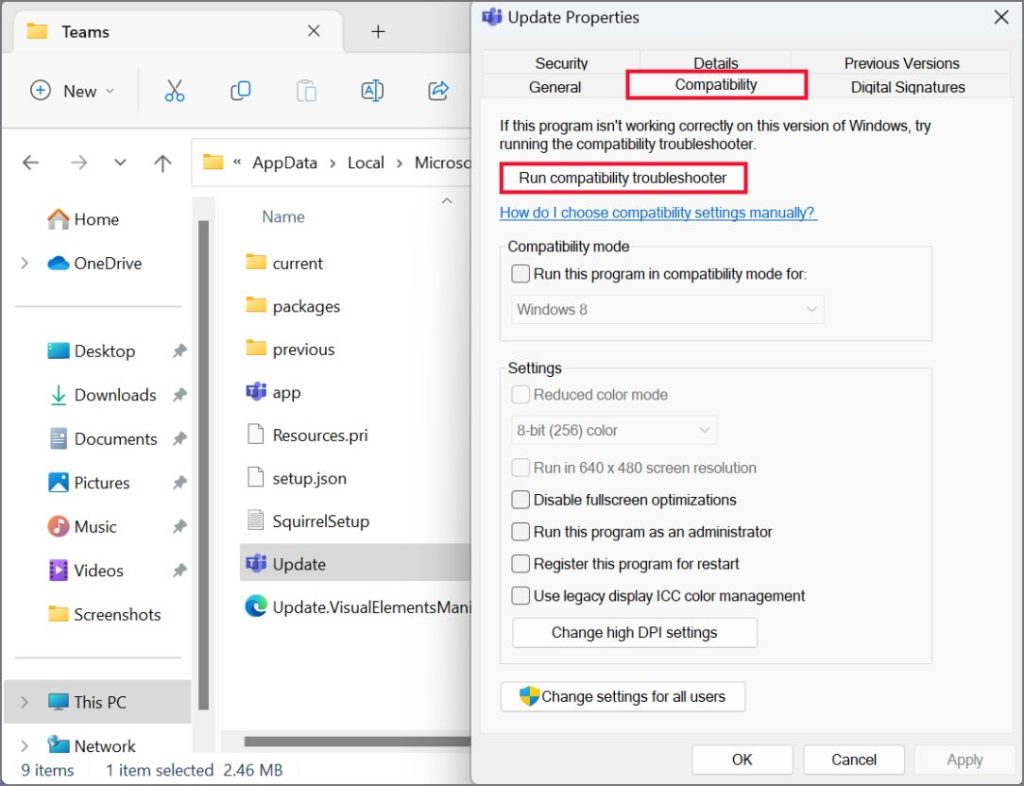
1. Right-click on the Teams app icon and click on the Properties option.
2. Switch to the Compatibility tab. Click on the Run compatibility troubleshooter button.
3. Click on the Try recommended settings option. Then click on the Test the program button.
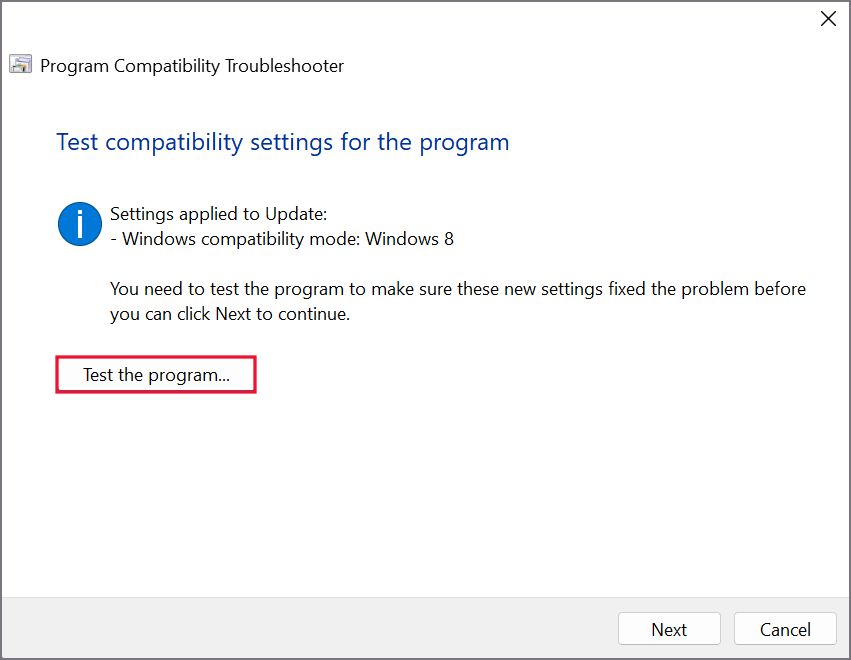
4. Check if the Teams app runs fine now. After that, click on the Next button.
5. Lastly, click on Yes, save these settings for this program if the app runs fine. Or, you can reattempt the troubleshooting with different settings using the No, try again with different settings option.

6. Enable TLS
TLS encrypts the data in transit and Microsoft Teams uses it too. So, enable this feature in Internet Properties if it is inactive by default. Here’s how to do it:
1. Press the Windows key, type Internet Properties, and press Enter.
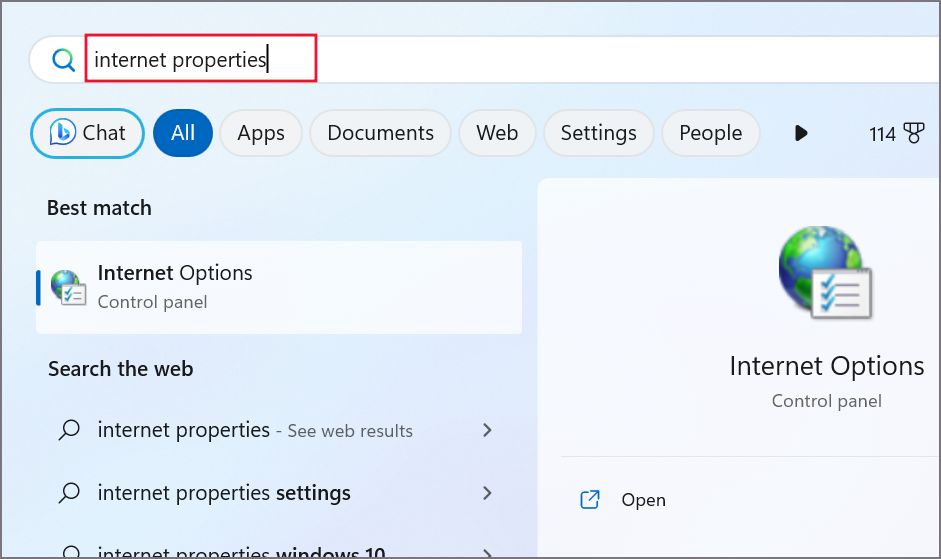
2. Switch to the Advanced tab. Scroll down and locate the TLS feature. Enable the check box present in front of each Use TLS option.
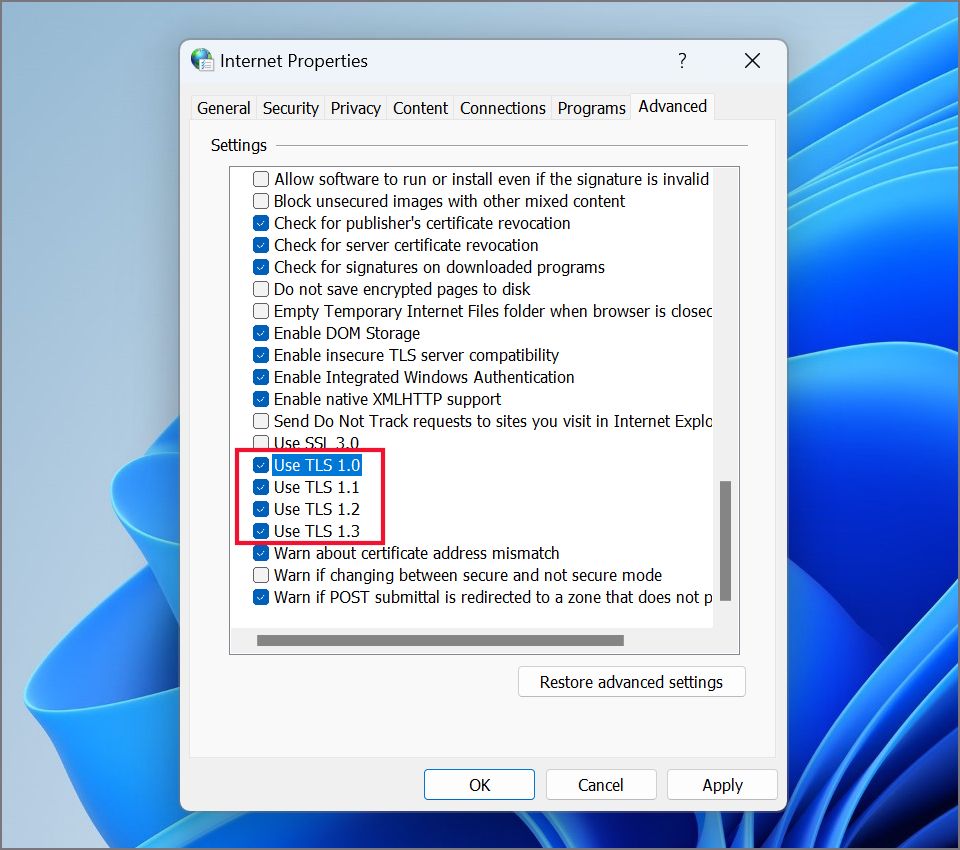
3. Click on the Apply button and then click on the OK button.

7. Reinstall Teams
Microsoft Teams doesn’t offer any means to repair or reset the app. You can delete the App Data folder to reset the app manually but that doesn’t ensure a complete reset. So, you must manually remove and then reinstall the Teams app on your PC. Here’s how:
1. Right-click on the Start button to open the Power User menu. Click on the Installed apps option.

2. Find Microsoft Teams in the list and click on the meatballs button. Select the Uninstall option. Reconfirm your decision and click on the Uninstall button.

3. Now, open Microsoft Store and reinstall the Teams app. Log in to your account and check if you see the “We’re Sorry – We’ve Run Into an Issue” error.
8. Use the Web Version
If none of the above solutions worked for you, don’t lose hope. You can still access your Microsoft Teams account using a web browser. Moreover, you can download the PWA version of the app and save it on your desktop. The features and functionality don’t differ and you can resume work at once while Microsoft or your administrator fixes the issue.
Get Teams Working Again
Being unable to access your Teams app and the data due to errors like ‘We’re Sorry – We’ve Run Into an Issue’ can impede daily work tasks. Check the internet connectivity and clear the app cache from multiple folders. After that, remove your account and try running the app in compatibility mode. Lastly, remove the app or use the web version for the time being.