One of the best ways to let people know that you are Live on Twitch is to message them where they hang out, most importantly, your Discord community. But why send them manually when you can automate the process. There are multiple ways to connect Twitch and Discord to send notifications to people on Discord when you go live.
How to Get Twitch Live Notifications on Discord
Let’s start the easiest option out of the bunch.
1. StreamCord Bot
Streamcord is a Discord bot that allows users to manage Twitch Notifications inside Discord for free.
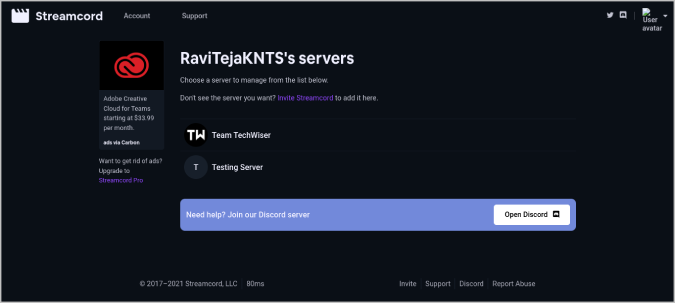
1. Just open the StreamCord website and log in with your Discord account.
2. It will display all the servers that you are managing. Select the server that you did like to receive Discord notifications.
3. Now scroll down and click on Add notification option under the Stream notifications section. In the free version, you can add up to 25 streamers while anything more than that requires a Streamcord Pro account which costs $2.50 per month.
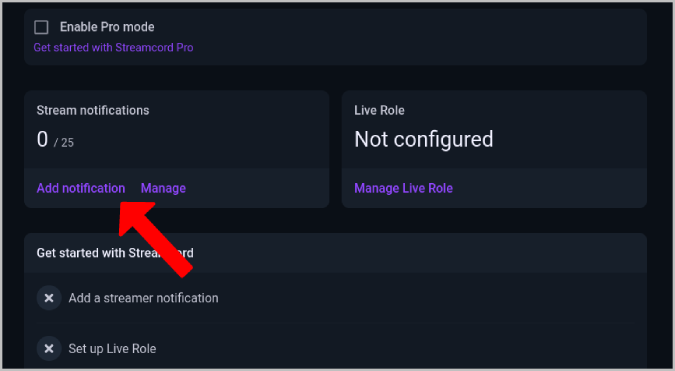
4. In the Add notifications page, enter the username of the streamer, select the channel to which you want to receive the notification message, and provide a custom message if you like to. Once done, click on Add notification button.
That’s it, you will start receiving the notifications when that Twitch account goes live.
2. MEE6 Bot
Unfortunately, MEE6 made this feature a paid option recently where you need to spend $11.95 per month. But MEE6 comes with a lot of other features which makes it worth the upgrade. If you like to purchase the premium or are already a premium user of the MEE6 bot, the setup process is similar to StreamCord.
1. Open the MEE6 Dashboard and log in with your Discord account. Now select the server where you want to receive message notifications for Twitch.
2. In the Dashboard, select the Plugins option in the top bar and then select the option Twitch.
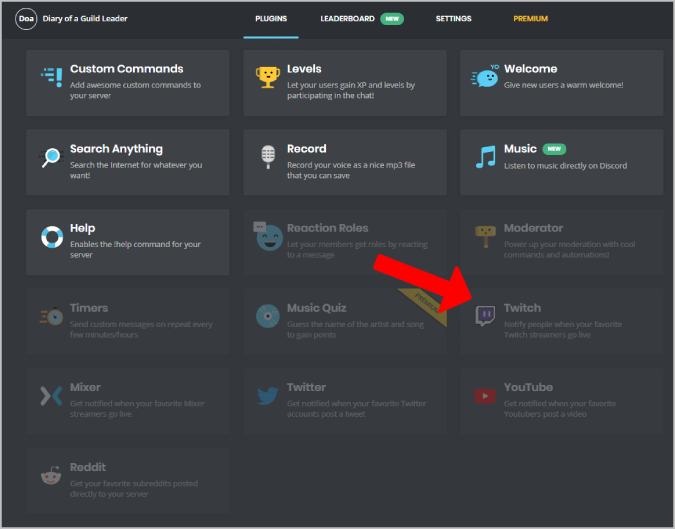
3. Here search for the Twitch username of the streamer, select the channel to receive the notifications, and then add a custom message to explain what it is.
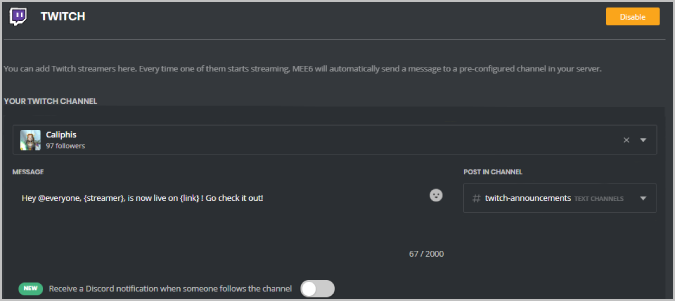
4. Once done, click on Save and you are good to go. The bot will begin working right away.
3. Using IFTTT
IFTTT is a service where you can link two services to work together using conditional logic. Here you create applets that will automate actions based on certain set triggers. For example, when the Twitch account goes live, send a message on Discord. Here’s how you can do that.
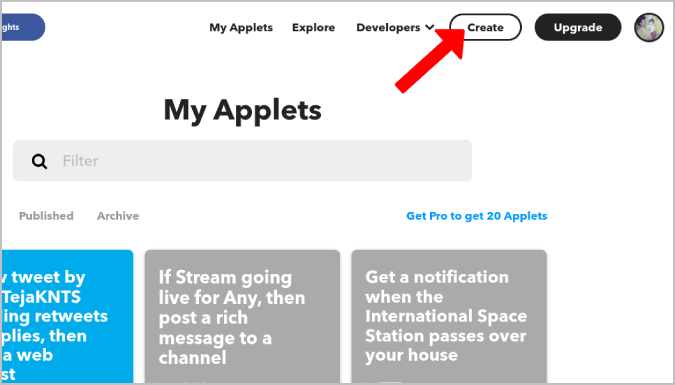
1. Open the IFTTT website, and click on the Create option at the top right.
2. Now click on the Add option beside If this and search for Twitch.

3. On the Twitch page, select the trigger Stream going live for a channel you follow. If you want to notify about your own streams that you will be starting, select New stream started by you.

4. Then log in with your Twitch account and select the channel. You can only select the Twitch channel that you are following.
5. Once done, click on the Add option beside the Then that and search for Discord.

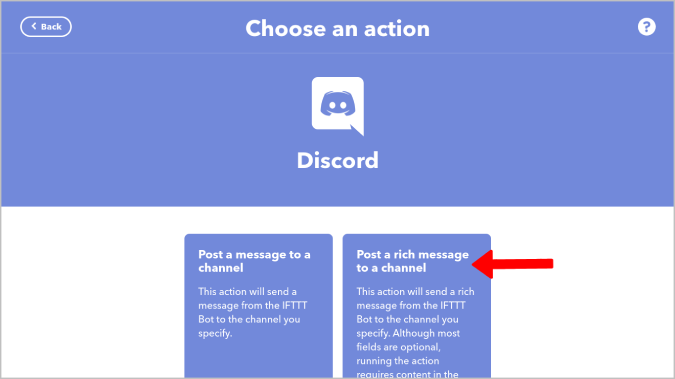
6. Here select the action Post a rich message to a Channel and then log in with your Discord account
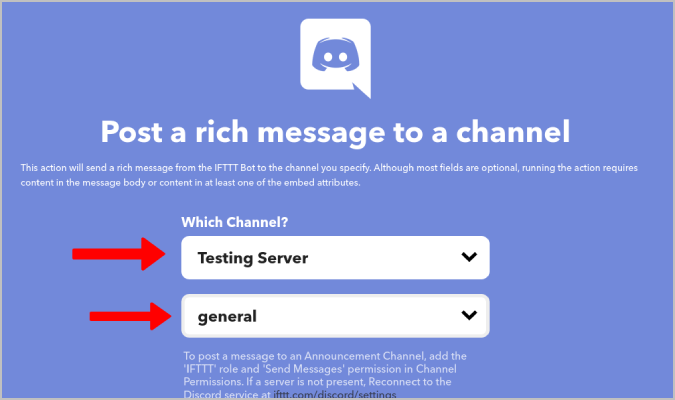
7. On the next page, select the server and then select the channel.
8. Everything is ready. Just scroll down and click on Create action and then Continue.
That’s it. You have successfully created an applet that will connect both Twitch and Discord and will notify you when the specified channel goes live. But during my tests, the Discord bot worked faster than IFTTT and sent notifications right after a stream started on Twitch.
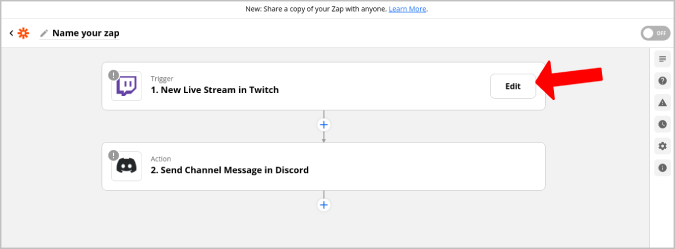
4. Zapier
Zapier is another third-party app that links two services together, just like IFTTT. Except for a somewhat different setup process, there aren’t many differences between the two. But in the free version, you can only create 5 zaps and it can perform only 100 tasks, later you need to upgrade to paid plans that begin at $20.
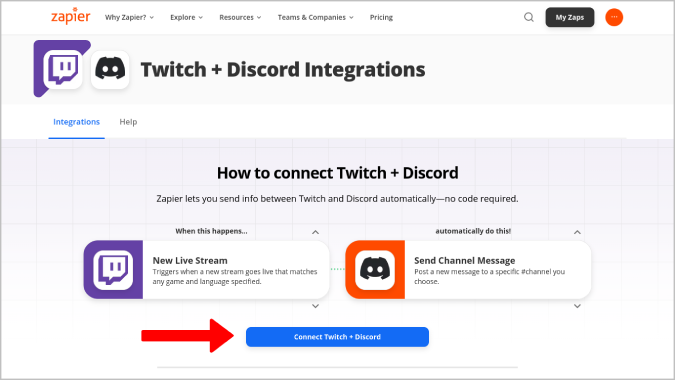
1. Open the Twitch and Discord integration page on Zapier.
2. Select the New Live Stream option under When that happens and then select Send Channel Message option under automatically do this. Once done, click on Connect Twitch + Discord button.
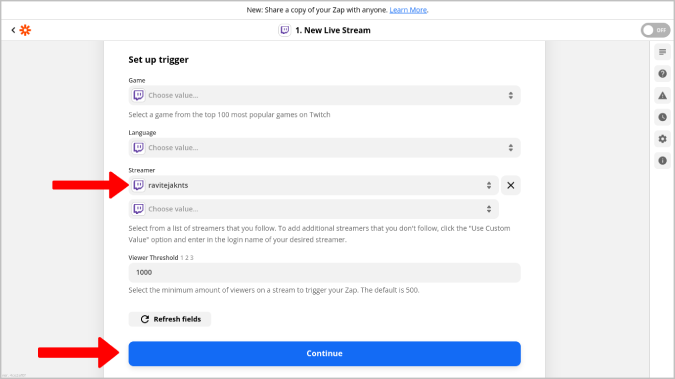
3. On the next page, click on the Edit option beside Twitch and log in with your Twitch account.
4. Then you can select the streamer from your following list and click on Continue. You also have the option to choose multiple streamers here.
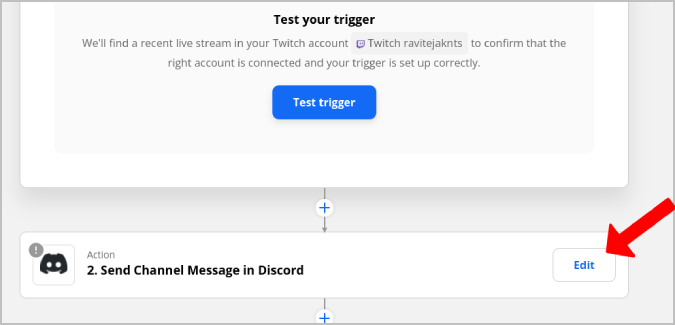
5. Then click on the Edit option beside Discord and log in with your Discord account.
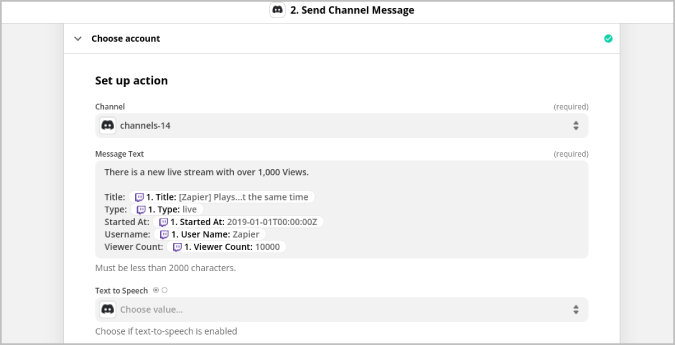
6. Here you can pick the channel, message, etc. The app already provides default options for messages. You can leave it to default if you like the default message. Once done, click on Continue.
7. Once done, give a new name to the Zap and turn the toggle on the top right corner to enable it.

Now whenever your chosen streamer begins streaming on Twitch, you will receive a notification message on the selected Discord channel.
5. Discord Webhooks
Discord Webhooks is an extension of the IFTTT and Zapier process. As they are third-party services, they are a bit slower to send the message compared to Webhooks. With webhooks, you will take the trigger from IFTTT or Zapeir and send the message using the Discord webhook.
1. First, go to Discord server > Server settings > Integrations > Webhooks and click on New webhook.
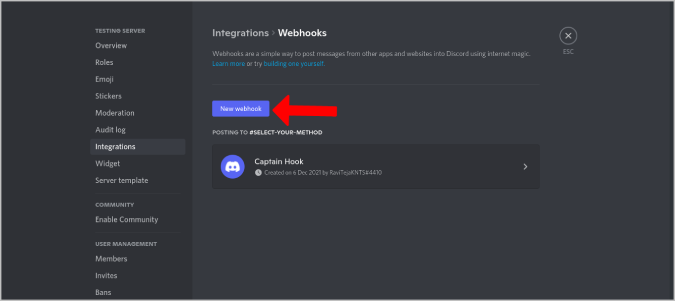
2. Give it a name and select the channel. The webhook is created and you can Copy webhook URL.

3. Now open IFTTT or Zapier and continue the process just like in the above steps. Here I am showing the steps for IFTTT as an example, you can replicate the same action on Zapier.
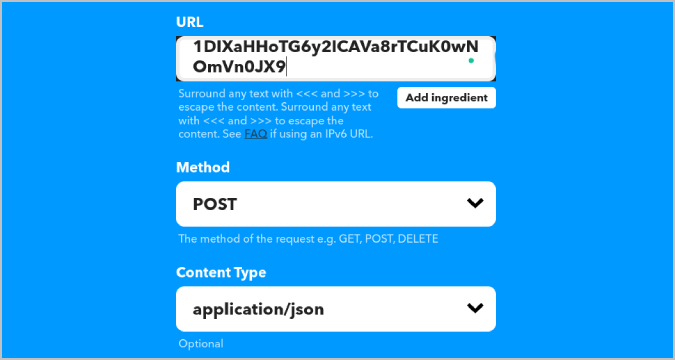
4. Instead of selecting Discord in Then that option, select the Webhooks option.

5. Now paste the copied Discord webhook URL. Select the Post option in Method and application/json option in the Content Type.
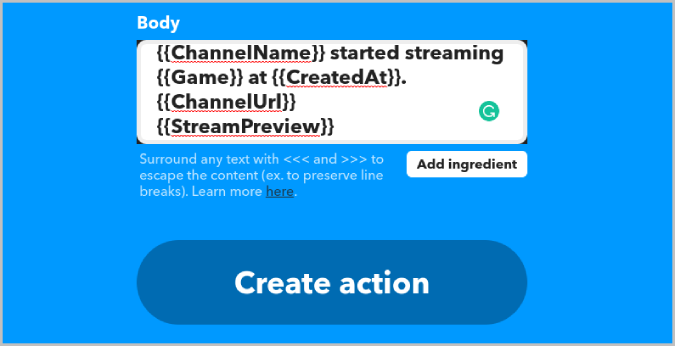
6. Paste this code in the Body option.
{{ChannelName}} started streaming {{Game}} at {{CreatedAt}}.
{{ChannelUrl}}
{{StreamPreview}} 7. Once done, click on Create action.
That’s it. Now you can set the trigger for a new Twitch stream using IFTTT or Zapier and send a notification message to the Discord channel with the help of the Discord webhook. It is much faster than sending messages directly via IFTTT or Zapier.
Wrapping Up: Send Notification from Twitch to Discord
Except for the speed and set-up process, they all work just fine and send a notification on Discord when a Twitch stream begins. Using bots is the fastest way, but it will bloat the server. Options like Zapier and IFTTT work great, but they are slower to send the message. Using Discord Webhooks makes the process faster, but the setup process is a bit complex.
Next, learn how you can create and manage a Discord server.
Also Read: