Google Forms is part of the Google Suite of apps and comes free for all Drive users. It became an instant hit because of its user-friendly approach and easy to use interface. While many users believe Forms to be a simple form-making app, there are plenty of advanced features hidden deep beneath the surface. I have compiled a list of some of the best Google Forms tips and tricks for pro Google Drive and Forms users. Make no mistake, SurveyMonkey and JotForm are still ahead in the game, but these hacks will make you realize maybe, you don’t need them after all.
Let’s begin.
Also Read: 9 Best Google Forms Add-Ons to Bump Productivity
Google Forms Tips and Tricks
1. Set One Person, One Response Limit
Depending on the purpose and intent of the form you have created, you may wish to limit one person to one response only. Otherwise, anyone could come back and choose and submit multiple responses leading to a skewed dataset. Making your users having to sign in using their Google account before responding will help Google track the number of times they have responded.
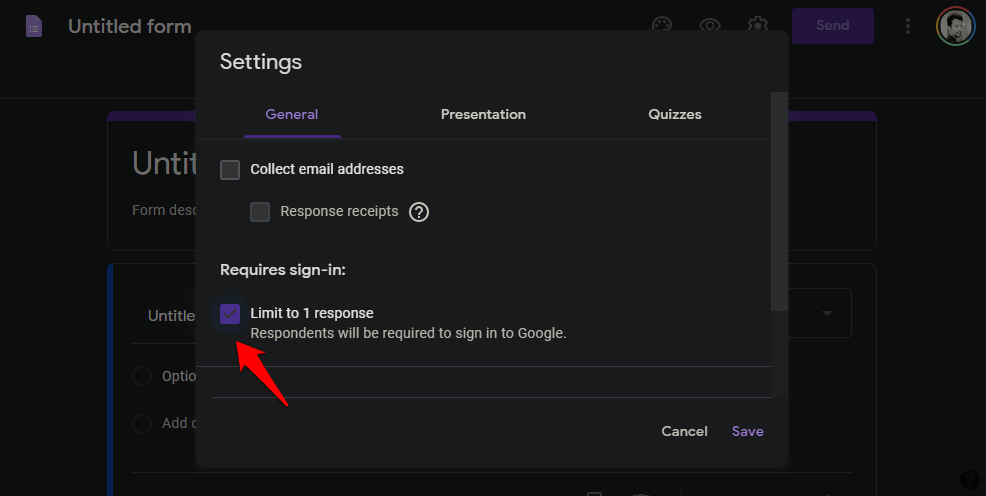
Create a Google Form and under Settings, select Limit to 1 response. Save.
2. Collect Respondents Email IDs
They say ‘money is in the list’ and for all the right reasons. Once you have email IDs of the respondents, you can send them more emails with backend offers. Now, you can do so for free using Google Forms. Create a form and click on Settings.

Under the General tab, you will see an option to Collect email addresses. Check that option and you will be asked if you want the respondent to receive a receipt and whether it is sent by default or only when requested.
3. Edit After Submitting a Response
It happens with all of us. We submit a wrong response or choose the wrong option and submit in a hurry, only to realize our mistake later. Open Settings again and under the General tab, scroll to the bottom of the page to select Edit after submit option.

Note that users don’t need to be signed in to their Google account in order to edit their response or answer.
4. Create Sections and Pages
Creating one long-form can be a bad idea. Consider breaking it into pages and sections. That will allow you to segregate the form into different sections based on categories of questions and give the users a break.

Just click on the two vertical box icon at the bottom of the screen to insert a section in Google Forms. You can then move questions between these sections or add new ones when you want. You can also add a header and description to this newly created section.
5. iFrame to Use as Contact Form Anywhere
Noticed how most sites have a contact us page with a form to collect details like name, email ID, and responses. You can easily create a robust form in Google Forms and paste It anywhere you want using an iFrame. Click on the Send button at the top to begin.
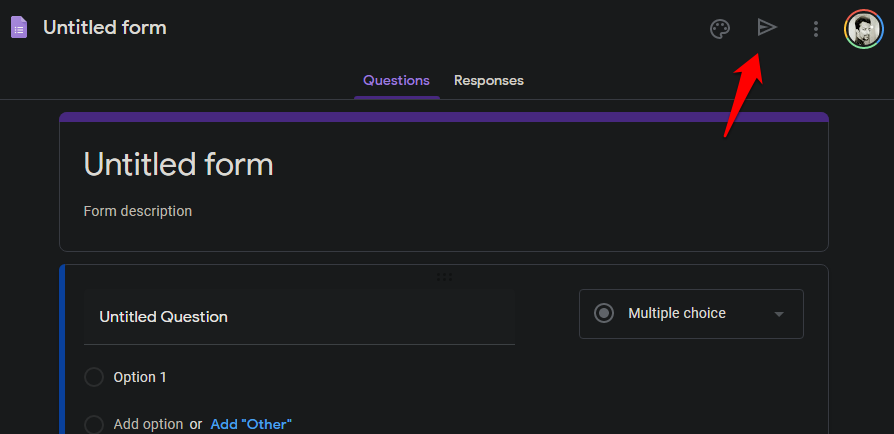
Click on the code icon (two close arrow brackets) to find the iFrame code. You can change the size of the form here by changing the width and height at the bottom of the screen.
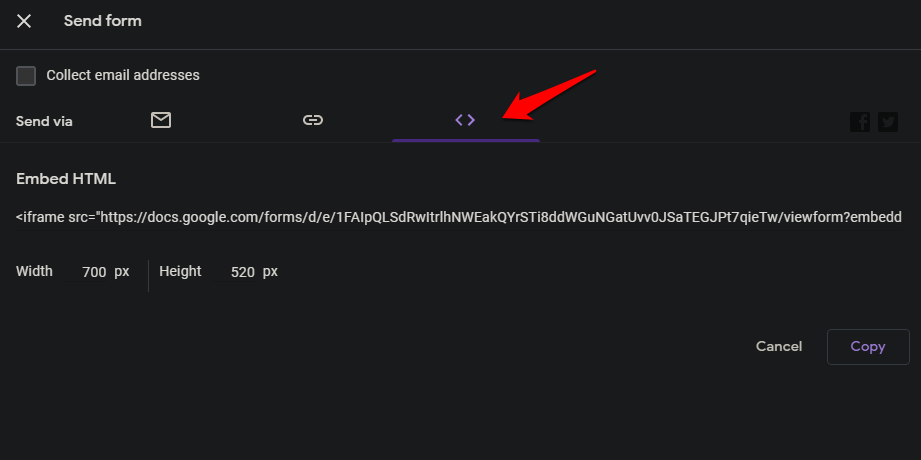
Once done, click on the Copy button to copy the form code.
Also Read: How to Add Google Forms on Facebook Page (Video)
6. Receive Email Notification for Each Response
Don’t try this if you are expecting a lot of responses. That will flood your inbox but if you want it anyway, go ahead. Click on the Response tab and select the three-dot menu that says More.
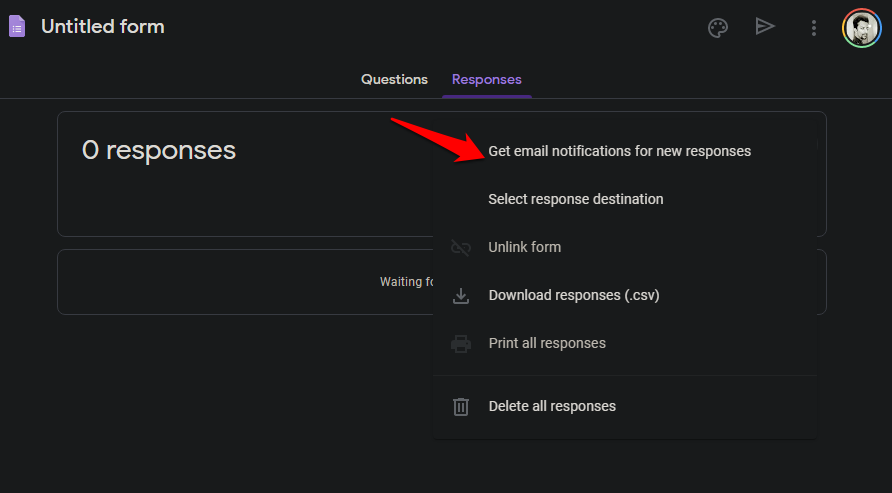
Click on Get email notifications for new responses option there and you are done.
7. Grade Students Automatically
This is for teachers, because of whom I am where I am. Most of you are already using Google Forms to collect answers and whatnot. What some of you may not know is that you don’t have to grade students anymore. Google Forms will do it automatically.
There is a template called Blank Quiz in the template section under Education that will make your job even easier.

You can create questions with answers here and one of them would be the correct answer. Enter the marks or points that answering correctly will give them. Once the quiz is over, students will see an option to View Score.

If the quiz is not working as intended, make sure that the Release mark option is enabled under Settings in the Quizzes tab. That way, they can self-check and self-correct their mistake, saving you an awful lot of time.
8. Adding Conditional Logic
Conditional Logic will help you create complex forms that will change future questions based on answers. For example, are you a male or female? Depending on the answer, you can direct the respondent to a further set of questions.

Click on the three-dot menu icon next to the question and select Go to section based on the answer. This is how you can begin adding conditional logic to Google Forms.
9. Adding Complex Scripts
If you are a coder and know how to write a script or found one on the web and want to use it, there is a way. Google Forms doesn’t support scripts directly but does offer an option.
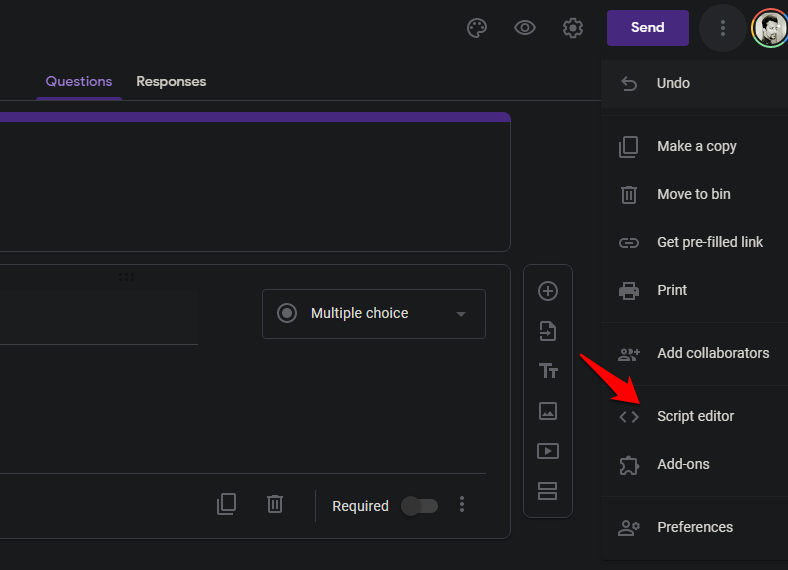
Click on the form menu icon on the top right and select Script editor. You will see a blank area to enter codes. Go, do your thing.
Google Forms Tips and Tricks
These are some of the best Google Forms tips and tricks for pro users. I suggest you create a demo form to try everything I mentioned here so that when you are working on the real thing, you don’t mess up. That can be embarrassing, especially when there are other collaborators on the form and you are working together on the same one. Better practice alone. If you have any advanced tips or tricks for Google Form, dos hare with us in the comments below. We would love to hear more from you.