Microsoft Word offers multiple options while adding a blank page to your document. While that is good, some users get confused about which option to use and why. We will explain both ways to add a page to your Microsoft Word document and then also cover how to add page numbers to Word.
Table of Contents
How to Insert Blank Page into Word
People insert a blank page in their documents for different reasons. A common reason is when the document is too long and you want to divide a long document into different sections or mark the end of a section or document itself. You can add a new blank page either at the end of the page or even in between a paragraph.
Simply place your cursor where you want to insert a blank page into a Microsoft Word document. It can be in the middle of a paragraph too. Now click on Insert and select Blank Page under the Pages option.
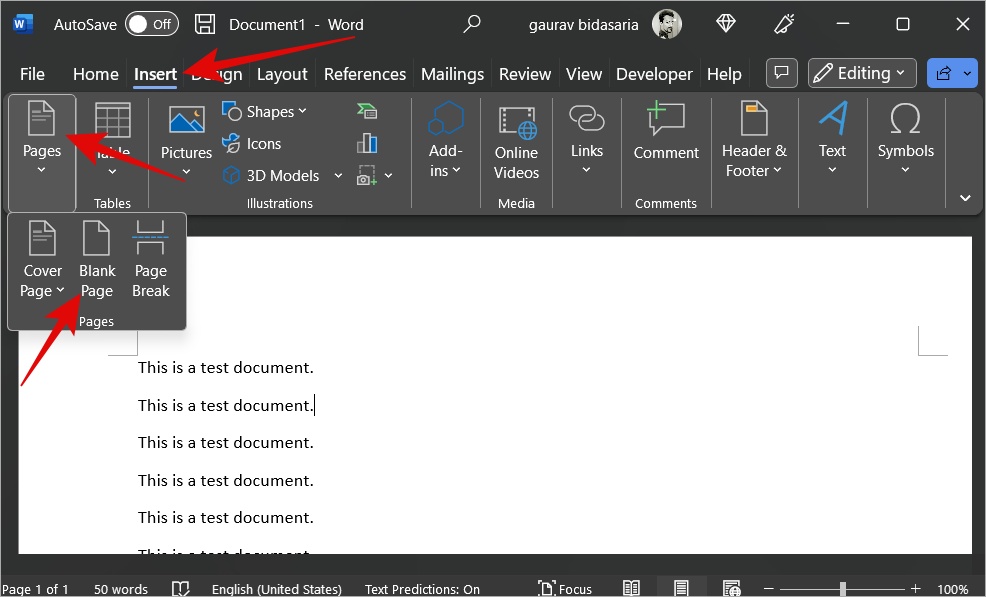
Wait a few seconds and you should see a blank page right after where you had put the cursor.
Pro Tip: How to Add Signature in Microsoft Word
How to Insert Page Break into Word
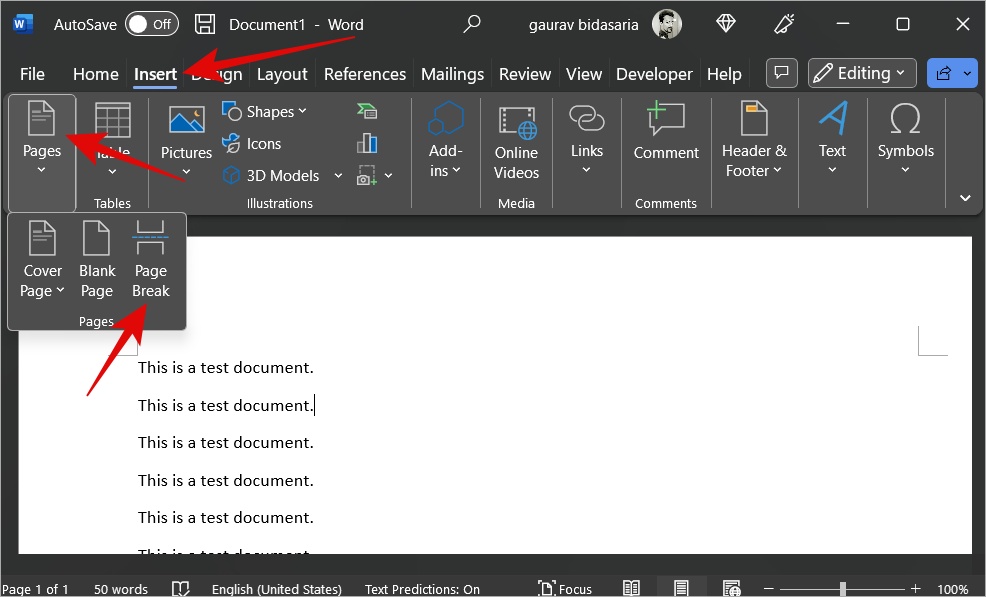
Adding a page break is not the same as adding a blank page. They are two different features that people often confuse. Page Break will simply push the content that comes after the cursor to the next page.
Place the cursor where you want to add a page break, click on Insert, and select Page Break under Pages. You can also use the keyboard shortcut Ctrl+Enter to add a page break quickly.
Pro Tip: Go to View > Navigation > Pages to quickly view all the blank pages and page breaks that you or the writer has inserted in the Word document.
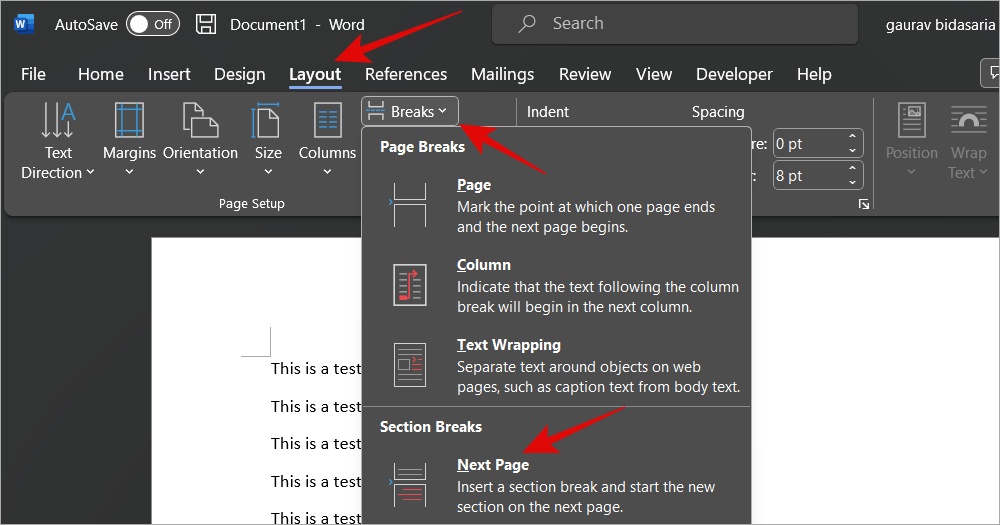
Now here is something interesting. You can also add a blank page or page break from the Layout menu. Then what is the difference you ask? Well, there is an additional feature called Section Break that you will find here.
The difference between a page break and a section break is that a page break retains the formatting of the previous page. Whereas section break allows the user to use new formatting.
To add a section break in Word, click on Layout > Breaks and select Next Page in Section Breaks.
Also Read: 4 Ways to Put Two Pictures Side by Side in Word
How to Add Page Numbers to Word
Once you are done writing and adding all the pages in the document, you may want to add page numbers too. This gives the reader some sense of how long the document is and the time he/she may require to set aside to read it.
Select Insert > Page Number and then choose a location for the page number to appear. You add the page number to the top, bottom, margins, or even current position of the page.
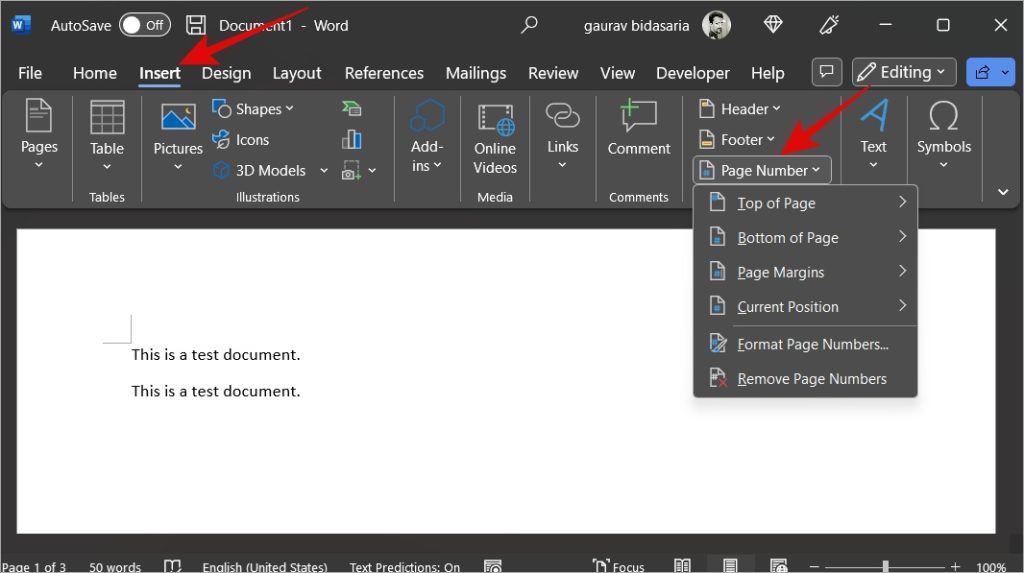
Select Different First Page if you don’t want the number to appear on the first page. Note that even though the first page is not numbered, the second page will be numbered from 2 only and not 1.
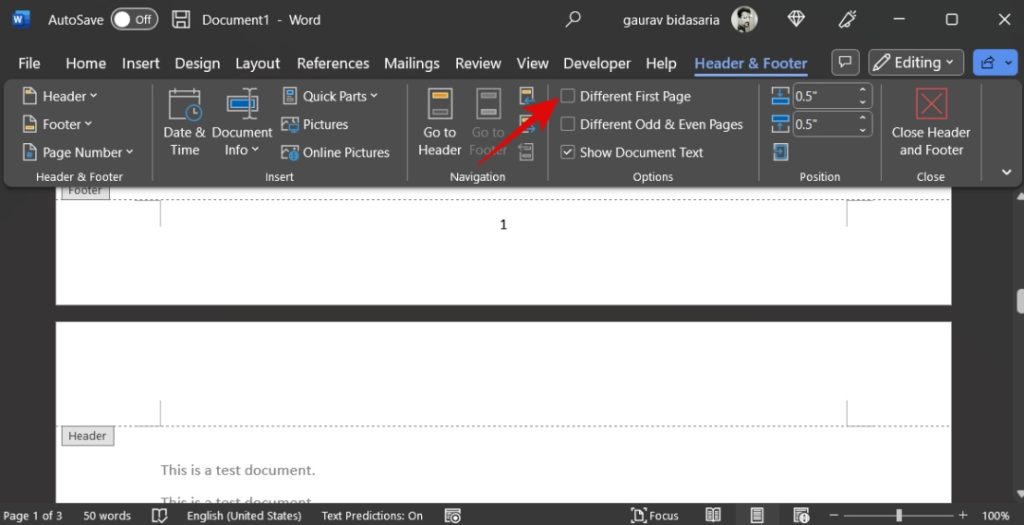
However, if you don’t want to number the first page and directly want to begin numbering from the second page, it can be done.
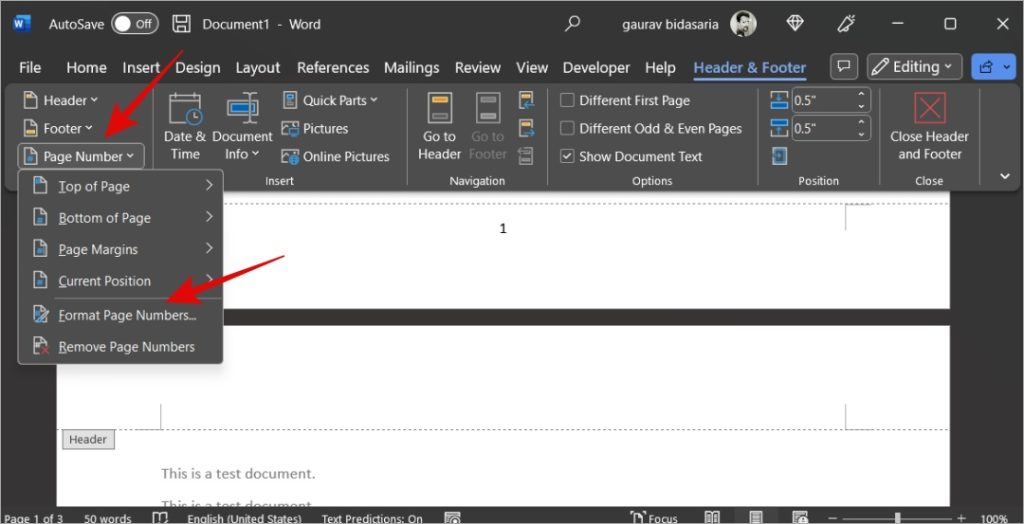
Go to Page Number > Format Page Numbers.
Now enter 0 next to Start at.
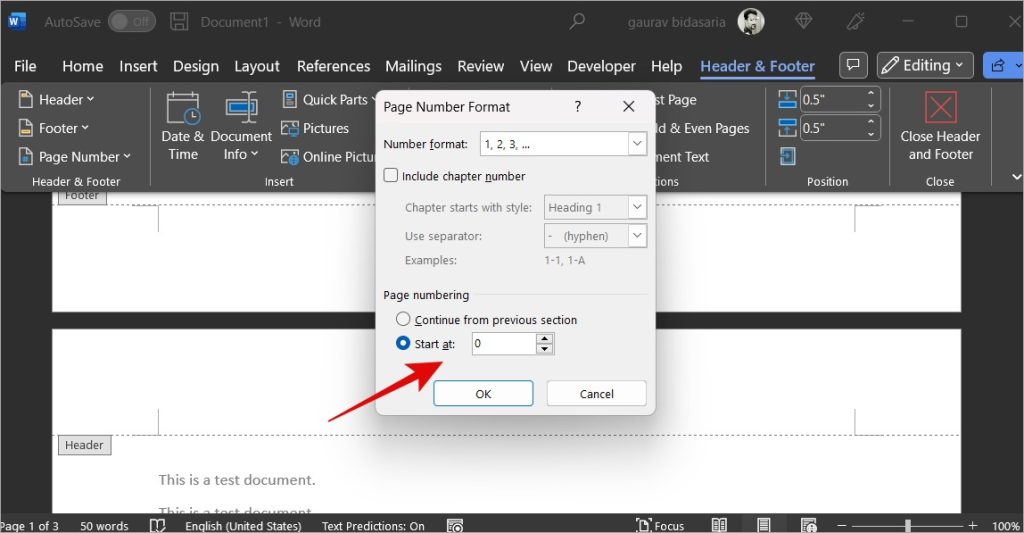
Press Esc key when you are done with formatting page numbers in Word.
Page and Page Numbers in Word
Microsoft makes it easy to add pages whether you want to add a page break or section break, or blank page. However, people often get confused between these options. Similarly, adding page numbers is easy but formatting options are not so clear immediately.
Working on a confidential document or need to create brand awareness? Here is how to create a watermark template in Word.