Over the years, Wi-Fi has grown tremendously but sharing huge files or for that matter, a whole drive is still not efficient. You get cramped up speed and your data is running through a public channel. I would any day prefer sharing a drive or transferring data over LAN cable. On that note, the following is the step by step guide to transfer files between PC’s using an Ethernet cable.
Just in case, if the file you want to transfer is small and the systems are in the same network then consider doing it over Wi-Fi. Here are a few software to use to transfer data over Wi-Fi.
When to Use LAN Cable
Dropping an Ethernet cable makes things simple with faster data speed. The cheapest of CAT5e cable supports speeds up to 1000 Mbps. To give you some perspective, USB 2.0 supports speeds up to 480 Mbps. So, transferring data over Ethernet should be the obvious choice.
Related: 7 Ways To Access Your Computer’s Files From Anywhere In The World
The advantage of LAN cable Over others
The main advantage of using the ethernet cable method is faster transfer speeds, at least faster than your regular flash drives and Wi-Fi. If you have a lot of data to transfer then using the ethernet cable is the best way to go. We have tested this on all mainstream Windows versions. i.e, on Windows 7, 8, and 10.
Things You Need
- Two Windows computers obviously
- A LAN cable, CAT 5 will work fine
- A bit of time and patience (if it’s your first time)
Also Read: Best Airdrop Alternatives for Android, iOS, and Windows
Share Files Between Two Computers Using LAN Cable
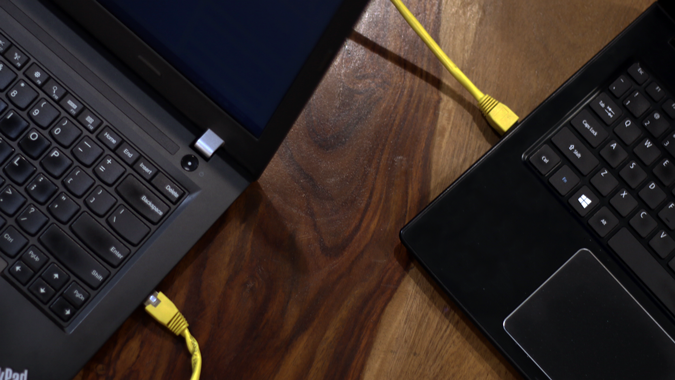
Step 1: Connect Both PCs With LAN Cable
Connect both computers to a LAN cable. You can use any LAN cable (crossover or ethernet cable); it doesn’t matter on a modern computer. Because both of them use the same port and have very few functional differences.
Step 2: Enable Network Sharing on Both PCs
Now that you have physically connected both PCs with a LAN cable, we have to turn on Network Sharing on both computers to exchange files between them. It is a simple process step-by-step process. Make sure you do this on both PCs.
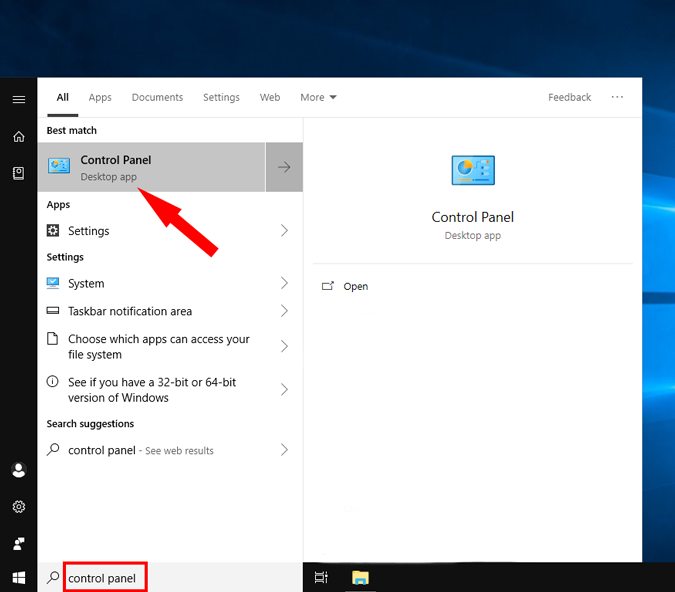
To enable sharing, go to the Start menu and search “Control Panel”. Once you see it, click on it, to open it.
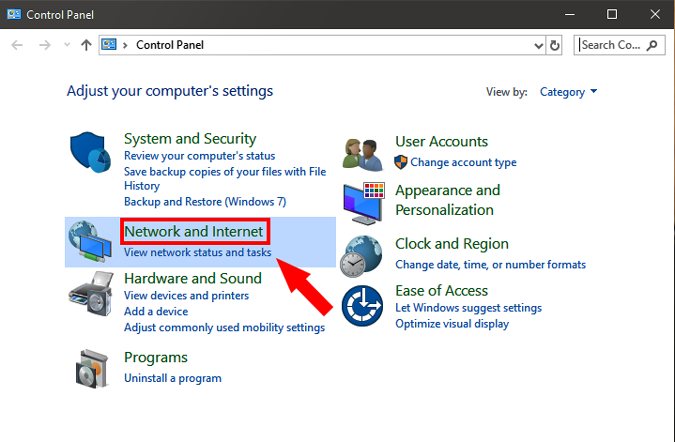
Once the Control Panel window opens, click on Network and Internet.
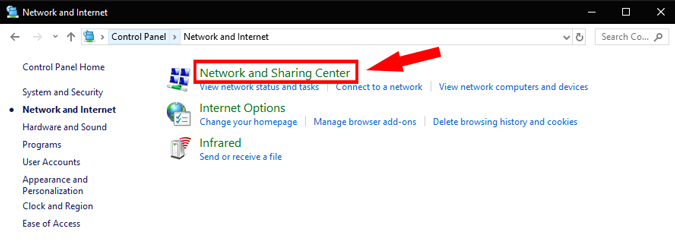
In the next dialogue box, open Network and Sharing Center. Alternatively, you can also type “Control Panel\Network and Internet\Network and Sharing Center” in the search box of Control Panel and hit Enter key. This will redirect you from Control Panel to Network and Sharing Center.

On the left-hand side of ‘Network and Sharing Center’ window, click on “Change advanced sharing settings”.

Here, you’ll find three networks – Public, Private and All Network. Public Network is for places like airports and coffee shops, Private network is for an organization or your home network and All Network comprises of both. To make sure, the setup is flawless, we’ll recommend you choose “All Networks“.

Next, expand All Networks by clicking on the drop-down icon. Here, we need to enable Public Sharing so that the PCs can access files from each other over the LAN cable. To avoid more configuration, just Turn off password protected sharing.
By doing so, you enable the other computer to access shared data without providing any credentials. This is not a good security practice by since you are sharing your data with people you trust, you can make this one-time exception. Once you are done with file sharing, make sure you Turn on password protected sharing.
Once done, click Save Changes. Just as I said in the beginning, repeat the same steps for the other PC.

Step 3: Setup Static IP
Now that you have enabled network sharing on both PCs, it’s time to bring both the computers on to the same network. We will do this by setting a static IP address of the same class. Just like the previous step, you need to do this on both PCs. The following are the steps.
1. To set up a Static IP, open Control Panel, browse to Network and Internet and click on Network Sharing Center. Alternatively, you can also right-click on the Start Menu and select Network Connections.
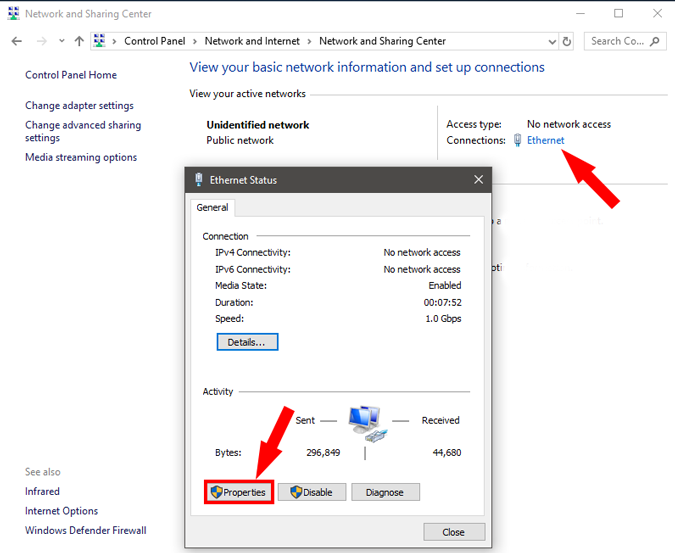
2. On the next window, you will see the active connections which should be Ethernet, since both PCs are connected with a physical LAN cable. Click on the Ethernet link. A new dialog box will open, here click on the Properties button.
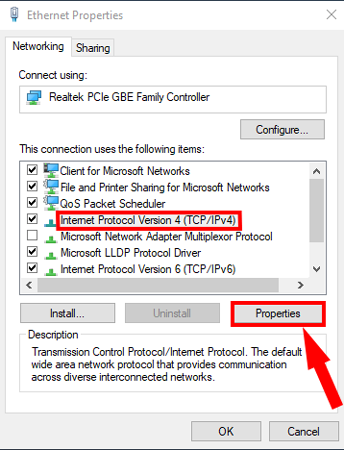
3. In the next pop-up, select “Internet Protocol Version 4 (TCP/IPv4)”. Now, click on Properties. This will open another dialogue box.
4. Here, you need to configure the two PCs with different IP settings.
On computer 1, select the option “Use the following IP address.” and, put the following values
- IP Address: 192.168.1.1
- Subnet mask: 225.225.225.0
- Default gateway: 192.168.1.2
Of course, it’s not necessary you use these IP addresses. You can use any Class A or B IP address. In case you are not sure what this all means, better stick with this example.

On the second computer, do similar steps, but flip the IP address and Default gateway values
- IP address: 192.168.1.2
- Subnet mask: 225.225.225.0
- Default gateway: 192.168.1.1
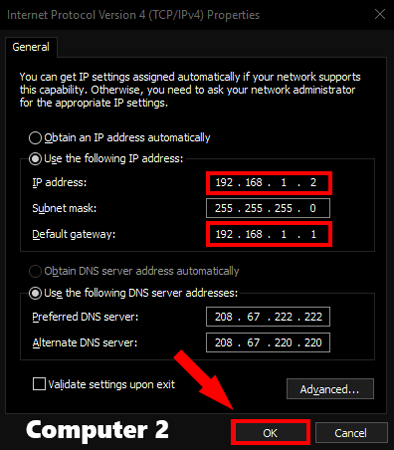
What we are doing is keeping the subnet mask the same and changing the IP address.
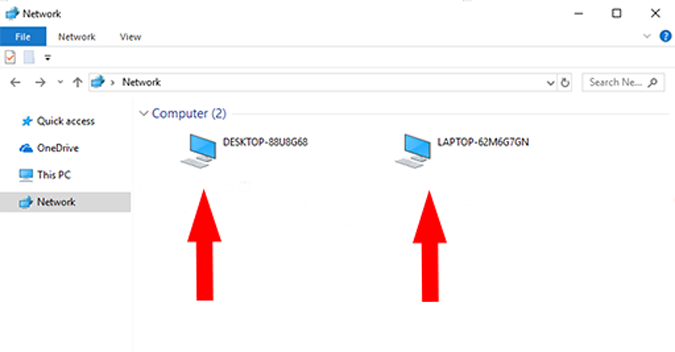
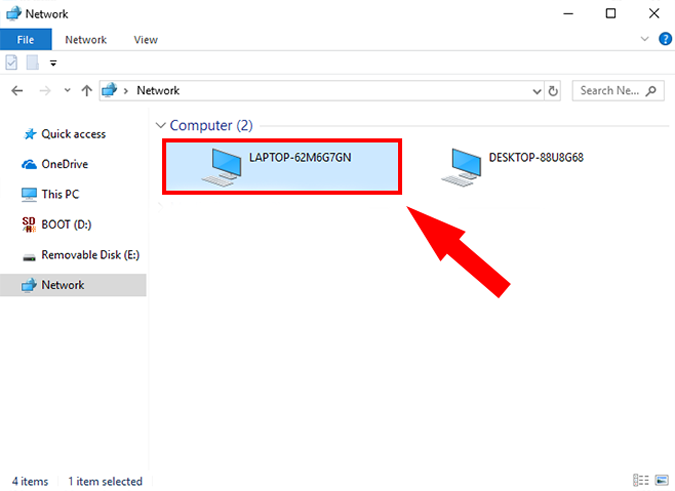
Next, open your Window’s File Explorer and click on Network tab at the left side of the window.

If you have set up everything right, both the PCs should appear in this Network window on both computers. Now, you can just click on the other PC’s icon and browse the file. But wait, you still need to configure one last setting.
Step 4: Share a folder
Assuming that you have connected the cable properly, enabled the sharing options, and configured the IP addresses. Now, it is time to send files from one PC to another. For that, you first need to share the target folder on LAN. I’ll recommend, you can create a new folder on your desktop, and copy paste all the files that you want to move to another computer in that folder.

Next, select the folder you want to share and right-click on it. From the context menu, navigate to “Give access to” and select the option “Specific People.”

3. In the File Sharing window, choose Everyone from the drop-down menu. Click on the Add button next to it and finally hit the Share button.

Once you have shared it, the next window will show you the network location of the folder.

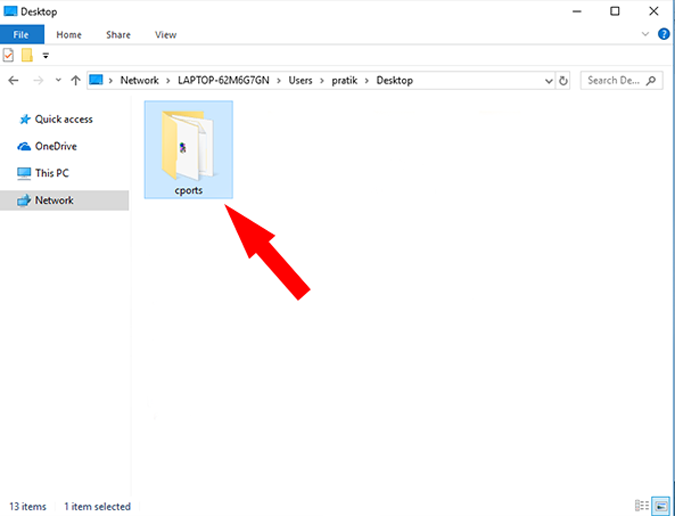
That’s it. Just go back to the other PC from where you want to access the file, open the Networks panel and click on the other computer’s name.
Here, you will see the folder you just shared. From there, just open the folder and transfer the files and folders as you normally do. i.e, by copy and paste. Similarly, you can repeat the same steps from the other computer.
Closing Words
In case of any queries, I would suggest you watch this video tutorial. The same process has been described visually.
This method would work only between Windows PC. For Mac or Linux, you need to use a different file sharing agent like Samba. If you have furthermore queries, drop down a comment and I will be happy to answer them.
Also read: 10 Ways to Share Files between Two Computers