Discord is undoubtedly one of the most famous social media platforms for gamers surpassing Skype, TeamSpeak, etc. Most games have their own server on Discord for their fans to follow, but the best part is you can create a server for your community on your own. A Discord server is like a group chat on steroids designed to get in contact with your community. Here is how you can create a server on Discord. Let’s begin.
In this article, we’d take a look at the steps on how to create and effectively manage a Discord Server. I would explain what every feature does and why you should or should not enable it.
1. Creating a Discord Server
Creating a Server on Discord is pretty simple, Just open the Discord website or download the Discord app ( Windows, Mac, Linux, Android, or iOS ) and log-in.

If you are logging in for the first time, you will get a pop-up asking you to create or join a server. If you are already a Discord user, just click on the “+” icon on the bottom left to start. There is also a way to create Discord Server from existing templates, to do that, you can start from here.

It would open a new popup, click on the Create a server button.

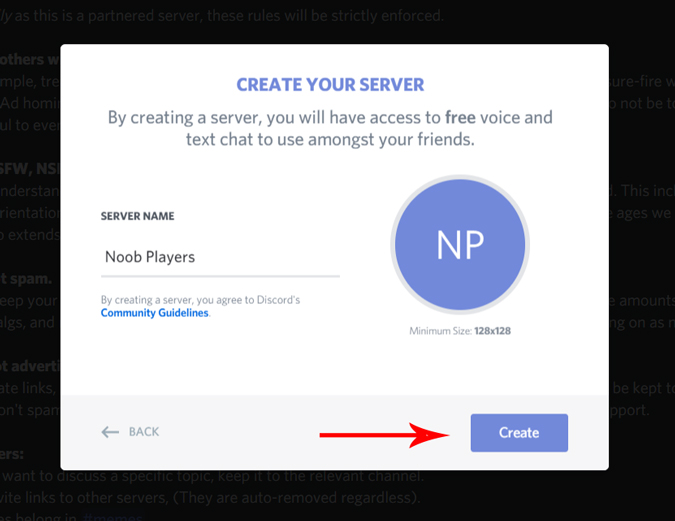
Fill out the essentials such as Name of your Server, and maybe a Picture. If you’re not sure about the picture you can skip that, for now. Click the “Create” button to proceed.
Also Read: How to Change Fonts in WhatsApp Chats
That’s it, you have successfully created your first Discord server. Discord would prompt you to invite friends to your server. You can go ahead and invite your discord friends or skip it for later.
2. Adjust Server Settings
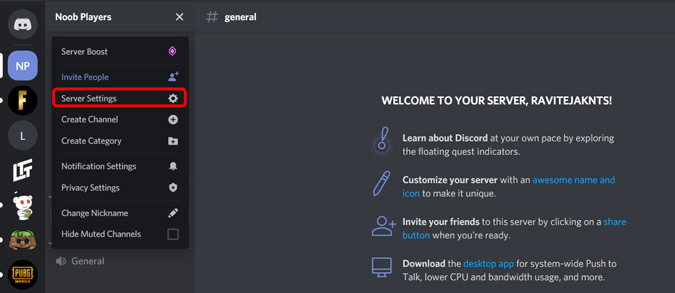
To customize the server settings, right-click on the server name at the top -left corner and click on Server settings options. We’ll focus on Overview, Moderation and Interactions sections.
Firstly, in the overview section, you can enable the AFK channel and AFK timeout. Discord would automatically move people to AFK channel if they are idle for longer than AFK Timeout. This would come in handy when you want to optimize the server and don’t want people who aren’t interacting enough.

Now, you can scroll down and change the default notification settings from all messages to only mentions, so that people don’t get disturbed by all the messages on your server.

In the moderation section, you can change the verification level and content filter on your server. If you just have friends on your account, you can set it as “Don’t scan any media content”, but if your server is going to be public, it’s best to scan media content for inappropriate content.

finally, On the Interactions tab, you can connect your other accounts such as YouTube, Steam, Reddit, etc to your Discord.

Also Read: How to use clownfish as Real-time Voice changer for Discord
3. Adding People to your Server
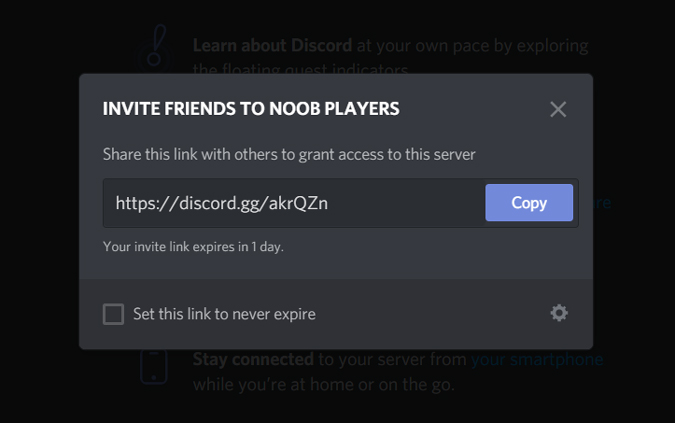
To add people to your server, just click the server name on the top left and select Invite People.

Discord will generate a link, you can share it to your friends via Email, WhatsApp, iMessage, etc.
4. Managing Roles on your Server
To manage roles on your server, you can just click on server name > Server settings > Roles and click the plus( + ) symbol to add a new role.a
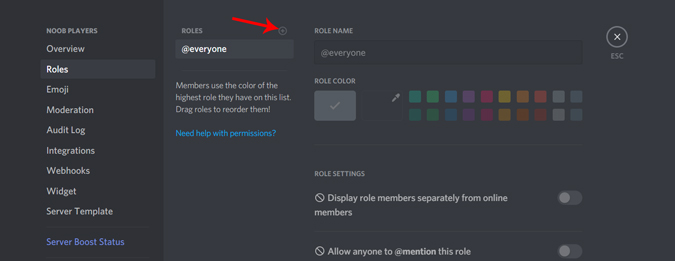
The roles are basically titles given to specific members of your server that define what they can control on the server. The settings are pretty straight forward, all you need to do is set a designation and color, and assign what they can do on your server.

Now you have roles on your server. You can fill in these roles by navigating to Server Settings> Members and you can see all the members on your server. Just Click Plus (+) symbol beside the name and select the role for the member.

5. Creating Channels and Categories
A Channel is nothing but a chat area for all the people to talk on that server. There are 2 types of channels, a text channel, and a voice channel. People create multiple channels for various purposes.
There are channels to talk about Builds, textures, beta versions, various Minecraft apps like Dungeons and Earth, technical support and normal chat for Minecraft players. Voice channels are mostly used to communicate with people on the server while on the game. Admins also create channels for rules to follow on their server, FAQ, announcements, and channel list to explain about all the channels in that server.
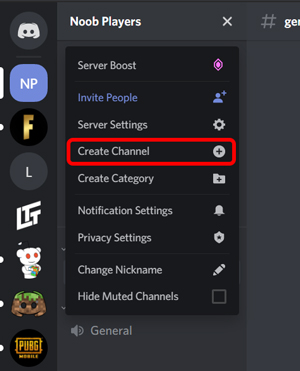
So, to create a channel in your server, click on the server name at the top-left corner and click on Create Channel.
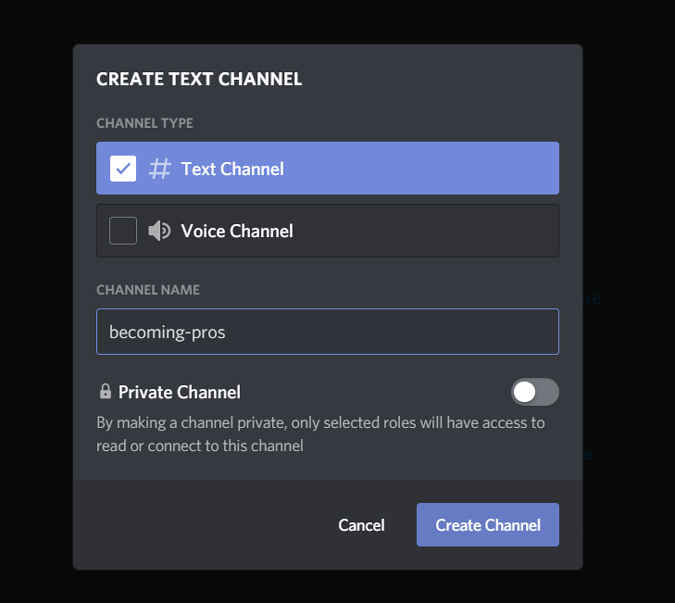
Select the type of channel you want to create, give it a name, and click Create Channel. You can also make it private so that people with invites can participate.
Coming to Categories, you can create Categories by click on the Server name at the top-left corner and click Create Category. The Categories section lets you segregate your channels based on Context.

Give your category a Name and click Create Category. Now, you can just drag your channels into different categories so that you can track them easily.

6. Boosting your Server for more features
Based on your Server’s popularity and interaction, Discord would unlock special features for your Server. You can check out your server status anytime by click on the server name > Server settings > Server Boost Status. As your server grows, you would get extra perks exclusive to your tier.

Final Words
You can totally use any social media platform to get in contact with friends or your gaming community. As Discord is made specifically for gaming, it offers more control for your need and as it offers as many channels as you want in your server. What do you think? Are you going to create a Discord server for your favorite game? Let me know in the comments below.
Related: How to Play Retro Games on Steam Using Steam ROM Manager?