Instagram is on par with most apps with the Live feature where you can interact with your fans and friends. However, you can’t go live on PC nor can you cast your desktop on Instagram Live which is a huge let-down. So if you’re a creator like me, who loves showing others walkthroughs of their projects on Premiere Pro, or even do a live giveaway for Instagram have to settle for makeshift setups. But fret not, here’s a simple way to cast your desktop on Instagram Live easily. Try it now!
Read How to Hide Hashtags from Instagram Posts & Stories
How to Go Live on Instagram From PC
To stream Instagram live from a PC or Mac, we’ll follow 4 simple steps.
- Download Yellow Duck and login with your Instagram account
- Get the Instagram stream key and RTMP URL
- Download and configure OBS
- Copy the stream key and RTMP URL to OBS
Step 1: Log in to Instagram with Yellow Duck
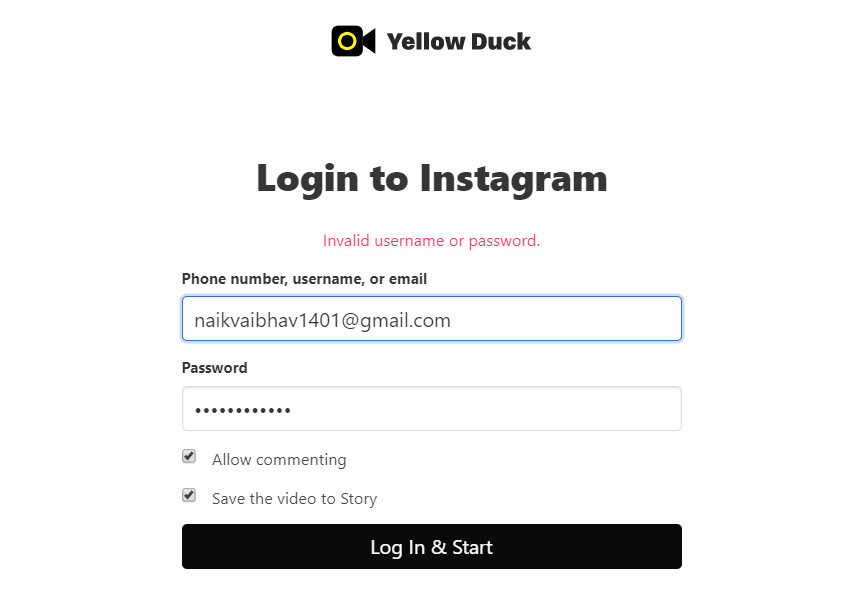
To stream to Instagram from your PC, you need to download a software called Yellow duck. This will provide you the necessary keys to live. Install Yellow Duck for Mac or Windows and open it. The software might take a few minutes to install extra packages. Once it’s done, hit start now to begin. Now feed in your Instagram login details with your username, email, or your phone number and enter your password. It uses the Instagram API, so your credentials are safe.
If you want to enable the comment feature, click on the checkbox. You can also tick the option to save Instagram live to stories so that you can share it later. Note that these settings cannot be modified once you start the stream.
Step 2: Get the Instagram stream key and RTMP URL
Once you hit Log In & Start, it’ll take a few moments to load. Now the most important piece of info, which is your RTMP URL and Stream Key, will be displayed. I recommend you copy both the URL and Key in your notepad. We’ll use both of these to copy to our broadcasting software, which I’m going to talk about in the next step.
Both these codes expire after a few minutes. So, either generate these again or login after you set up the broadcasting software.

3. Install and Configure OBS
Next, you need to download any streaming software that supports RTMP such as OBS, SLOBS, Wirecast, etc. For this instance, we’ll download the popular free and open-source software – OBS. It not only supports Instagram but you can stream YouTube, Twitter, Vimeo, and many more platforms. Download OBS for Windows and Mac and follow the installation steps and launch OBS Studio.
If you’re using it for the first time, you’ll be prompted with an auto-configuration wizard. Hit no, as we’re manually going to configure it for Instagram.

Next, we’re going to make a profile with all the settings for Instagram. So, if you also stream games, YouTube among other things, you can make multiple profiles so you can switch between the settings with a click.
To set a new profile, tap on the profile on the toolbar at the top. Select new, give it a name, in our case Instagram and hit Ok.
Now let’s make the video settings unique to this profile (Instagram). You can find Settings on the bottom right of the screen. Simply tap on the option which will open a new settings tab. From the sidebar tap on Video to open video settings.

Since the default profile is landscape(1920×1080) unlike the Instagram story, we’ll need to change the resolution. To do that tap on the first option, i.e, base( canvas) resolution. Now change the value from 1920×1080 to 1080×1920 and hit ok.
This will change the orientation on the screen and you’ll see an Instagram story like the layout. You don’t have to fiddle with any other settings.

The next step is to add a scene collection. Scenes in simple words are just like layers on photoshop. They’re layers of video and audio which makes the composition of every scene unique. You can have multiple scenes and sources (video/audio). This way you can spice up the composition of the desktop and webcam on the screen.
You can make a scene collection from the top toolbar. Click on scene collection and select new. Then give it a name, in our case Instagram and hit ok.

Once you’re done, it’s time to add some meat to the recipe which are video and audio layers, hence the most important part.
In our case the most importantly we need to cast the desktop. To do that, click on the add sign at the bottom and select display capture and give it a name (desktop), and hit OK.
I’m sure you also want to capture your camera as it’s great for user-base interaction. To enable the webcam, hit the add sign again and select the video capture device. You can select another webcam in case you have an external option, else just can hit okay, to use the default cam.

More than halfway in our journey, it’s still missing the most crucial interaction feature, i.e, the audio. As I said, we’re working in layer style just like photoshop, we’ll have to add an audio input. This can be done in the same way by clicking on the addition sign at the bottom and selecting audio input capture. Name this input/mic whatever is fine with you and hit ok.

Before you start streaming, you can drag both the frames, resize them, overlap with each other and much more. Once you’re satisfied with the composition, check the audio from the audio mixer at the bottom. You’ll notice the jump in the mic levels when you speak. That means everything is on track and you’re good to start the stream.

Step 4. Copy-paste the stream key and RTMP URL to OBS
On Yellow Duck
Enter Instagram details > Generate RTML URL & Stream Key
On OBS Studio
Open settings > tap on stream > copy RTML URL (server) & Stream key from Yellow Duck> Ok

That’s it. All you have to do is tap on start streaming on the bottom right. Whenever you want to end the stream, hit stop streaming in the same option. After you stop the streaming here, select save and finish on Yellow Duck to save the Instagram Live in your stories.

Knows Issues and Solutions
Black Desktop Screen
You might encounter a blank screen when trying to cast your desktop and windows. This issue is quite common in systems with more than one graphics adapter, where one GPU is used for apps which require high performance like gaming while other can be used to handle windows and desktop to save power. To solve this we must make OBS run on the same GPU as the screen. To do that, simply follow the steps below.
Right-click on the desktop > Display settings > Scroll down to graphics settings > Browse > C:\Program Files\obs-studio\bin\64bit > Options > Power saving mode

Infinite Desktops
If you’ve just started to use OBS Studio for the first time, this might seem like a problem but actually it’s not. Since you’re using OBS studio to capture the monitor, it in turns is capturing OBS Studio on the screen. This results in an endless loop of mirrors. You can take care of this by either minimizing the screen, which solves the problem and you can stream normally or crop the view so that, the desktop preview area isn’t what you’re capturing. Alternatively, if you’re workflow is to capture a browser or other apps, you can also add window capture and stream multiple windows at once.

Closing Remarks
So, this was the easiest way to cast your desktop on Instagram. Simply follow the steps as it is and you’ll be able to stream smoothly. Besides that, some might notice an infinity screen when you start streaming on OBS studio. That’s because it mirrors itself which gives it a never-ending mirror-like effect. This will go away as soon as you minimize the screen. If you have any questions do leave a comment below.
Also Read Best Apps for Instagram Hashtags for iOS & Android