iPhone has a native way to hide photos and videos in the Photos app. Simply select the photo you want to hide, tap on the Share icon, and select the “Hide” option. However, this isn’t full proof. It only hides them from ‘Moments’ and “Albums”. Anyone can see your hidden photos or videos by going to the new “Hidden” album.
Fortunately, there is a hidden trick that not only completely hides all your photos and videos, but also password protect them with your Touch or Face ID. No third-party app required. All you have to do is import all your private photos and videos in the Notes app, use the lock feature to password protect the note, and then go back to Photos app and delete all the media you imported into Notes. Here’s a step by step guide.
Password Protect your Photos on iPhone
To get started, open the Notes app and create a new note by tapping the new note button on the bottom right corner of the app. Give it a generic name that doesn’t raise any suspicion. And tap Done on the top right corner.
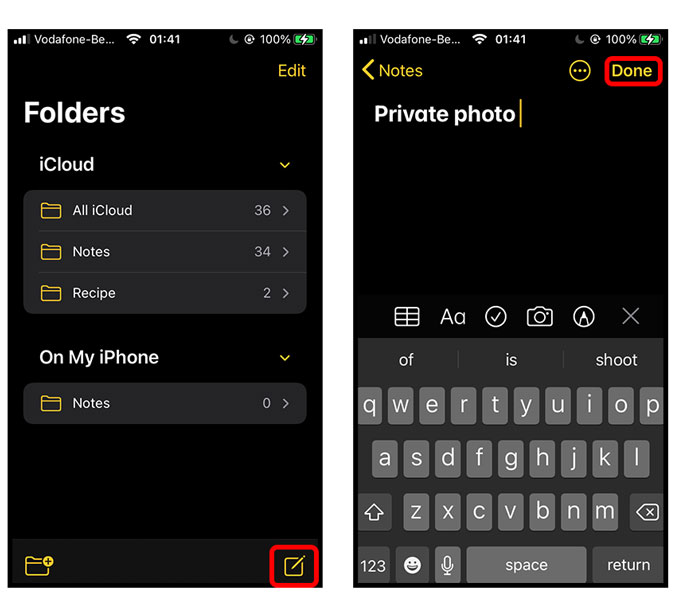
Now, tap the Camera button on the bottom strip of the app and select “Choose Photo or Video” from the popup list.
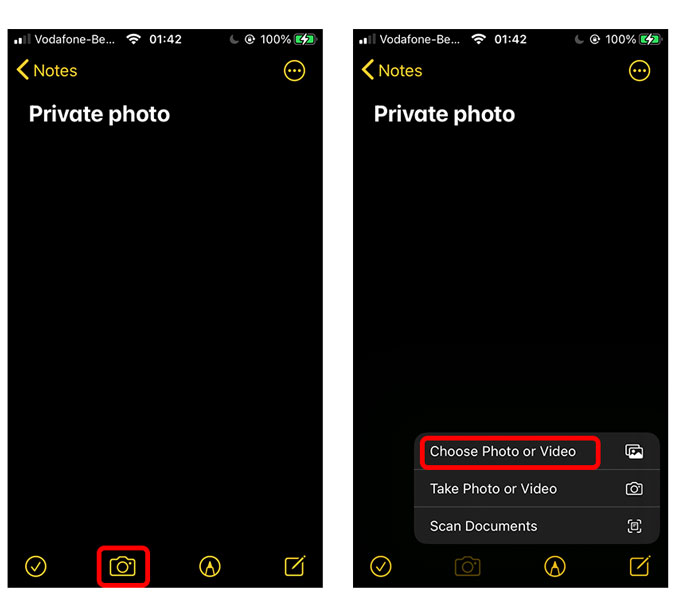
It would open the camera roll and you can select all the images and videos that you want to hide from your iPhone gallery. Once you’ve selected all the items, tap the Add button on the top right corner.
Now, we just need to go ahead and lock the note with Touch ID and Face ID. Tap the meatball menu button on the top right corner.

Tap the big violet Lock button from the Share Sheet. If you’ve never set up a password for your notes, you’d be asked to create one. The password can be different from your iPhone passcode that would mean you can safely create a new password to lock your photos.
Enter the password, verify it, and add a hint. After that tap Done on the top right to finish the lock setup.

Tap the newly appeared lock button next to the meatball menu button on the top to lock the note. Every time you want to view the note, you’d have to enter the correct password or use your Touch ID/ Face ID.

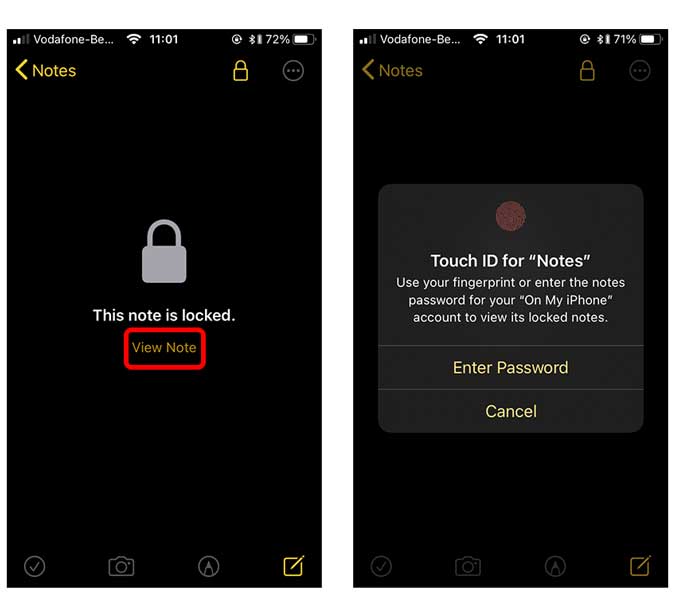
Whenever you revisit your note, it would present this lock screen as shown below on the left. To unlock your note, simply tap the View Note button and authenticate with Face ID/ Touch ID.
Don’t Forget to Delete Photos
Do keep in mind, hiding private media in the Notes app, doesn’t delete the original media from the Photos apps. So, don’t forget to delete the images and videos from your Photos app, and even from the trash. To do so, simply open the Photos app and select all the photos that you have hidden in the ‘Note’ app. Tap the Trash can on the bottom right of the screen and select Delete Items.

iPhone keeps a copy of the deleted photos in the ‘Trash’ for the next thirty days and after that removes it permanently. You can manually delete the photos by simply scrolling down the Albums section and tap “Recently Deleted”. Tap Delete All button on the bottom left corner to delete your Photos permanently.

Final Words
This was a quick way to hide your photos on the iPhone and securing it with Touch ID/ Face ID. It is not the most efficient method but it is still better than hiding your photos within the Photos app where anyone can access it by simply navigating to the hidden folder. Alternatively, you can use free third-party apps like Folder Lock, it works similar to notes app – i.e. password protect private photos and video, however, it’s much more convenient. Although, you still have to delete the media from the Photos app.
Let me know if you have any thoughts and comments about it in the comments below.
Must Read: How To Reduce Background Noise in Voice Memo on iOS 14