A VPN not only masks your location but also encrypts the connect and make it almost impossible for the outsiders to track what you are browsing. Additional, depending on where the VPN server is located, you can easily access geo-restricted websites. There are several VPN services, both free and paid. However, the one problem I always face when using these third-party VPN services is that they are pretty slow. For instance, I have a decent 30 Mbps connection at my home. But, when I connect to a third-party VPN service, the connection speed drops to anywhere from 1 to 5 Mbps.
One of the reasons for this is that the VPN services stuff as many people as possible in a single server and all those users should share the available bandwidth. Additionally, when using a third-party VPN service, you have no control over how they use the data they gather about you.
To deal with all this, you can how to set up your own VPN server in the could and connect to it. Do keep in mind that creating your own VPN server is not free. At the very least, you need to pay $5 per month per server which gives you 1TB monthly bandwidth.
Now, I want to make VPN creation as simple as possible so that even a beginner user who has never created or dealt with the cloud can be comfortable. For that reason, I’m using Vultr. This is because Vultr offers pre-configured OpenVPN image which makes it quite easy to create your own VPN service. Follow the below steps as is and you should have your own VPN server in minutes.
Read: VPN protocol Explained – PPTP vs L2TP vs SSTP vs IKEYv2 vs OpenVPN
How To Setup Your Own VPN Server
First, sign up for a Vultr account. After that, go the main screen and select the “Server” options in the left panel. Next, click on the “+” icon appearing in the top right corner.

You will be taken to the server configuration screen. First, select the country you want your server to be located in. In my case, since I want my VPN to have a United States IP address, I’m selecting the New York location.

Vultr has a pre-defined image to create your own VPN server. Which simply means that you don’t have to go through all the effort of manually setting up the server, installing all the VPN related software and configuring it. So, go to the “Applications” tab and select the “OpenVPN” option.

The next step is to select the server size. Since the $5 server gives 1TB bandwidth, it is plenty enough for most. So, select the $5 server. If you want more bandwidth, you can select other sizes too.

You can leave all other settings as it is. At the bottom of the page, you can name your server. Name it whatever you want and click on the “Deploy Now” button.

It can take a few minutes to set up the server. Since we selected a pre-configured OpenVPN image, the server gets automatically configured in the background.

Once the server is installed and properly configured, you will see “Running” under the “Status” section.

Since the server is pre-configured to use OpenVPN, a VPN admin username and password is created for you. Click on the server name and you will find the OpenVPN admin dashboard login IP address, username, and password right under the server details. The same username and password are sent to your email address.
Note: Keep in mind that the OpenVPN username and password is different from the actual server username and password.

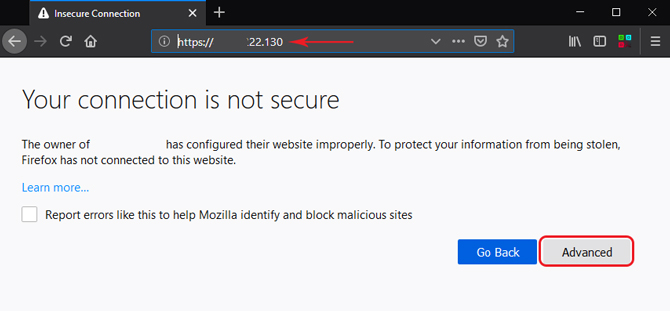
Copy the server IP address, paste in the address bar and press the Enter button. Your browser might warn that the SSL certificate is not valid. This is perfectly normal. Click on the “Advanced” link.
You will now see the OpenVPN admin login screen. Copy the username and password from the Vultr server details page, paste them in, select “Login” from the drop-down menu and click on the “Go” button.

Up till now, you’ve only created a VPN server. You need to connect to that server to create a VPN connection. To make things easier. OpenVPN gives you a simple installer for Windows, MacOS, Linux, Android, and iOS. This installer lets you connect to your VPN server with a single click from the system of your choice. Simply click on the link and the installer will be downloaded. In my case, I’m downloading the Windows installer.

After downloading the software, install it like any other Windows software. Once installed, you will see that the OpenVPN is added to the Windows taskbar.
![]()
Right-click on the OpenVPN icon, expand your server IP address menu and click on the “Connect” button.

You will be prompted to enter the OpenVPN username and password. Type in those details and click on the “Connect” button.

Since this is your first time connecting to the VPN server and it has a custom SSL certificate, you will see a warning window. Select the “Don’t ask again” checkbox and click on the “Yes” button.

That is it. The software will connect to your server and establishes the VPN connection.

If you want to, you can search for “what is my IP address” in google and it will show your server IP address rather than your real IP address.
When you want to disconnect from the VPN server, right-click on the OpenVPN icon in the taskbar and select “Disconnect” option.

OpenVPN Admin Page
Now, if you want to, you can see how many users are connected to your VPN server. To do that, log into your VPN server from the web browser and click on the “Admin” button. In the admin page, go to “Current users” page and you will see all the connected users/systems. This page also gives the real IP address of the connected systems and how much data is used.

When needed, you can also create multiple users via the OpenVPN admin page. To create users, simply go to the “User Permissions” page under “User Management” section. On the right panel, type username in the blank field and hit the save settings button. If you want to give admin rights to that user, select the “Admin” checkbox before hitting the “Save Settings” button.

Closing Words: Setup your own VPN server
That’s all there is to do. It is that simple to create your own VPN server. Of course, browse through different pages in the OpenVPN admin page make yourself comfortable. While creating your own VPN lets you unblock geo restrictions on most video sites, unfortunately, it didn’t work for us on sites like Hulu and Netflix. If you are adventurous, try messing with different settings. After all, if you mess anything, you can destroy this server and create a new one from scratch in a few minutes by following the above steps.