Almost all laptops come with a default webcam (I am looking at you Xiaomi) but even that isn’t usually up to our usual standards. A lot of users, especially professionals, end up using an external webcam. The problem occurs when Windows 10 or 11 fails to recognize that webcam. So how do you add or change the default camera on your Windows 10 and 11 computers?
Let’s begin.
Add External Webcam to Your Computer
Most devices are these days plug-n-play which means there is little to no setup process required. Simply connect the camera using the USB cable that came with it. Windows should detect the new device and begin installing the drivers automatically. You should see a notification on the desktop or in the Taskbar notification area when the device is ready. The webcam should have a green led light that should light up when you open video calling apps like Google Meet or Zoom.
Changing Default Webcam on Your Windows Computer
Ideally, your computer or the video calling app should detect the third-party external webcam automatically and switch to it. In case it fails to do so, here is how you can set the new webcam as your default webcam on Windows 10 and 11. Note that while the steps are exactly the same for both Windows 10 and 11, I am using the latter for this guide.
Switch Webcam From the Video Calling App’s Settings
Most advanced video conferencing apps like Meet and Zoom allow users to switch between webcams on the fly from right inside the app.
1. For example, go to the kebab menu (three-dot icon) in Google Meet and click on Settings.
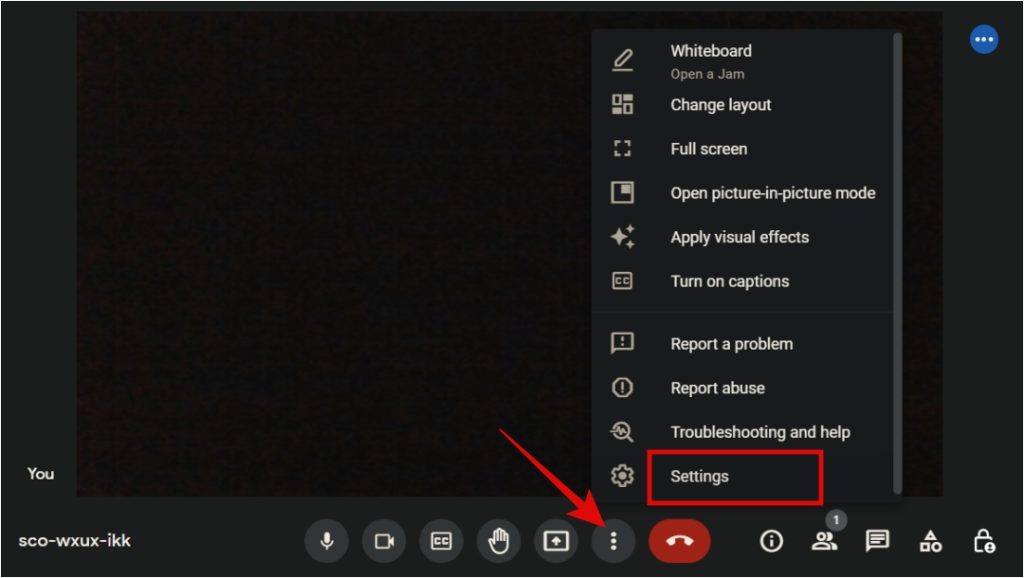
2. Under the Video tab, select your default webcam under the Camera section.
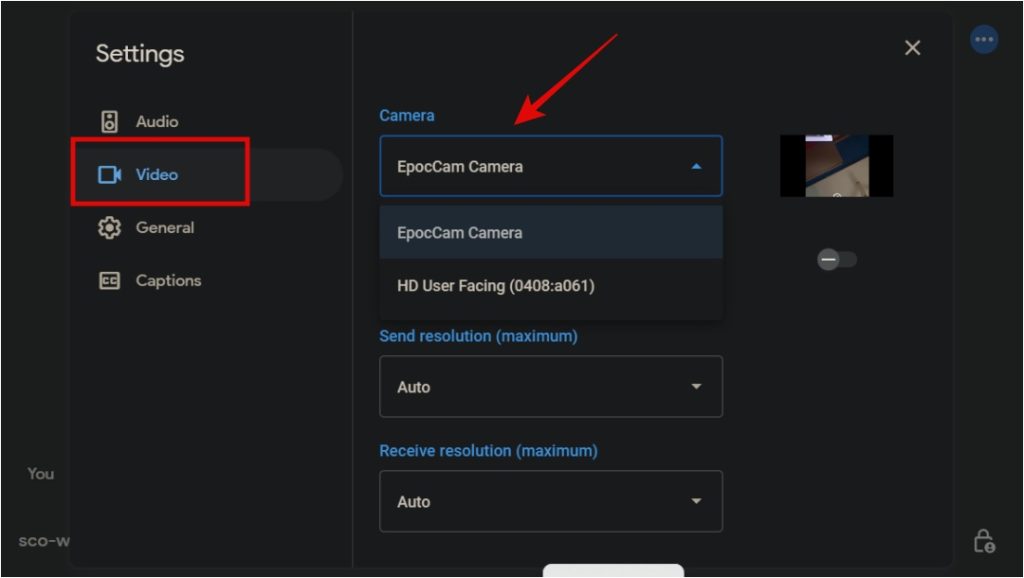
I like this method more because it is quick, flexible, and allows me to move back and forth between webcams on the fly. You will find this option in any video calling app worth its money and that includes Zoom too.
Set Default Webcam From Control Panel
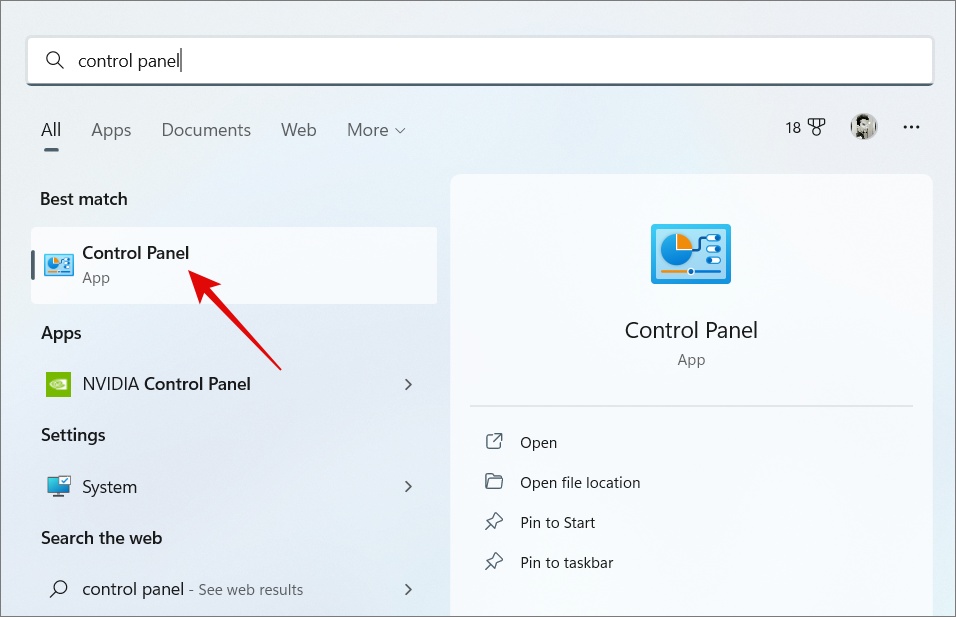
If you want a more permanent solution and wish to set a default webcam on Windows 10 and 11 once and for all, you can do so from Windows Control Panel.
1. Press Windows button on your keyboard and search for and open the Control Panel.
2. Go to Hardware and Sound > Devices and Printers.

3. You should see a list of devices connected to your Windows computer. Find your external webcam, right-click on the same, and select Set as Default Device from the pop-up menu.
On Windows 11, it will open Bluetooth & devices settings. Click on Cameras here.

And then find select the internal or in-built webcam from the list.
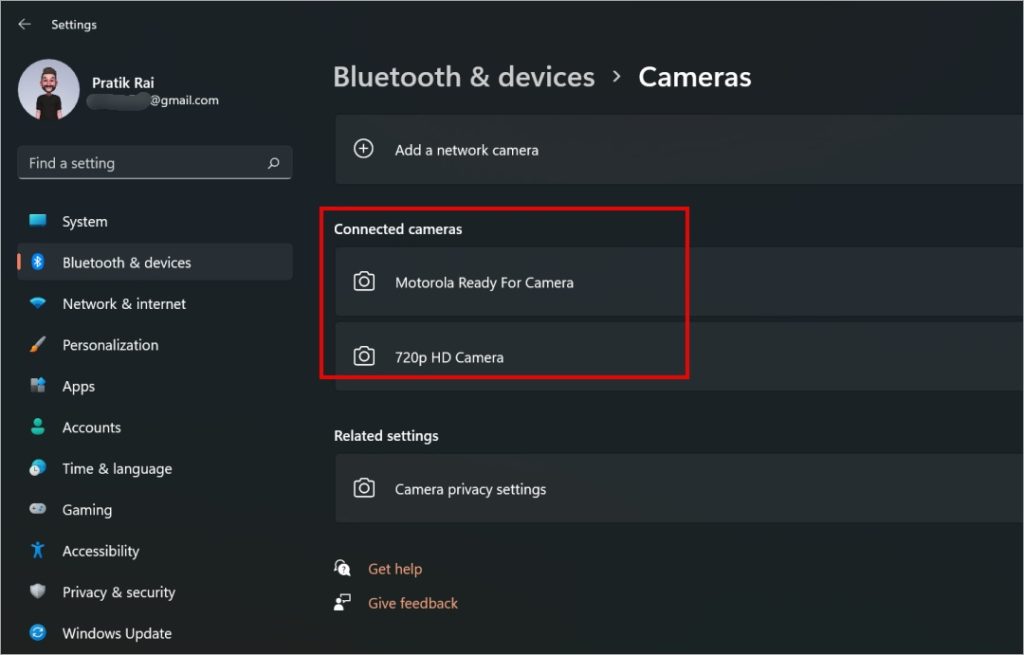
Now simply click on the Disable button. Now video calling apps will choose your new USB webcam as the default camera for all Windows video calls since the integrated camera has been disabled.

The reason why some users may see a different option is their Windows version. To repeat, you either set the new webcam as default or disable the in-built webcam.
Disable Built-in Webcam on Windows 10/11 From Device Manager
If the above method doesn’t work for you, there is another way. Simply disable the drivers for the integrated webcam to mark the new camera as the default webcam on your Windows computer.
1. Press the Windows key and search for and open the Device Manager.

2. Click on Camera to expand it. Now right-click on the integrated webcam and select Disable Device from the pop-up menu.

In the absence of the integrated webcam, all video calling apps will switch to the third-party webcam automatically.
Default Webcam Quality
I wish laptop makers would install better cameras on their devices. While the quality has improved over the years, it still leaves a lot to be desired. Fortunately, there are ways to fix this issue and one of them is using your smartphone camera as a webcam on your Windows 10 or 11 computers. Yes, that would be awesome, right? You can do that using free apps.