Deepfakes has taken the internet by the storm, resulting in some hilarious, weird, and unsettling videos. But how do you create deepfake videos? Enter DeepFaceLab, a popular deepfake software for Windows which uses machine learning to create face-swapped videos. It is free, open-sourced, and relatively easy to learn.
However, first-time users might need some instructions to get started. For instance, to create a deepfake video, you will need at least two sample videos; one is the source video and the other one is destination video. It first disintegrates the video into individual frames and looks for faces in every frame using facial recognition. After detecting and extracting faces from each frame of both source and destination video, it then trains the algorithm to match similar facial expressions of source material with destination frames. DeepFaceLab then applies the source face mask on the destination video frames. As you might notice, this requires a fairly powerful PC and some free time.
It also goes without saying, if you’re going to use DeepFaceLab to create funny videos for YouTube, it’s probably a good idea to read copyright guidelines. Also, do not create Deepfakes of any person without their consent, else, it could get you in serious legal trouble. With that said, let’s create our first deep fake video. Shall we?
Download and Install DeepFaceLab
You can download the pre-built DeepFaceLab software from their Github page. Click this link and select the appropriate software for your machine. The software is available for a lot of different GPUs and even supports integrated Intel Graphics, you can read more about which build would be best for you, here.
Pro Tip: NVIDIA GTX and RTX graphics cards work best with this build.
After selecting the appropriate software bundle, download and extract the contents to your local storage, preferably with a lot of empty space. While testing this software, a small project took up 2 GB so decide accordingly.
DeepFaceLab doesn’t have a GUI but is pretty straightforward to use. You won’t have much problem understanding the workflow but mastering the software takes time, skill, and determination.
Step 1: Add video files to the Project
Browse to the directory where you extracted the software. You’ll see a lot of batch files and two sub-folders. Open ‘Workspace‘ folder by double-clicking and you’ll see two videos; ‘data_src‘ and ‘data_dst‘.
We’ll extract faces from ‘data_src‘ and paste those faces onto ‘data_dst‘.

Replace these video files with the files you want to use or keep the original files to practice your first deep fake video.
Step 2: Extracting Frames from the videos
The next step in the process is to extract the frames from both source video and the destination video. First, we’ll extract the frames from the source video.
To do this run the batch file in the DeepFaceLab directory which reads ‘extract images from video data_src‘. It would open a command prompt window and ask your preferences. You can skip all these settings for the first time and let it run on default settings by pressing ‘Enter or return‘ key.
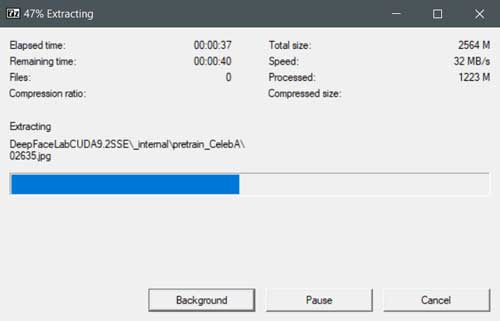
Depending on the length of the video, the number of frames, and your computer hardware it may take a few minutes to extract the frames. After it is done, you can see the extracted frames in the data_src folder in the Workspace.

Repeat the same process to extract the frames from the destination video by executing another batch file which reads ‘extract images from video data_dst FULL FPS‘.

Step 3: Extracting Faces from the Frames
Now, we have still frames of the videos and we’ll use the software to extract the faces from each frame. We’ll do this for both the source file and the destination file.
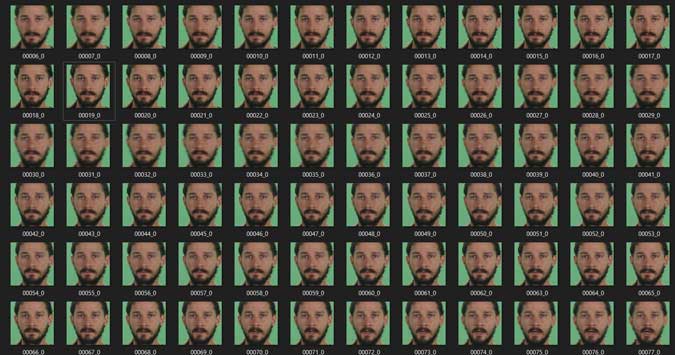
There are a few different algorithms which you can use to detect and extract faces from the frames. Some are more accurate than the other and I’m sure you’ll figure out the best one for you in time. For now, Find ‘data_src extract faces S3FD all GPU‘ batch file and execute it. Extracting faces from hundreds of frames will take some time so let the window finish.
After the process is done, you’ll find all the faces extracted in ‘Aligned‘ folder in ‘data_src‘ directory.

Now, proceed to do the same for the destination video frames by executing the batch file corresponding to the file which we used for the source file. It is crucial because if you use different algorithms for source and destination frames then your deepfake won’t look authentic. Find ‘data_dst extract faces S3FD all GPU‘ in the DeepFaceLab directory.
Step 4: Train the Software to link facial expressions
This is the time where we’ll train the software to recognize similar facial expressions so that it can easily replace the face in the destination video file. There are several different settings but we’ll stick with the beginner course. Find and execute ‘train H64‘ from the list of batch files.

It would ask you for some settings but leave them at default and move on by pressing the ‘Enter or return‘ key. You will see that the software is now matching the faces from the two videos and training itself. Let the software train until the original and generated faces start to resemble each other. Press ‘s’ key to save the trainer and ‘Enter or return’ key to exit.

Step 5: Convert the faces in the Destination Video
It’s time to paste the faces on the destination video frames. To do this find ‘convert H64‘ batch file and execute. It will show you a window that looks something as shown in the figure below. You can tweak the final mask to see how the final frame with the different face should look like.

Use these keys to see how the converted frame would look like. After you’re satisfied with the frame, you can repeat the same for each frame or press ‘Enter’ key to let the software take care of it.

After the batch file is done executing, you’ll see all the converted frames in the workspace folder under data_dst subfolder.
Step 6: Convert the Frames into a video
Now, the frames of the final deepfake video are created, you just have to assemble the frames into a video. You can easily use any software to do this or run the executable batch file which reads ‘converted to MP4‘.
Viola, you’ve now created your first deepfake. As we’ve converted the frames to a video we won’t get any audio and you’ll have to add it manually using a video editor.

Closing Words
As you can see for the output gif, the results are not quite magical, but it is pretty cool.
Overall, this was a quick walkthrough of the DeepFaceLab which utilizes machine learning to replace faces in videos. It is a simple software which does the heavy lifting for you in creating a face-swapped video. Of course, the software with that much power comes with a ton of responsibility and the responsibility falls on the shoulders of the users who are going to use it to create creative videos. Use it carefully and have fun. Tell us what do you think about this software in the comments below.