Chrome OS is undoubtedly the fastest Operating System for desktop computers. It is light, easy to use and also not too resource-hungry like Windows or Mac. This makes it a great OS to install on your old PCs and Macs which lags and drains the battery.
On top of that, you can have additional benefits like unlocking your computer using your Android phone and seamlessly switching devices while browsing. But the official Chrome OS which Google uses on their Pixelbooks (and allows other OEMs to install on Chromebooks) is not available for everyone to download. As there are also some hardware requirements that only Chromebooks have.
How to install Chrome OS on any PC or Laptop
Though we cannot install Chrome OS, we can install the Open-source software Chromium OS which anyone can install, modify and use it in the way they like. But it requires some technical expertise. Thankfully we have many developers that modified the Chromium OS and made it easy to install.
Among them, two of the best Chromium OS forks are Neverware’s Cloud Ready and Flint’s Fyde OS.
Google’s Chrome OS vs. Cloud-Ready vs. Fyde OS
Just like Google’s Chrome OS, they have also developed the OS from the Open-source Chromium OS project. They take the source code from the Chromium and add their own proprietary code to make a working OS. They look and work just like the Chrome OS and the best advantage of them than Chrome OS is that you can install them on a wide variety of hardware.
Cloud-Ready is developed by Neverware, which is secured, easy to install and also has excellent documentation. And they also update the OS quite often. This is the most stable Chromium OS fork you can find and also undoubtedly the most famous one among all. But there is a caveat, though you can run Linux apps on this OS, you cannot install Android apps in it. Neverware said they will be supporting Android apps in the future, there is still no sign of such an update at present.
Fyde OS is first introduced as Flint OS by the London company Flint innovations. They have developed the OS for the Chinese market. When Chrome OS started supporting Android apps, they have added the Android apps support to the Flint OS and renamed it as Fyde OS. On top of that, you can install Fyde OS even on Rasberry Pi & ASUS Thinker Board along with PC and VM ware. But the UI looks a bit different compared to the Chrome OS and also not a stable OS.
Cloud-Ready is the best fork you can find to install, but if Android apps are so much important for you, you can choose Fyde OS as the second-best alternative.
How to install Cloud-Ready on any PC or Laptop
1. Navigate to the Neverware website, scroll down till you see the option For personal, home use. Click on it. Alternatively, you can click on this link.
 2. There you can see the download links for Windows, Mac, and Chromebooks.
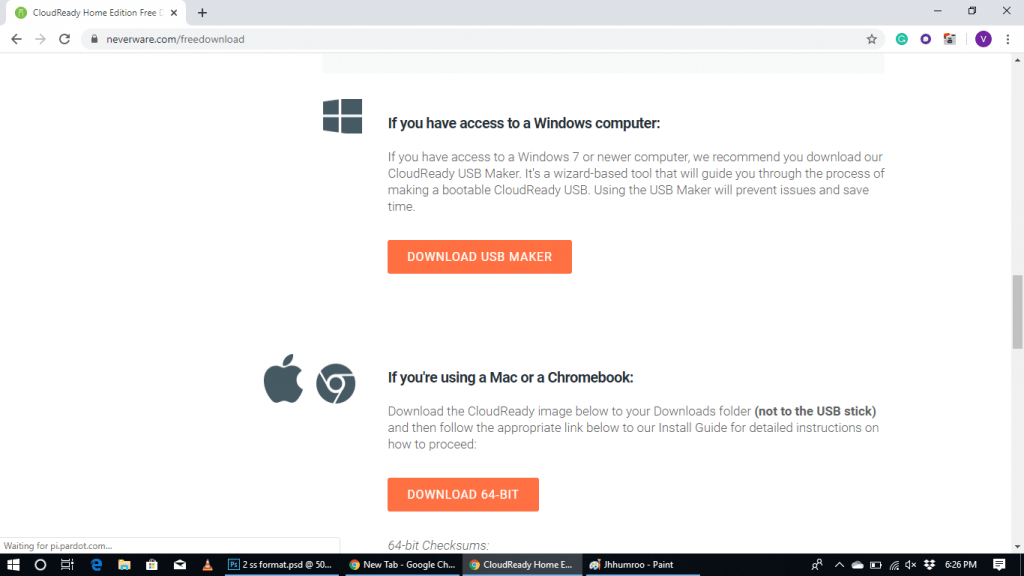
3. Under the Windows section, Download the USB Maker app & install it on your Windows PC, just like you install any other app.
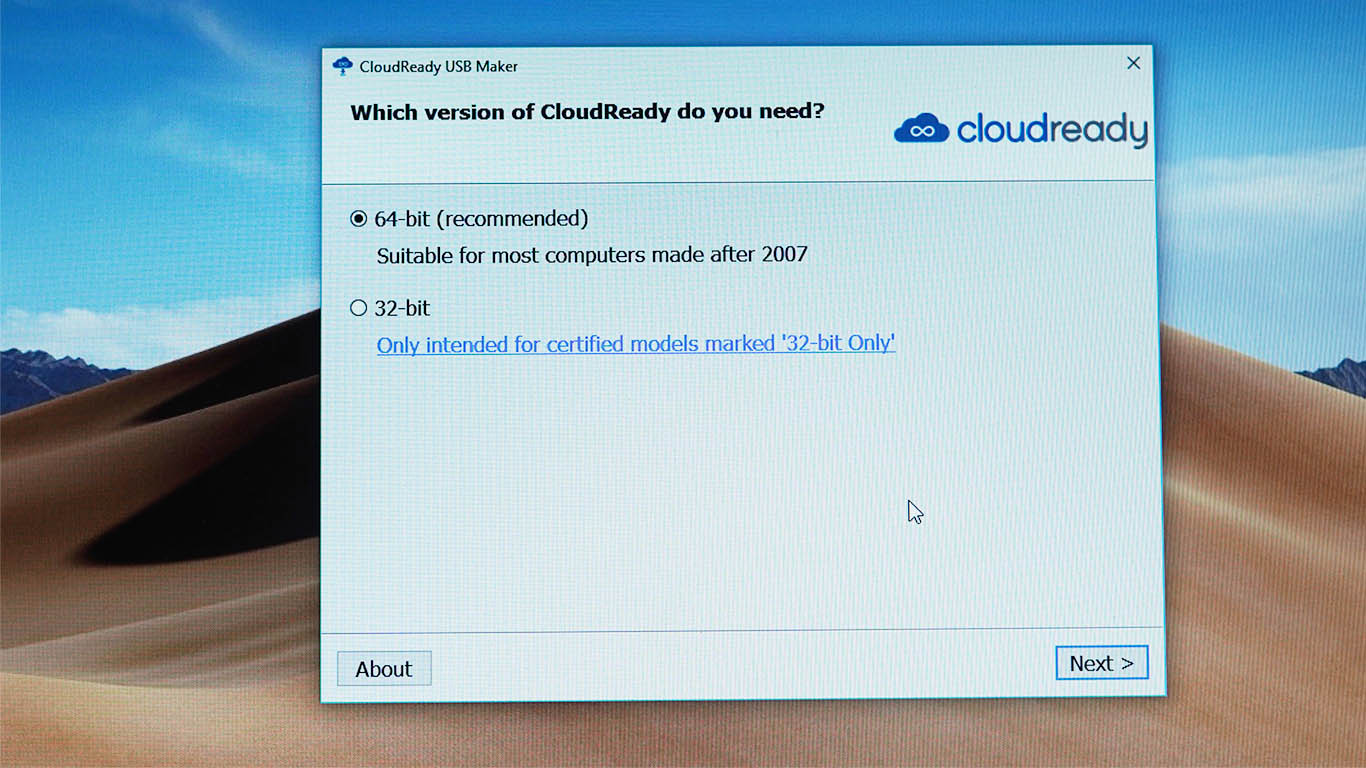
 4. Select 64 -bit or 32-bit according to your computer.
5. Connect the USB stick and click on Next. The data on the USB stick will be lost in the process, so make sure to back up your data in it first.

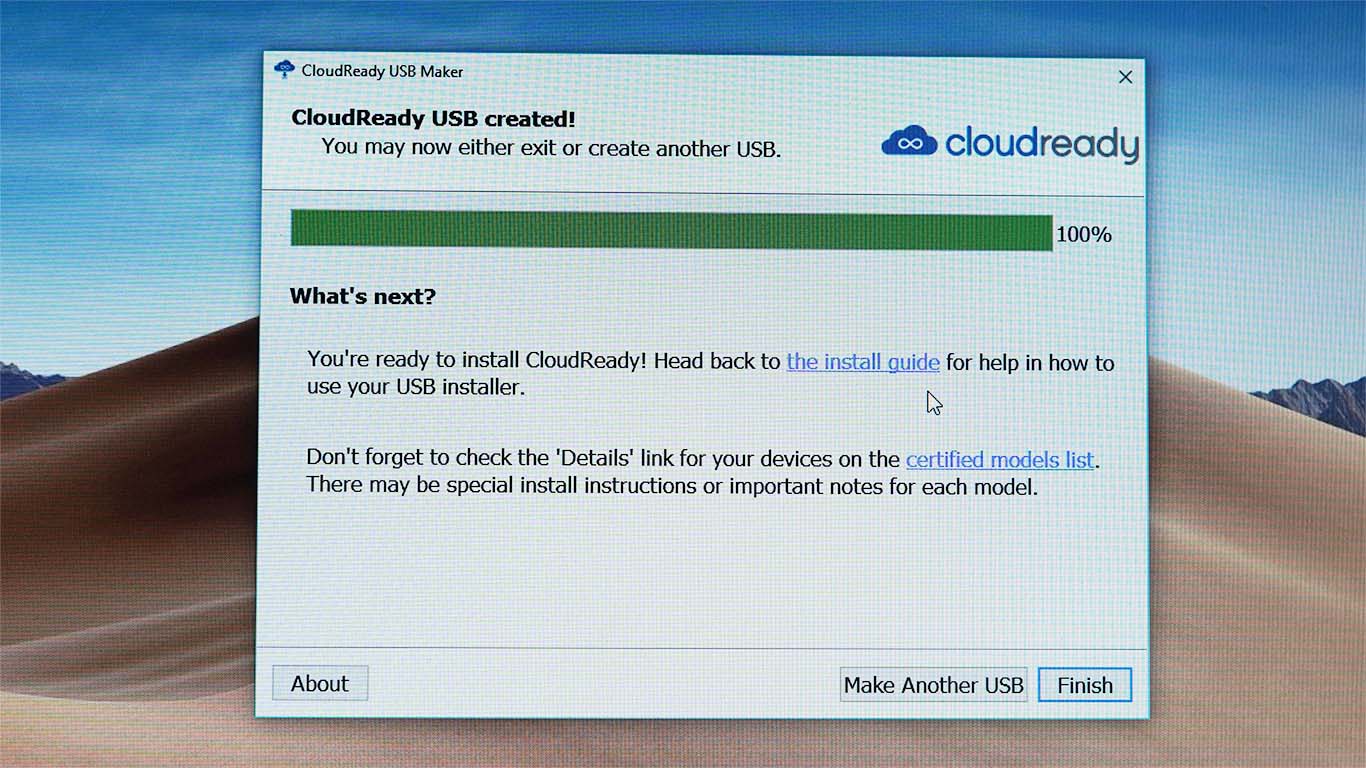
6. This process will download CloudReady files from the Internet and may take up to 20 minutes. Once the process is completed, click on Finish.
7. You are ready to install the Cloud Ready OS using the USB stick.
8. Shutdown the computer you want to install the OS on and boot it from the USB. To accomplish this, you need to change the Boot Order in BIOS.
9. Keep the USB Drive as the first option in the boot order, so that the device will boot from the USB.
10. Once the device got booted using USB, you can almost see the Cloud Ready UI already, then click on Let’s Go to get started. This may take a few minutes to pop-up as the OS is loading from the USB. 11. Connect to the Internet using ethernet cable or Wifi.

12. The OS will check for any latest updates and then ask you to Log in by using the email address that’s associated with your Google Account. I recommend you don’t log-in immediately.
13. You can use Cloud-Ready OS every time like this by directly booting up with the USB drive. So if you don’t want to install on the hard disc, you can continue logging in. But if you want to erase entire windows and install Cloud Ready Natively into the system, read along.
Installing part is so easy, but now just check whether the entire device is working properly or not. Check the WiFi, keyboard, mouse or trackpad, etc. If something is not working properly, it might be a hardware compatibility issue, so do not install the OS as it is not compatible with your hardware.
However, If everything is fine, you can continue to the next step of installing the Chrome OS. Most computers just work fine.
Also, make sure to back up your data in the computer to the cloud or external hard disc, once the OS is installed, all your data on the computer will be lost.
14. To install, click on the time in the lower right corner and click on install OS toggle in the quick settings panel.

15. Then again click on the INSTALL CLOUD-READY.
Once the process is completed, turn off the device, remove the USB stick and switch on the device back. You can see the Cloud Ready is successfully installed on your computer.
To enable Linux, you can find a Virtual Box in the app drawer, open and install the Virtual Box.
Then you can select the OS, you want to open including Linux.
How to install Fyde OS on any PC or Laptop.
First things first, Fyde OS is not compatible with Mac. So only PC users can download and install it. And it is not as easy as Cloud Ready to install.
1. First, you need to download two files.
Open the Fyde OS website and download the iso file. This website will be in Chinese, but you can translate using Google Translate or just download by clicking the first button.

Then open the Etcher Website and download the Etcher app.
2. Open the Eitcher and select the image, which is the iso file we have downloaded from the Fyde OS website.

3. Connect the USB stick and select the USB stick as the target and click on Flash. ( The data on the USB stick will be lost in the process, so make sure to back up your data in it first )

4. Once the process is completed, reboot the device from the USB stick. You need to change the boot order to accomplish this step.
5. Once the system is loaded, you can see the interface of Fyde OS. (it may take few minutes to appear, as the OS is leading from the USB)
6. At present, the website will be in the Chinese language, to change, click on the Globe icon (International Icon)

Next, select the language from the drop-down menu and click Ok.

7. Now click on Let’s Go and connect to the Internet via ethernet or wifi.

9. Unlike Cloud – Ready, you need to have a separate Fyde account. To create an account, click on more options and then ‘Create Account’.

10. Log-in to your account. You can use the entire Fyde OS from here. But it is still not installed on the hard drive.
11. To install, reboot the device and press control + alt + F2 when the Fyde OS logo appears to switch to command line mode.
8. Use ‘ Chronos ‘ as both username and password. Then enter the command ‘ isblk ‘ and click enter.
9. Search for the physical disk. It will probably be displayed as sd x. You can also determine by the size of the disk space and the number of partitions. The following command will take “sda” as the label.
10. Enter the following command:
sudo /usr/sbin/chromeos-install --dst /dev/sda
11. The installation script will ask if you want to continue and prompt that the target disk will be emptied. If you are sure, enter Y and press Enter to confirm.

12. Once the installation is done, reboot the device by removing the USB stick.
You have already installed the Fyde OS.

But there is still no support for Android apps and Linux apps. Don’t worry, you can easily enable them.
Enabling Android Apps support
1. Support for Android apps is already available. You can download apks and install but there is no Play Store.
2. You just need to sideload the Play Store by downloading the Play Store apk file. Or you can even download Nova Launcher so that you can access Play Store from it.
Enabling Linux Apps Support
1. Open Chrome & open a New Incognito Windows
2. Type “chrome://flags/#enable-experimental-crostini-ui” and enable the flag
3. Chrome will ask to restart to take effect
4. After restarting, open up Chrome OS’s system settings.
5. Search for “Linux” and you should see a “Linux(beta)” section.
6. Open it and click the ‘ Turn on ‘ option
7. Now, install the Linux (Beta) and confirm
8. You will have the Linux terminal installed within minutes.
By default, Fyde OS default search engine will be set to bing, you can change that Google in the browser settings if you want.