Google Docs was primarily designed to be a word processor tool, one that took a web-first approach. That meant no desktop apps. Soon, Google started adding other features like the ability to add and edit images, draw and sign documents, and so on. The image editor has come a long way since and can be used to make quite a few edits if you know where to look and what to do. One such trick is layering and grouping images in Google Docs. You. no longer have to use third-party apps now.
How to Layer and Group Images in Google Docs
You can use this method to not only layer images on top of one another, but also text. This process is called overlay and while there is no direct way to achieve, there are a few workaround. Here’s how.
Layer Images in Google Docs With Google Drawings
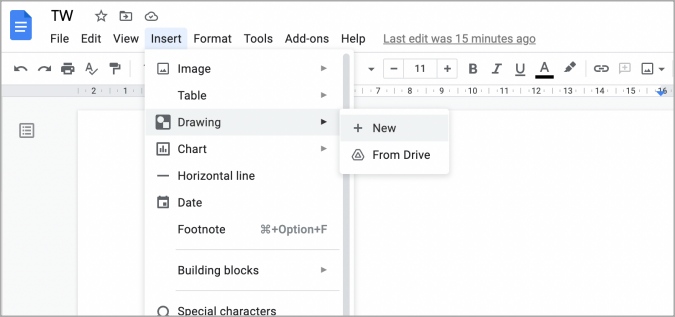
1. Open Google Docs document and select Insert > Drawing > New.
2. Drawing tool will open in a pop-up menu as it is integrated within Docs now. Select the image icon to add the base layer image on top of which, you would like to add another image or text.

3. Another pop-up will open where you will have a variety of options to open the image. Google Drive, local drive, and so on. Just find the image and open it in Drawings app.

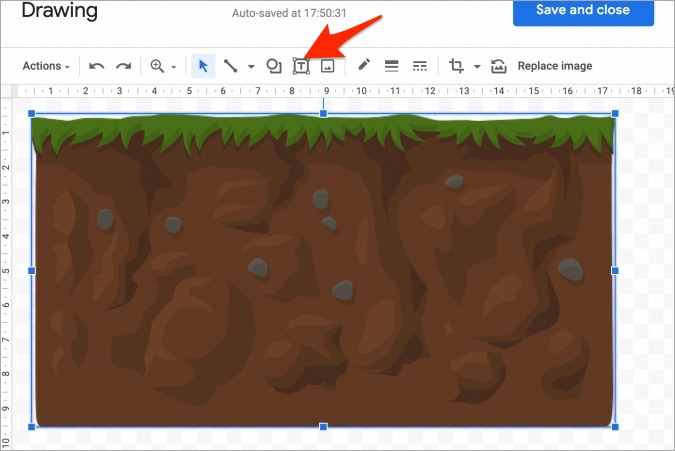
4. You can now add or layer another image on top of the first image or add text. To add an image, follow the same steps. To add text, click on the Text box icon first.
5. Draw a text box where you want to add text and type whatever you want to. Then select the text and you can easily format it using the toolbar that should be visible now. Formatting options include font type, size, and color among others.

6. Similarly, you can add an image on top of another image and then edit it to your liking. Once you are satisfied with the end result, click on Save and Close button to add it to the Google Docs document.

Also Read: How to Make a Table of Contents in Google Docs
Layer Images in Google Docs Using Wrap Text
Okay, so why do we need this method if Drawings works well? The reason is that with wrap text, you can quickly change the overlayed image on the go. While Drawings is more useful if you want to overlay text or need more control over layers. But it is also time-consuming. This is quicker.
1. Open the document in Google Docs and click on Image > Insert and select the image you want to add. It doesn’t matter if the image is supposed to be in the foreground or background.

2. Repeat the same steps and add the second image now that you want to be layered on top of the first. By default, Docs will place these images one below the other instead of one on top of the other, like so.

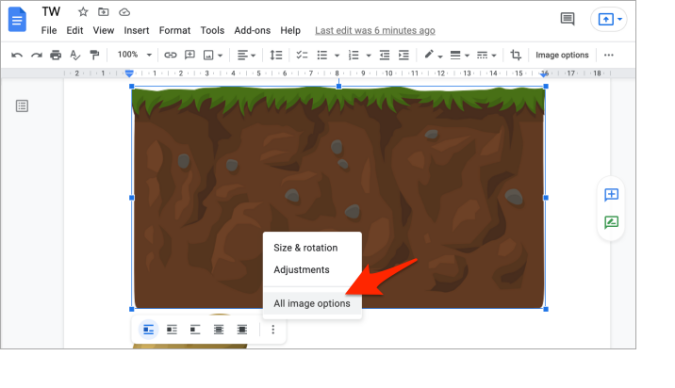
3. Now select the first image that you added and in the toolbar that pops up, click on three-dot menu icon to select All image options.
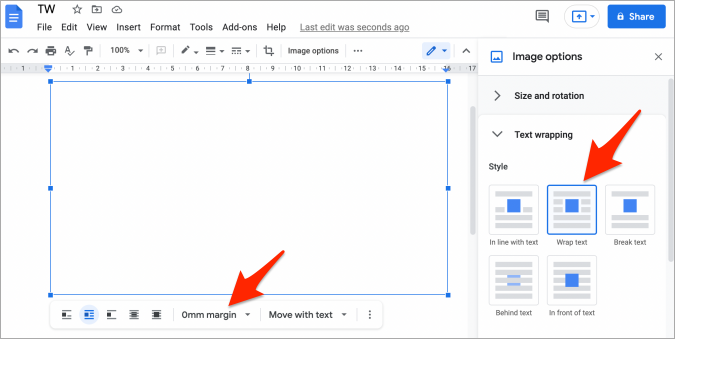
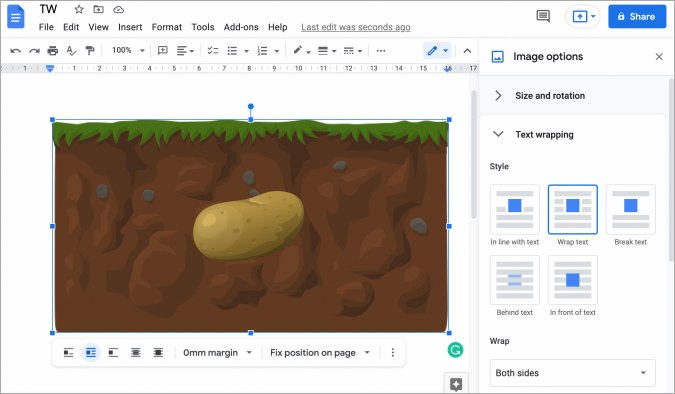
4. The Image options panel will appear in the sidebar. Select Wrap text option and then right below the image, set the margin from the dropdown menu to 0mm (zero).
5. Repeat the same steps for the second image too that you want to layer on top of the first. Select Wrap text option and set the margin value similarly.
Note: If the postition of the text in the document is moving around, select Fix position on page instead of Move with text option in the dropdown menu right next to where you set the margin. You can check in the screenshot above.
6. Now all you have to do is drag one image on top of the other and position it however you like. It is that easy to layer one image on top of the other using this trick.
Wrap Up: Layering and Grouping Images in Google Docs
The first method takes more time but offers more control and flexibility. Plus, you can use it to add text and format it. The second one is quicker and easier to use but works best for images. Also, because it is working outside Google Drawings app, it offers much less control over the positioning of the images. Google Drawings, while limited itself, still offers several features over what we saw later.
Meanwhile, here are some of the best Google Docs shortcuts you should try to make your life easier and more fun.