Google Docs is a powerful yet simple resume maker to create resumes. A resume is a document that includes details about your professional life, such as work experience, internships, education, awards, and some personal details like name and contact details. It helps employers to gauge whether you are suitable for an organization. You can make your CV from existing free Google Docs templates or start from scratch. Let’s check both methods to make a resume on Google Docs and also learn how to share it with others.
How to Create a Resume on Google Docs Using Templates
Creating a resume with the help of Google Docs templates is the easiest way to make your resume. Google Docs offers five resume templates for free that you can edit and customize according to your preferences using the steps shown below.
1. Find the right Google Docs resume template.
2. Edit the template to suit your needs.
3. Share the template with others.
Let’s check these steps in detail.
1. Find Google Docs Free Resume Templates
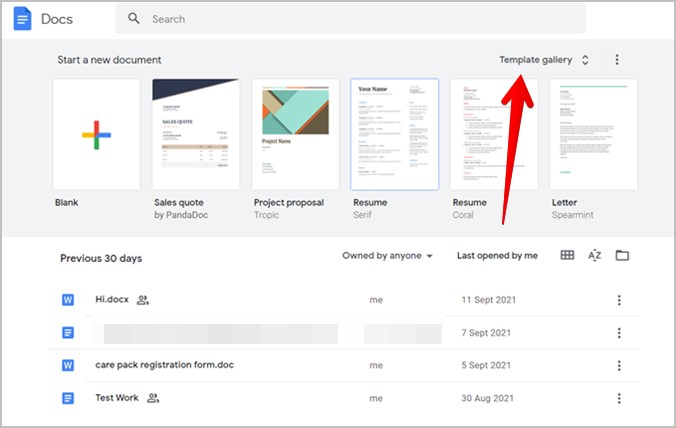
Open docs.google.com on a PC and sign in to your Google account. Click on the Template gallery option at the top to view the available templates. Alternatively, use the direct link to open Docs templates.
You will find the available resume templates under the CVs section. Click on any one of them to start editing it in Google Docs.
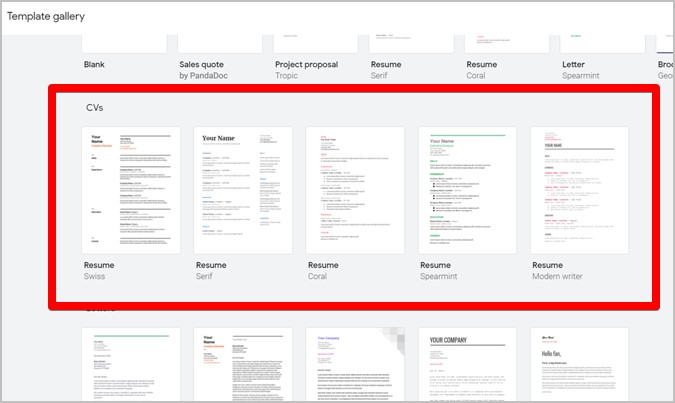
If you don’t like the currently selected template, you can always choose a different one.
2. Edit Template
The selected resume template will show up on your screen. You will see that the template consists of most of the required sections such as skills, experience, education, etc., with sample data added to them.
Place your cursor on any text item that you want to edit and type your own details. Let’s say you want to add your name. First, remove the Your Name text and replace it with your own name. Similarly, edit other details in the CV as per your requirements.
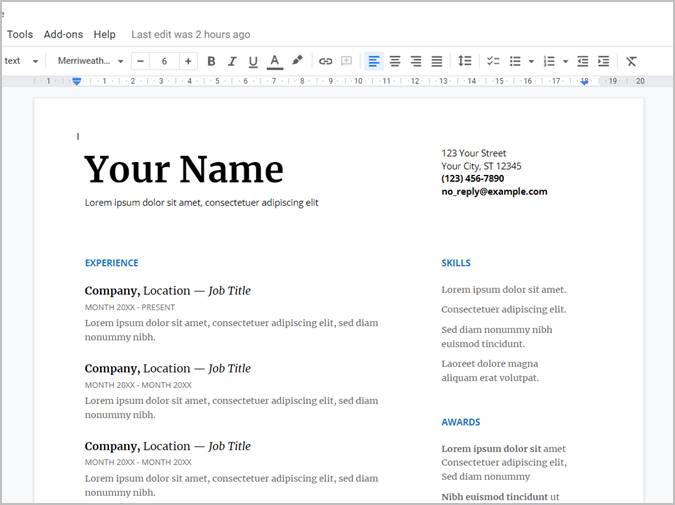
Likewise, you can change the font color, style, or size of any text on your resume. Select the required text and use the available editing options from the formatting toolbar. You will find more tips to edit resumes in the section below.
Once you start editing a resume template, it’s automatically saved to your Drive account. Go to docs.google.com or drive.google.com to find it.
Tip: In case you mess up a template, don’t worry, just click on the same template again to start editing it from the scratch.
3. Share or Download Google Docs Resume
When your resume is ready, you can download it on your computer or share it directly with others using a Google Drive link.
Download Google Docs Resume
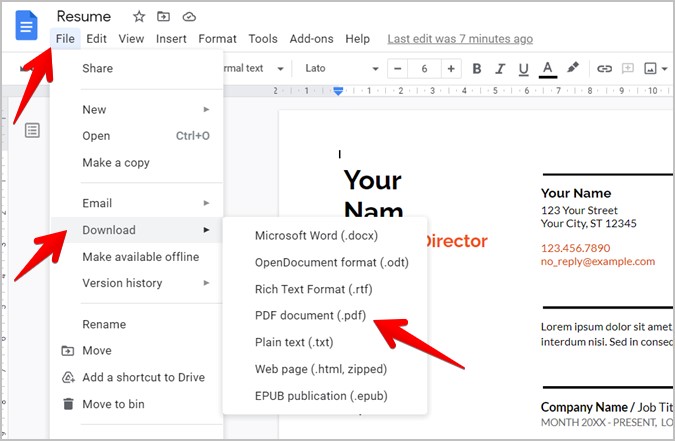
To download the resume, click on the File menu > Download. Select the download format for the resume. The preferred method is to download in PDF format as it will retain the formatting on all devices and browsers.
Create Google Docs Resume Link
Alternatively, to create and share Google Docs resume links with others, click on the Share button at the top of your resume page.
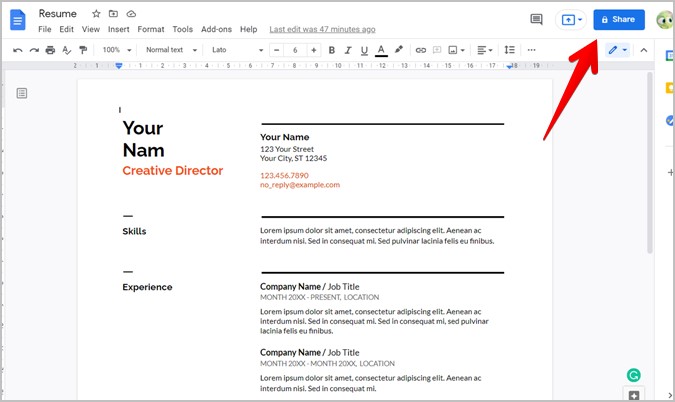
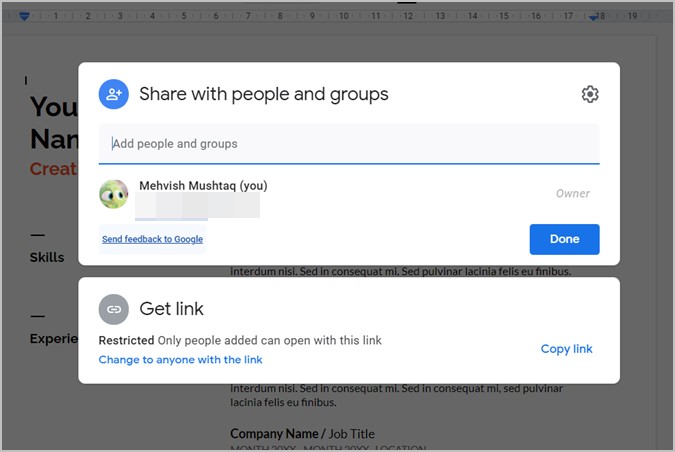
Now, you have two options. You can either add selected people or generate a shareable link. In the first method, you will have to add the email ID of the people with whom you want to share the resume under the ‘Share with people and groups’ section. And in the second, press the ‘Change to anyone with the link’ and hit the Copy link button. Then share the copied link with others through any medium such as an email, chat, etc. Do note that anyone with the link can open your resume.
How to Make Google Docs Resume From Scratch
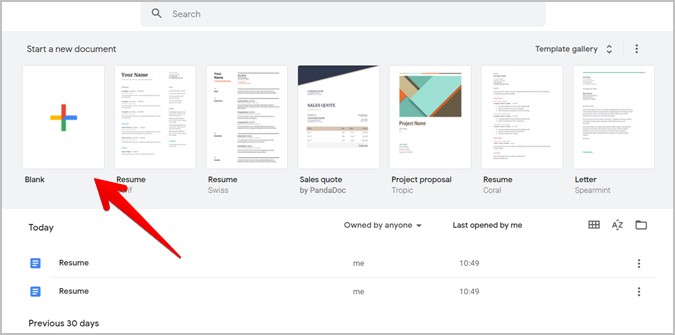
If you want to get a bit creative and start making your own resume on Google Docs, you can do that too. Open docs.google.com and hit the Blank template option. Or, press the File > New > Document from inside any existing Docs document.
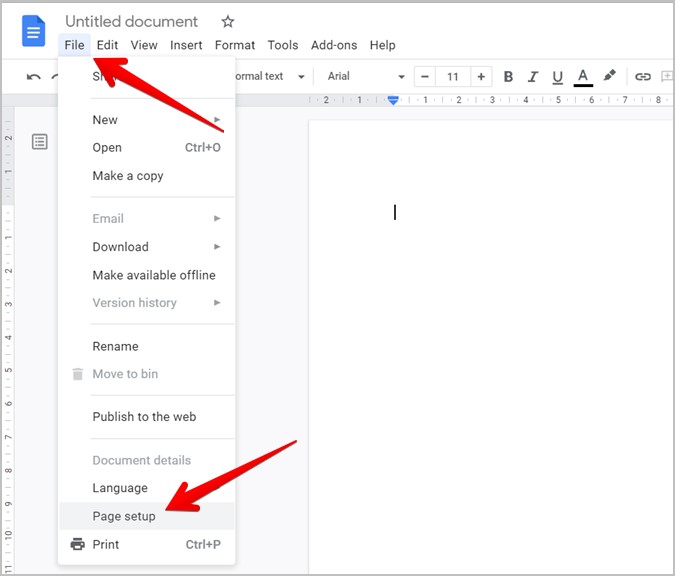
A new, blank Google Docs document will open. Start by checking the page size. For that, go to File > Page setup. Select A4 under paper size. This helps if you intend to print your resume in the future. You can also adjust the page margins here if need be.
Tips to Customize Google Docs Resume
Here are some tips to add various elements to your resume:
1. Add Name and Contact Information Box
Click on the Insert Menu and choose Table. Go with 2×1 table.
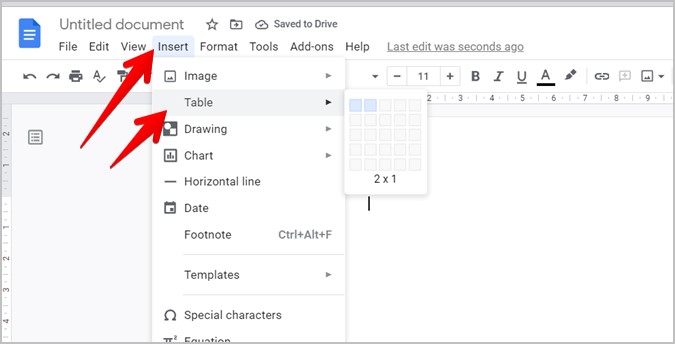
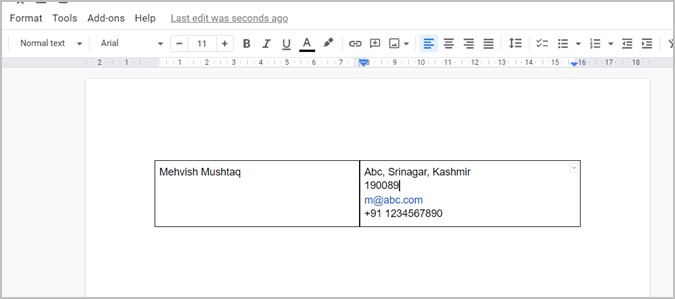
The two-column table will be added to the document. In the first column, type your name, and in the second, enter your contact details such as an address, email, and contact number. Adjust the size of two columns using the middle bar. Find out how to make multiple columns in Google Docs with templates.
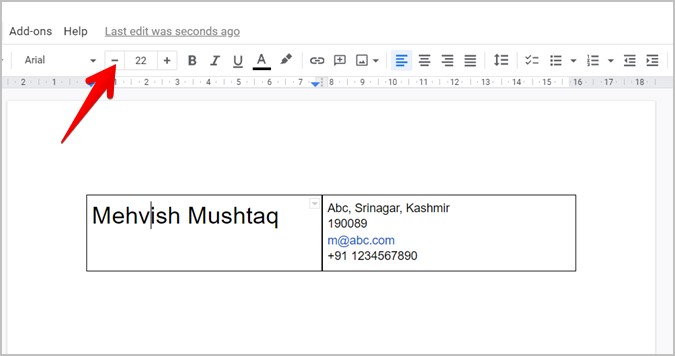
You can change the font size of your name to make it more prominent. For that, select the name and increase the font size using the available option in the formatting bar.
Finally, right-click anywhere inside the table and select Table Properties. Then under the Table border section, choose 0 for border size. It will be next to the border color box. That will make the table border invisible and give a cleaner look to your CV.
2. Add Headings
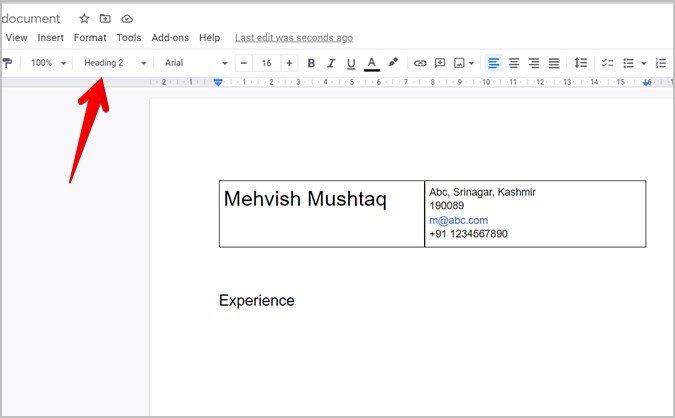
Now, you have to start working on the resume body. This will include many sections. Keep the cursor below the table that you added above and enter the section name. Let’s say Experience. Increase its size and make it bold. The best way is to select Heading 2 from the font styles drop-down box. That way you don’t need to remember the font size for other section headings.
3. Add Divider Line
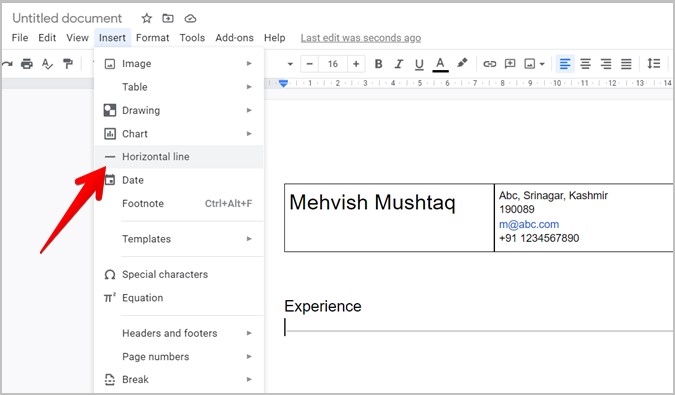
You can also add a horizontal line to separate sections. For that, go to Insert > Horizontal line.
4. Add Experience and Education
With the section headings added, next, you might want to enter your previous work experience and education details. You can either do it by adding a table or using the paragraph format.
Add a 2×2 table by going to Insert > Table. In the first column, enter the previous company name, job title, and time period of employment. The second column is the most important part of your resume. This is where you need to sell yourself in the best possible way.
Add honest job responsibilities and achievements next to each job that you have done in list format. To make a listicle, select the text and click on the Bulleted list option in the formatting toolbar. Keep the points short yet strong and clear.
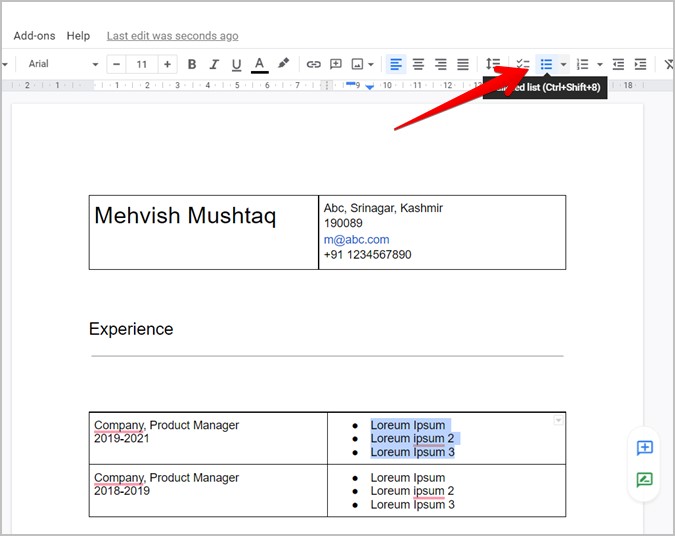
Similarly, add other rows while keeping the most recent job details at the top. To add more rows to the table, right-click on the table and select Insert row below.
In the same manner, you can add your education details by adding a section first followed by adding the relevant details.
Finally, add skills and other relevant things to your resume. Remove borders from sections. Once done, save or share the resume as shown in the above method.
More Tips to Create a Resume
- Make sure to use the same font, size and style throughout the resume.
- The section headings should be slightly bigger than its content.
- Rework your resume for different positions.
- Align your resume equally from all sides.
Simple Is Best
That’s how you can create a basic resume in Google Docs. The final results depend on how you style and edit your resume. However, do remember that simplicity often wins. Do not go overboard by making your resume too colorful or adding random images. Also, find out how to make address labels in Google Docs.