NVIDIA is still the king when it comes to gaming computers and while their hardware has come a long way, it is their software that is lagging. Most but not all computers powered by NVIDIA graphics card come with NVIDIA Control Panel. Most users don’t like the app. Even the UI looks dated. There is another option called NVIDIA Inspector which has gained in popularity over the years. It improves upon the official app and offers some new, additional features.
NVIDIA Control Panel vs NVIDIA Inspector
You can download NVIDIA Control Panel from the Microsoft Store if it didn’t come preinstalled on your computer. NVIDIA Inspector is actually a third-party app but still free and available on Throttle Stop’s website. The bundle will come with another open-source app called NVIDIA Profile Inspector. No need to launch it separately.
Let’s begin.
Also Read: How to Create Desktop Shortcuts for Stadia Games on Windows
Introdution
NVIDIA Control Panel has a dated UI and can be laggy and slow while using. NVIDIA Inspector, on the other hand, is light in weight doesn’t even needs to be installed. You will double-click the executable file and it will simply launch/run. No lags and small footprint.
The main window is where you will find all the features. A barebones approach with a minimalist look.
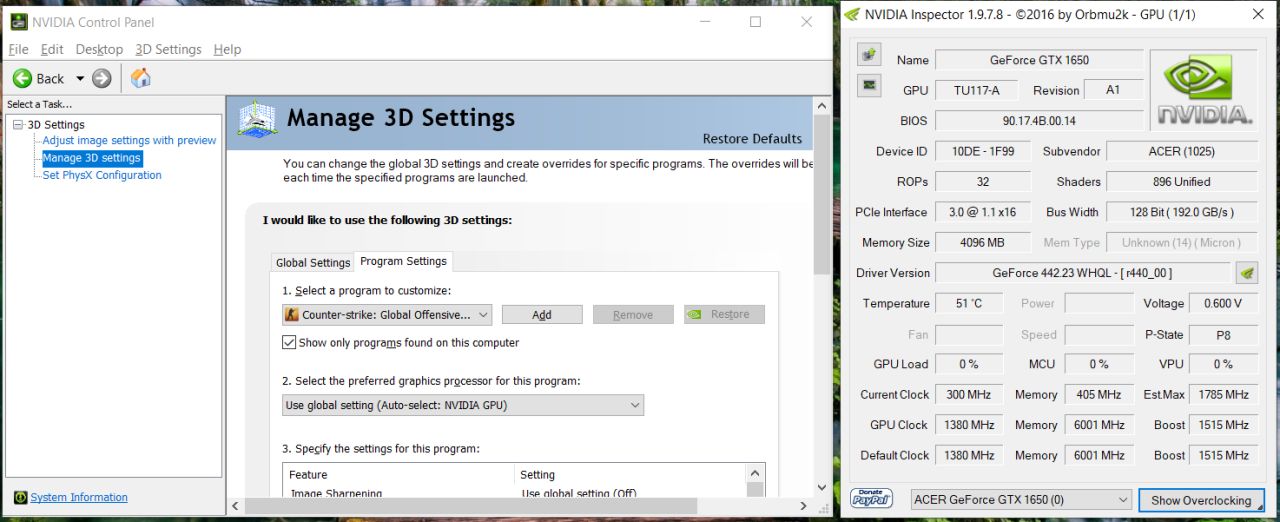
The first thing you will notice is all the details about your graphics card which is lacking in NVIDIA Control Panel for some reason. Not everyone knows these details about their card and they often come in handy. Other details include driver versions, whether or not you have overclocked your GPU, and ability to switch between dedicated and Intel graphics card.

On the flip side, the UI is pretty small and I wish, it was a bit bigger. Everything looks small here. Clicking on the Show Overclocking button at the bottom-right corner will show a warning pop-up first. Most people don’t overclock their GPU and for the right reasons, which is why there is no need to clutter the UI with it. Noticed the small button next to Driver Version? I didn’t, initially. That will launch the Profile Inspector.

In short, the UI has been divided into sections that are separate and can be launched as and when required.
The NVIDIA Control Panel can be used to change display and 3D settings, and you can also customize settings for other Windows apps like Netflix or browser and so on. All apps are listed under the Program Settings tab.
Also Read: How to Play Retro Games on Steam Using Steam ROM Manager?
2. How to Use
Here’s a unique and useful feature. NVIDIA Profile Inspector has a driver and settings profile for every game or most popular games here in the drop-down menu. You can also create your own presets and save it as a new profile but the preinstalled profiles are already cool. Just select one based on the game you are playing and save.

The moment you choose a new profile, you will see a list of settings displayed below. Some of these entries are grayed out but those that are not have a gear icon next to them. That signifies that you may edit the particular setting if you know what you are doing.
Note that the base profile is named ‘_GLOBAL_DRIVER_PROFILE’ (also known as Base Profile) and I recommend you to leave it untouched. If something goes wrong, you can always switch back to it. Unless you are a pro and know what you are doing and what these values mean, chances are you going to mess up at least once.
You will quickly notice that the same settings in NVIDIA Inspector has more options than NVIDIA Control Panel. Here’s an example. Both the apps allow gamers to change vertical sync however Control Panel only allows to reduce it by half. With the Inspector, you can also reduce it by a quarter. That means greater control and a better gaming experience.
Also Read: Yuzu Switch Emulator: How to Play Nintendo Switch Games on PC
What to Do
Here is what I recommend you should do. Don’t uninstall NVIDIA Control Panel even if you hate it. It is still helpful and has its own usage. Since you can use NVIDIA Inspector without having to install it, there is no conflitct. In fact, changing a common setting in one will reflect the same change in the other. It was designed to work together by the developer and so, there are no issues.
NVIDIA Inspector can overclock your GPU which the NVIDIA Control Panel can’t and if you are careful, you can max out settings to crank out more performance while gaming. Just make sure that you have taken necessary precautions.
Wrapping Up: NVIDIA Control Panel vs NVIDIA Inspector
Short Version: NVIDIA Profile Inspector is used to find and edit profiles of individual apps and not just gaming though it is mostly used by gamers. Similar to the NVIDIA Control Panel’s 3D Settings, but it offers more options per setting and has functionalities otherwise not available to users. Both the apps can be used together.
In NVIDIA Control Panel’s defense, it has come a long way and over the years, has improved a lot. Mainly due to the constant criticism that it faced from the gaming community who found third-party apps to do the job. But, it is still not perfect and lacks several features, some of them notable. I like the profile feature best which allows you to tweak and save in n number of variations you want, even for the same app.
Pro Tip: I would recommend you to check out Throttle Stop. Another app that you can use to not only overclock but also undervvolt to reduce thermals, improve FPS, and get better battery performance.
Did we miss anything? Do let us know in the comments section. It may help some of our other readers down the line.