Password protecting your files and folders in Windows is the best way to ensure no one gains unauthorized access to them. Unfortunately, Windows doesn’t offer any reliable way to add password protection to files or folders. Don’t worry though, we know some handy ways to password protect Windows folders and files. In this post, we will show you four ways to password protect folders in Windows, each method is suitable for a specific need.
Also Read: 12 Effective Ways to Stay Anonymous on the Internet
Password Protect Folders in Windows
1. Use Built-in Encryption
Windows comes with built-in encryption to protect a folder and its content from other users and content over the shared network. However, encryption is only available in the Professional or Enterprise edition of Windows 10. If you are using Standard or Home edition, you are out of luck.
Right-click on the folder you want to encrypt and select Properties from the context menu and select Advanced under the General tab. Now check the checkbox next to Encrypt contents to secure data and click on OK. Click on Confirm in the pop-up that follows and you are done. The folder should be encrypted now.

The folder color will turn green confirming that it has been encrypted. Now, only you can access this folder while you are logged in to your Windows user account. Other users will have to enter the password to access it. Unfortunately, if someone has access to your computer you are logged in, they will be able to access the folder. Not foolproof.
You can remove encryption following the same method after which, the folder will be visible and accessible to all Windows users.
2. Simple Password Managers
If you just need to protect your files and folders on Windows 10 computer from family members or colleagues and can live without encryption, simple password protection will work just fine for you. This software may not be able to protect your data from hackers and other bad actors, but for quick and easy folder protection, they are perfect.
Wise Folder Hider is a simple and free password manager that can protect your files with two different folders. Install and launch the program and you will be asked to create a password. You will use that to password protect folders on Windows 10. Alternatively, you can also try Easy File Locker.
Make sure to use a strong password that’s not obvious to ensure people don’t guess it. And in case you forget your password, contact the company with the PayPal transaction ID (only works if you are a premium user) and they will recover the password for you. There is no way to recover a password for free users since the software needs no sign-up.
Note: Unfortunately the free version of Wise Folder Hider is bloated with other less useful software like SpyHunter. So, make sure you carefully decline the install.
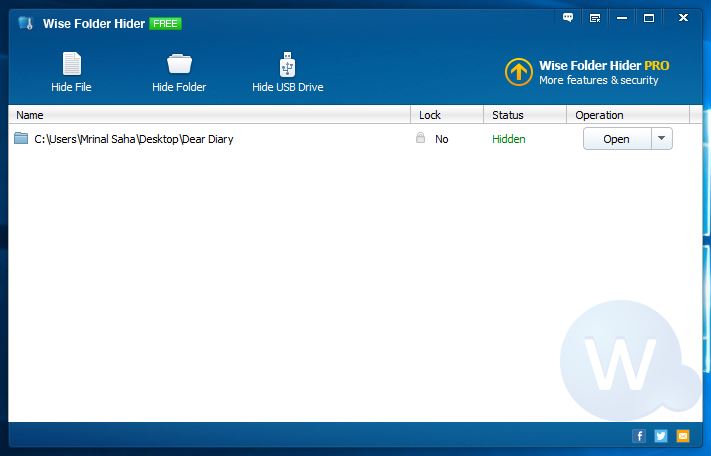
In the main interface, you can use the buttons above to hide files, folders and even USB drive content. Once hidden, you will have to click “Open” next to each item to make them accessible in Windows 10 File Explorer. As soon as you close the Wise Folder Hider window, the items will be hidden again.
Additionally, you can click on the upside-down arrow next to an item and select “Set password” to create a secondary password. Other users will have to provide the main password and the secondary password to open such files/folders.
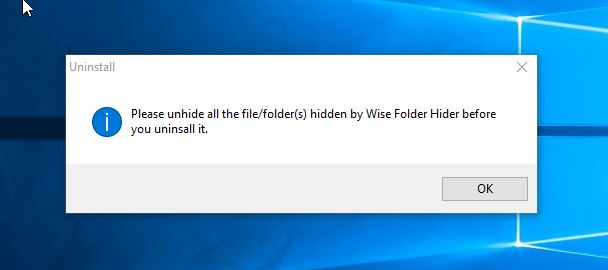
Make sure you unhide all the files and folder before uninstalling the Wise Folder hider (or any folder hiding software) or all your files will be lost forever.
3. Password Protect Folder in Windows 10 with 7-Zip
7-Zip is a popular archiving tool that is used for extracting compressed files. Did you know that it can password protect your data with strong encryption as well? If you don’t need to access a folder and its content frequently, you can encrypt and compress it to make it impossible for others to access it without a password.
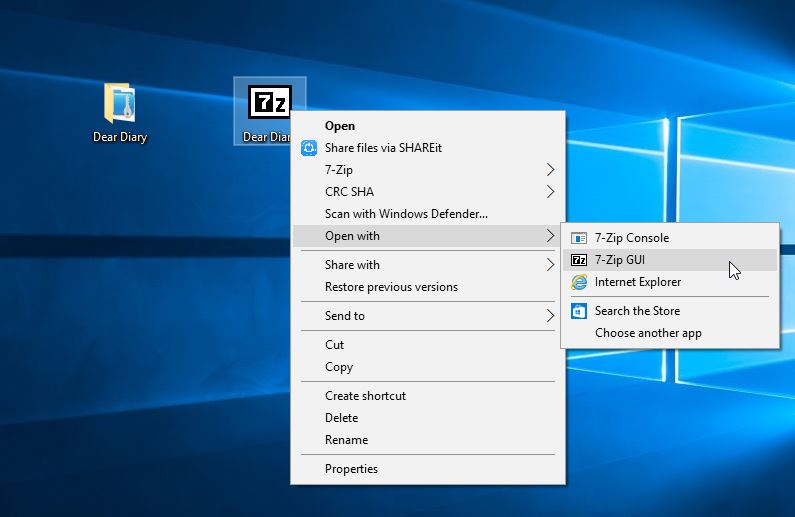
Once 7-Zip is installed, right-click on the folder and select Add to archive from the 7-Zip menu.
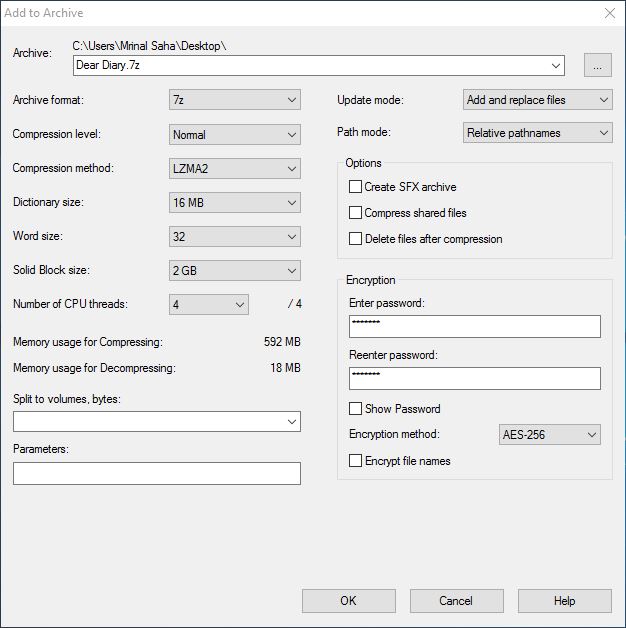
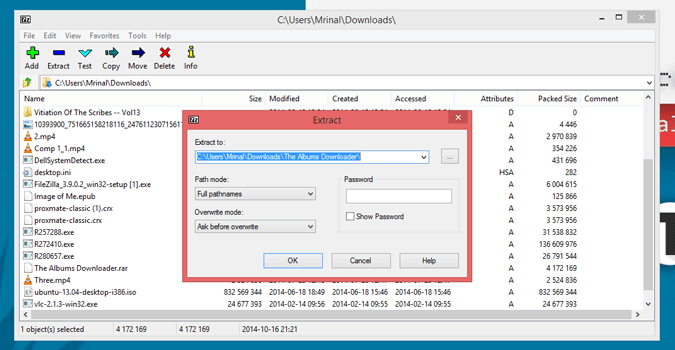
In the compression settings, enter the encryption password in the bottom right corner and then click on OK to encrypt the folder. This will create a new compressed folder in the same location that can only be extracted using the password you just created. You can now delete the unprotected folder to ensure no one accesses it. Ideally, you shouldn’t have to delete the original folder because then, someone could access it from the Recycle Bin or even recover it using some data recovery tool. That’s why I recommend deleting the original folder/file using CCleaner securely.
Unfortunately, you will have to extract the folder every time you need to access its content, and also delete the unprotected folder when you encrypt it again. That’s a tedious process but safe at the same time. You also have the ability to send or share the encrypted folder online using email or cloud storage securely.
4. Password Protect Folders in Windows Using Encryption App
The best way to protect your data is to encrypt and protect it with a password, and for this purpose, you will need to get help from a third-party encryption software. There are many encryption software available, but most of them will encrypt the whole drive content. Encrypting and decrypting an entire drive can be time-consuming.
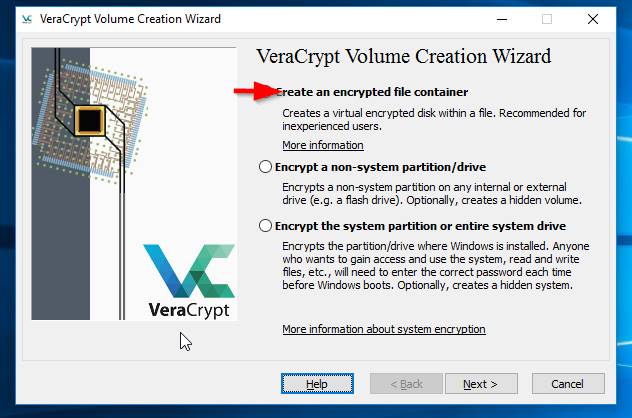
One way is to create a small dedicated drive with the intent to save all your sensitive data. For this purpose, VeraCrypt is a great software that will encrypt and password protect folders in Windows 10.
Once installed, VeraCrypt makes it a snap to create an encrypted volume where you can save your data. Click on the Create Volume button in the main interface and follow instructions provided by VeraCrypt to create an encrypted volume. You just need to press Next on most pop-ups and enter size of the drive and the password that you would like to use.
Also Read: How to Encrypt USB Drive Using VeraCrypt
After creating the encrypted volume, click on the Select file button in the main interface and select the volume you just created. Now click on Mount and enter the password to mount the drive. You will be able to see the newly encrypted drive next to your regular drives. You can now simply move files and folders to this drive to encrypt it.
Note: The encrypted volume you created may not be accessible, but it can still be deleted. So this will not stop people from deleting the sensitive data.
5. Hide Files and Folders Two Different Ways
There are two ways to simply hide files and folders in Windows 10. There is no need to enter a password or anything. The first method is easy where you select the file or folder you want to hide, and select Hide selected items in the toolbar above.
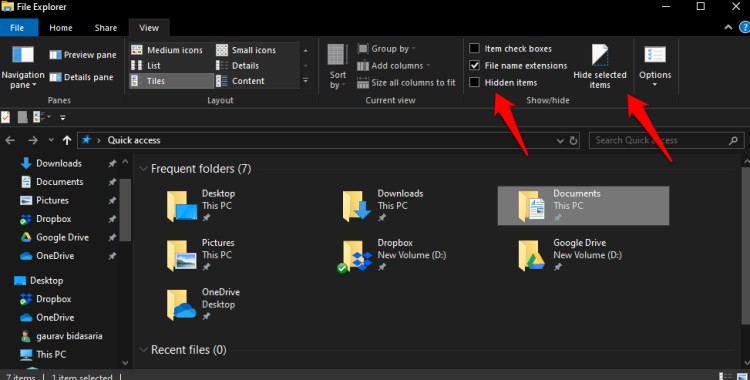
When you want to view all hidden files and folders, just open the folder and select Hidden items to view everything. This method is not very safe and pretty much everyone who knows about it can use it.
That’s why there is another way. This one is more obscure and needs more work. Most people don’t know about it either. You will be hiding folders as a system folder to make it stay hidden even if someone selects the Hidden items option above. To do so, open Command Prompt with admin rights and type the below command.
attrib +s +h “C:\Users\user name here\Desktop\Top Secret”
Replace ‘user name here’ with your computer’s username and ‘top secret’ with the folder you want to hide as a system folder. To unhide files and folders, repeat the same command but this time with the minus sign.
attrib -s -h “C:\Users\user name here\Desktop\Top Secret”
That’s it. Again, this is not very secure but a fast and simple way to hide stuff if you don’t want everyone finding it out. It depends on the age of the person and how computer savvy he/she is before you use this method.
6. BitLocker Drive Encryption
The best way to secure and password-protect files and folders on Windows 10 computers is by using BitLocker. That requires Windows Pro or Enterprise edition and a TPM chip on your computer. The steps are a little complicated and long but it is the highest level of security you can get on a Windows computer. It will encrypt everything on that drive using AES 256-bit encryption. Here is a step-by-step guide on how to use BitLocker to encrypt and protect files and folders on Windows 10.
Wrapping Up: Password Protect Folders on Windows 10
Using software like Wise Folder Hider is definitely the easiest way to password protect a folder in Windows 10. However, if you have sensitive data and want something more secure, you should encrypt it using 7-Zip or VeraCrypt. Do you know of any other ways to password protect Windows 10 folders? Let us know in the comments below.
Also Read: How to Make Your Own Folder Locking Software For Free