Nvidia GeForce Now lets you play the games you own on Steam or Ubisoft on their cloud servers. To top it off, the basic version of Nvidia GeForce Now is totally free with a bunch of free games like Fortnite, Destiny 2, and 73 other games. However, as of now, it’s only available in 71 countries as of now.
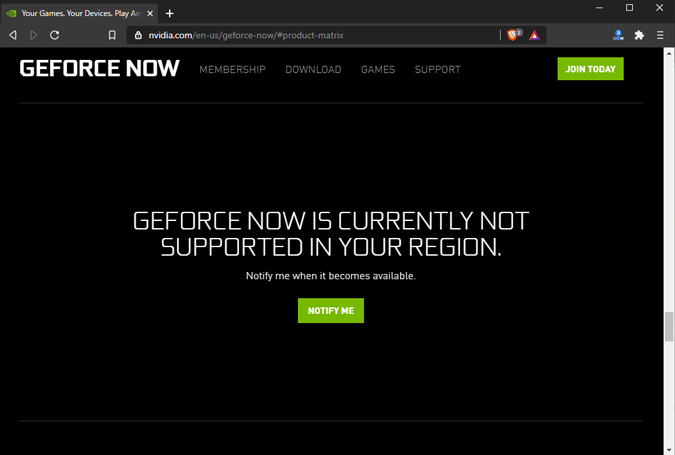
If you try to access Nvidia GeForce Now outside supported countries, you’ll be greeted with the “GeForce Now is currently not supported in your region”. So, if you live outside those countries here’s how to play Nvidia GeForce Now in unsupported counties.
Play Nvidia GeForce Now in Unsupported Countries
Nvidia GeForce Now supports a bunch of operating systems like Windows 10, macOS, Chromebook, Nvidia Shield, Android, etc. In case you have a device that doesn’t fall into this category, you can play on the browser instead. Jump to this link for the instructions to play GeForce Now on any device within the browser.
Nvidia GeForce Now requires you to have a minimum Internet speed of 15 Mbps. However, if you have lower speeds, it will just throw a warning and let you proceed anyway.
Step 1: Get a VPN
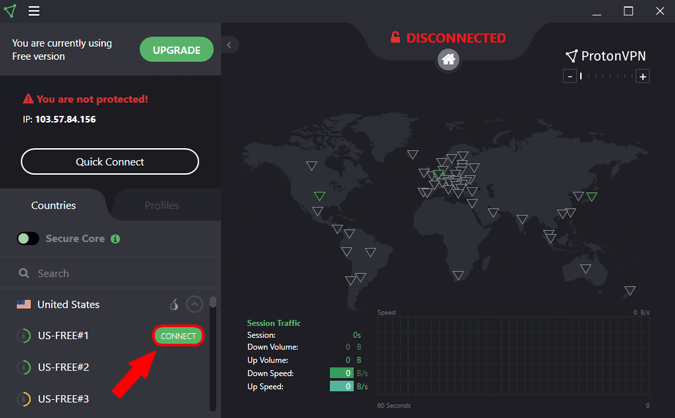
Foremost, we would need a VPN app in order to switch to one of the supported countries. We have a list of TechWiser recommended VPN apps and for this demonstration, I am using a free VPN app – ProtonVPN.
Download and install the protonVPN app on your device. In my case, I am using Windows 10. ProtonVPN only supports 3 countries in the free variants – United States, Netherlands, Japan. Fortunately, Nvidia GeForce Now works in all the 3 countries, hence, the country selection doesn’t matter in this case. I am selecting the United States for the sake of this example.
Download ProtonVPN
Step 2: Download Geforce Now
Next, head to the GeForce Now website to download the appropriate app for your Operating system. In my case, I am downloading the Windows 10 app.

Once you have downloaded and installed the GFN app, open it. Within the app, you can see the games included but in order to play, we first need to create an Nvidia ID. To do that, click on the download button and you would be redirected to the web browser.

Step 3: Create a free account
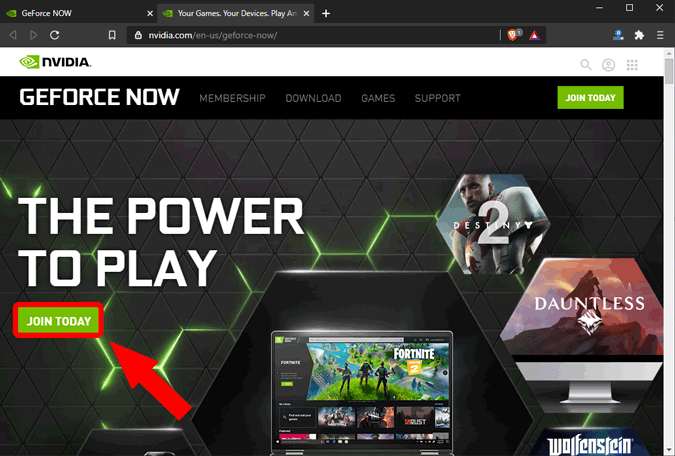
On the browser windows, create an Nvidia account by clicking on “JOIN TODAY“. It’ll open a different tab on the browser.
In case you already have an Nvidia account and are already logged in the browser, you will see the NVIDIA logo. Click on it and you’ll be logged in with the same account.

On the new tab, again, hit the “JOIN TODAY” button.
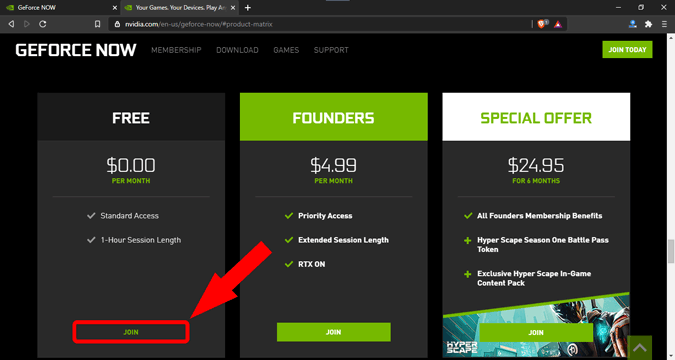
Next, you will be prompted to select the pricing tier. Nvidia basically provides 2 pricing models – Free, and Founders. The third one in the screenshot is just Founder’s edition with a discounted price tag.
Now, the major difference between Free and Founders edition is access to games. The Founder’s edition has access to a lot more games than Free members. Additionally, free members have standard access to the servers and can only game for about an hour in a stretch. On the other hand, the Founders have a 6-hour session time limit and get priority access to the servers.
Read: The Best Games That Support Ray Tracing on the RTX 2070 Super
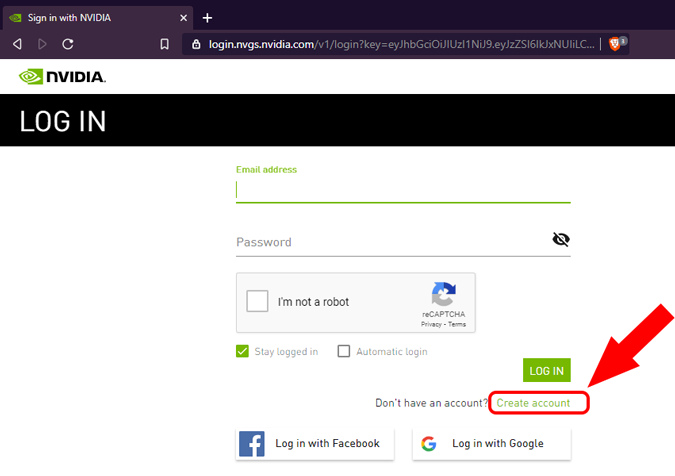
Once you hit the Join button, you’ll be asked to log in. But, since we have to create our ID, click on the “Create account” link. You can also choose to login with Google or Facebook.
On the Create an Account page, enter normal details like Email ID, password, DOB, etc to create an account. After entering the details, just click on the “Create Account” button.

Once you have created the account, you’ll receive a verification email on the mentioned email ID. After verifying the email ID, you’ll be redirected back to the Nvidia GeForce Now app. Herein, to see the free games, navigate to the bottom and you would see the “Free-to-Play” section. To the right of the label, click on the “SEE MORE” button to see all the free games.
Step 4: Start the game
You can click on any of the free games and next click on “Play” to start playing on the server.

The games on Nvidia GFN are owned by individual companies or game publishing platform like Steam, Ubisoft, Warzone, etc. So, in that case, you would also have to create an additional account on the publisher’s site before you can start playing the game.
On the Browser
In case your device doesn’t support GeForce Now. For instance, GFN doesn’t support Linux. Additionally, if you find downloading the Windows app and setting it up quite a hassle, you can play on the browser instead. Nvidia GeForce Now runs on the browser for Chromebook and with a Chrome agent switcher extension, we can play on Chrome within Windows 10 and Linux as well. The experience on the desktop app and browser is almost the same.
Foremost, download and install the User-Agent Switcher for Chrome. To do that, head over to the Chrome web store with the following link and click on the “Add to Brave” button.
Download User-Agent Switcher for Chrome

Now on the toolbar, right-click on the User-Agent Switcher icon and select “Options“.

On the Options page, we need to create a custom user agent called Chrome OS.
Basically, herein, we are creating a custom Chrome OS agent and then we’ll map the GeForce Now domain name with the Chrome OS agent. This way, whenever you open the GeForce Now site ie. play.geforcenow.com, the website will think of your device like a Chromebook.
Enter the following information on the Options page.
New User-agent name: Chrome OS
New User-Agent String: Mozilla/5.0 (X11; CrOS aarch64 13099.85.0) AppleWebKit/537.36 (KHTML, like Gecko) Chrome/84.0.4147.110 Safari/537.36
Group: Chrome
Append?: Replace
Indicator Flag: ASX
Once you have entered the details, click on the “Add” button.

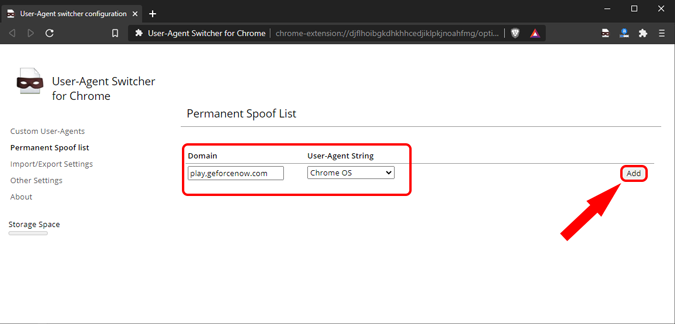
Now, we need to add a custom entry for the DNS – “play.geforcenow.com“. To do that, switch to the “Permanent Spoof List” tab.

On the permanent Spoof list tab, make the following entries.
Domain: play.geforcenow.com
For User-Agent String, select “Chrome OS” from the dropdown. It’s the user agent we just created.
Once done, turn on your VPN and logon to the US server. For this instance, I am using a free VPN app called ProtonVPN.
Next, head over to play.geforce.com and sign up to create your Nvidia ID. The process is pretty much similar to the desktop variant.
Once you are logged in, you can click on any game and get playing.

Closing Words
So these were the methods to play Nvidia GeForce Now in unsupported countries on pretty much any device. For more issues or queries, let me know in the comments below.
Also Read: How to Play Stadia in Unsupported Countries