Today, everything happens on the internet from online classes to office meetings. It would be great to take advantage of remote culture by recording it. The obvious benefit is that you can get back to it later for future reference. If you are using Google Meet and want to record your meetings, then here’s how to record Google Meet meetings on both desktop and mobile.
Let’s start with the in-built option that’s already available on Google Meet.
Table of Contents
1. Record Google Meet Using Native Option in Google Workspace
Google Meet has an in-built option for recording meetings, but only for paid Workspace users. It is available for Business Standard, Business Plus, Enterprise, and Education Plus plans. So if you are on the free plan or the Business Starter plan, you may not see this option. You can continue with third-party recording tools which I cover later below.

Before getting started, remember that if you are not the host of the meeting, it will ask for permission from the host when you start recording. The recording will get started when the host grants permission by responding to the prompt. It will also notify everyone in the meeting that you are recording the Google Meet meeting. Pinning people, opening captions, etc. will not be recorded though. That being said, here’s how you can record on Google Meet.
1. While you are in the meeting, click on Activities > Recording > Start recording and Start.
2. If you are not the host of the meeting, then the host will get a prompt to accept your recording request. Once the host clicks on Accept, the recording will get started. Also, all the people in the meeting will be notified that their meeting is being recorded.
3. Once completed, click on Stop recording on the bottom bar and again click on Stop recording in the pop-up to confirm. The recording will stop automatically when everyone leaves the meeting.
4. The recorded video will be saved to Organizer’s Meet Recordings folder in Google Drive. An email will be sent to you and the host of the meeting for access.
5. If it is a scheduled meeting, then the link will be added to the Google Calendar event. So that all the people who can access that meeting event, can also access the recording.
If you are using the supported plan, but cannot access the recording option, make sure you have enabled recording in the Admin Console. To do that, open Admin Console > Apps > Google Workspace > Google Meet and click on Meet Video Settings. Then click on Recording and check the Let people record their meetings box. Changes will take place at the organization level within few minutes to up to 24 hours.

The in-built option has few drawbacks. It is not available for everyone and saves the recorded video in the organizer’s Google Drive instead of yours. So not just you, all the people in the meeting can access your recordings.
2. Vmaker | Screen Recording Tool
I have tried a lot of screen recording tools and finally landed on Vmaker for two reasons. One, it records both the system audio and microphone audio at the same time. So you can listen to both your and your team’s voice in the meeting. Second, there aren’t any watermarks and ads. The app offers free recording for up to 720p. You need to get the starter pack for 4k recording, screen annotations, etc. They also provide a Team pack for scheduled recording, real-time collaborations, etc.
The free plan is good enough for recording Google Meet meetings though. Here’s how.
1. First install the Vmaker chrome extension from the Chrome Web Store.

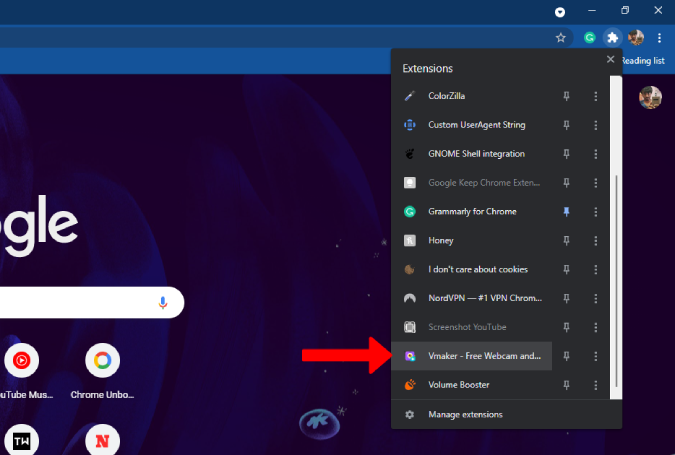
2. Now click on the Extensions icon at the top right corner and then select Vmaker.
3. It will open a pop-up menu for you to log in to the service.

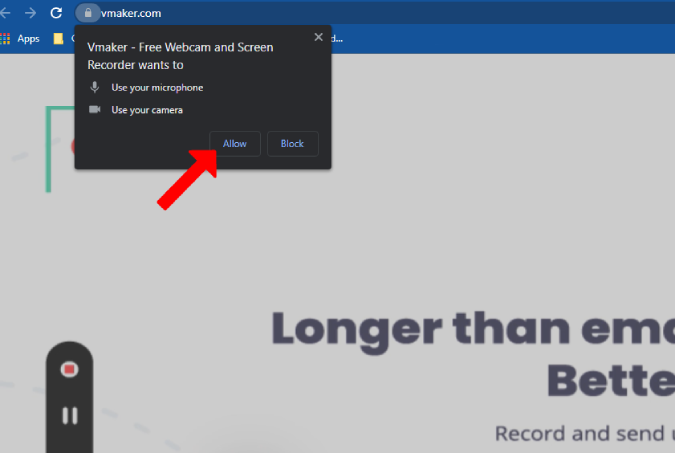
4. Once logged in, again click on the Vmaker extension. This will prompt for the camera and microphone permissions. Grant them by clicking on the Allow button.
5. The set-up is complete and you are good to go. To record, click on the Vmaker extension at the top right corner while you are in the meeting. This will open the overflow menu for you to select how you want to record.

6. At the top of the menu, you can select whether you want to record screen, camera, or both screen and camera. You can select Screen as you are recording Google Meet. Also, select whether you want to record the entire screen or just the Google Meet tab.
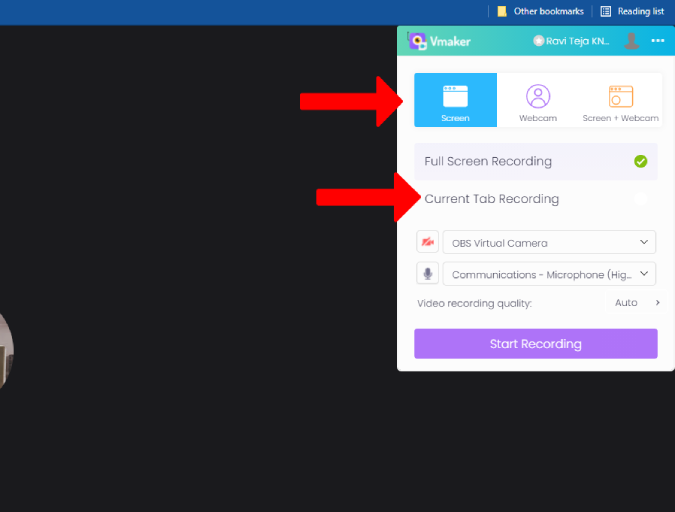
7. Then, select the mic if you are using headphones or an external mic. You can also change the video quality of the recording by clicking the dropdown next to Video recording quality.

8. Once you are done with setting up preferences, click on Start Recording.

9. Unlike the native way, this will record all the actions like pinning, captions, opening chat, etc. While recording, you shall see a widget on the left with options to pause the recording, delete, disable the microphone, etc. To stop the recording, click on the record icon in the widget.

10. This will redirect you to a new window where you can play your recording. You can scroll down and access other options to delete, edit, and download the Google Meet recording.

11. You can access past recordings under Vmaker Chrome extension > three-dot menu > My Videos.

12. This will open the Vmaker dashboard where you can access all the recordings.

Though the Vmaker Chrome extension is easy to use and free, it cannot record in high resolution. You need an upgrade to a starter pack that costs $10/month. But if you prefer high-quality recording for free, then you can use services like OBS Studio.
3. Using Obs Studio for Better Video Quality
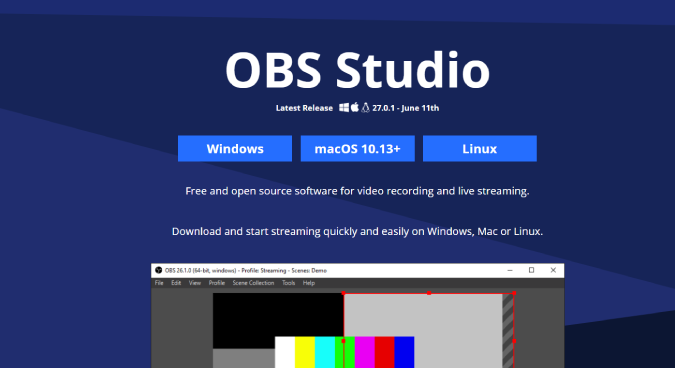
1. First, you need to download the OBS Studio. Once downloaded, open the file and install the OBS Studio app just like any other software. OBS Studio supports Mac, Windows, and Linux.
2. Launch the application once it is installed. Now, open the Settings option from the bottom right corner of the app.

3. Here, select the Video option to select the resolution that you want to record Google Meet meeting in. It will be set to high-resolution by default.

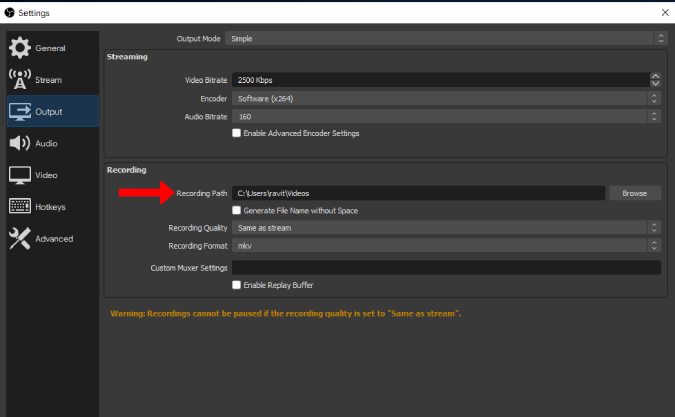
4. Then go to the Output option to change the Recording Format and Recording Path. Once done, click on OK to save changes.
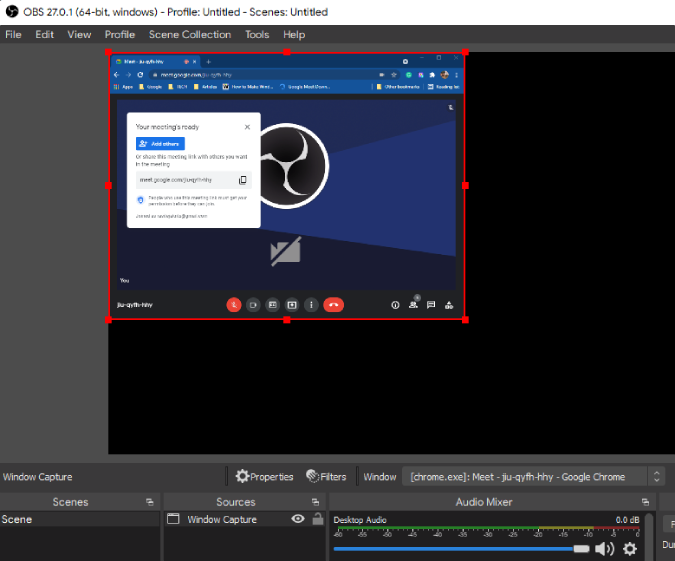
5. Now, click on the Plus(+) icon under the Sources tab and then select Window Capture.

6. Just click on OK in the pop-up window. Then click on the drop-down icon beside the Window option and select Google Chrome (or any browser that you are using for Google Meet) and click OK.

7. This will show you Google Chrome in a preview. If you have Google Meet tab open, you can find the Google Meet in a preview just like in the screenshot below.
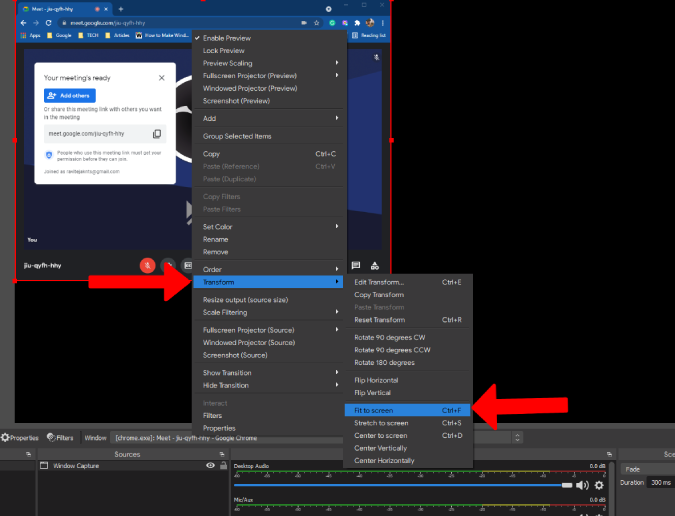
8. Just right-click on the preview and select Transform > Fit to screen.
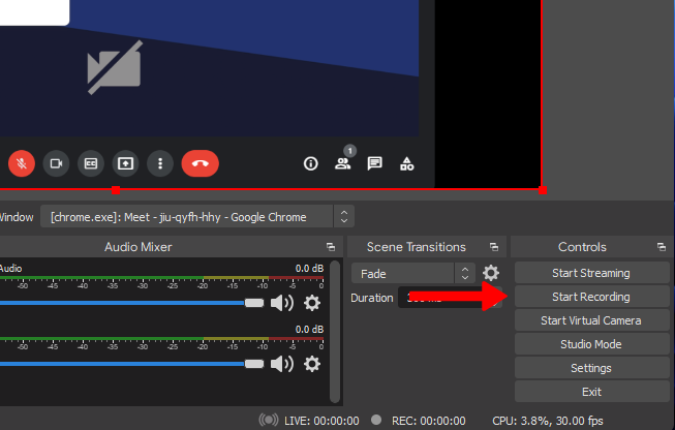
9. Once done, click on the Start Recording option at the bottom right corner. Now you can open Google Meet and continue your meeting just like normal.
10. To stop the recording, open OBS and click on the Stop Recording option at the bottom right corner.

This will save the recording to the Recording path you had set in the settings before.
4. Native Screen Recorders on Android and iOS
If you are looking to record Google Meet meetings on your phone, go for the native method if you are on a supported workspace plan. The entire process is similar to desktop. Others can use a screen recording app on Android and iOS as most phones these days offer a native way to record screens.
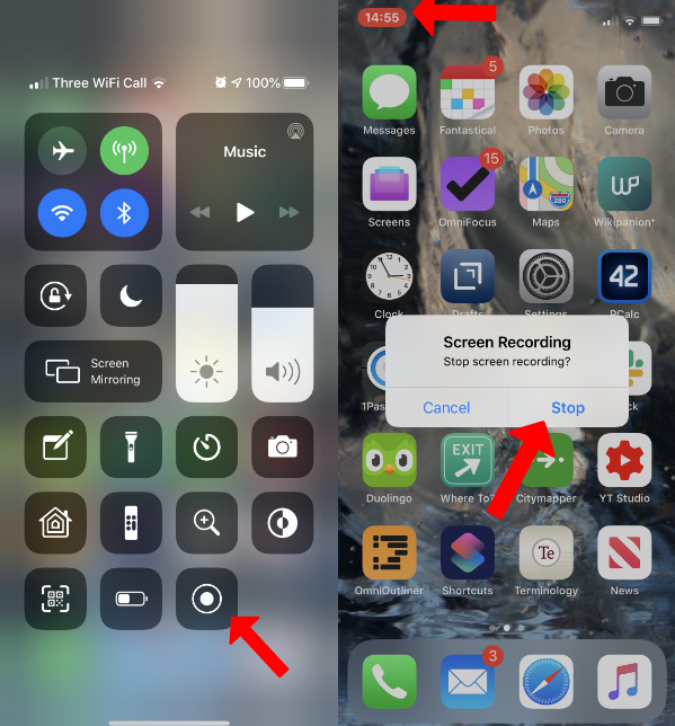
On iOS, go to Settings > Control Center and tap on the Plus(+) icon beside Screen Recording to screen recording feature to Control Center. Now open Control Center and tap on the Screen Recording icon to start the recording. To stop, again go to the Control Center and tap the same icon again. You can find recordings saved in the Photos app.
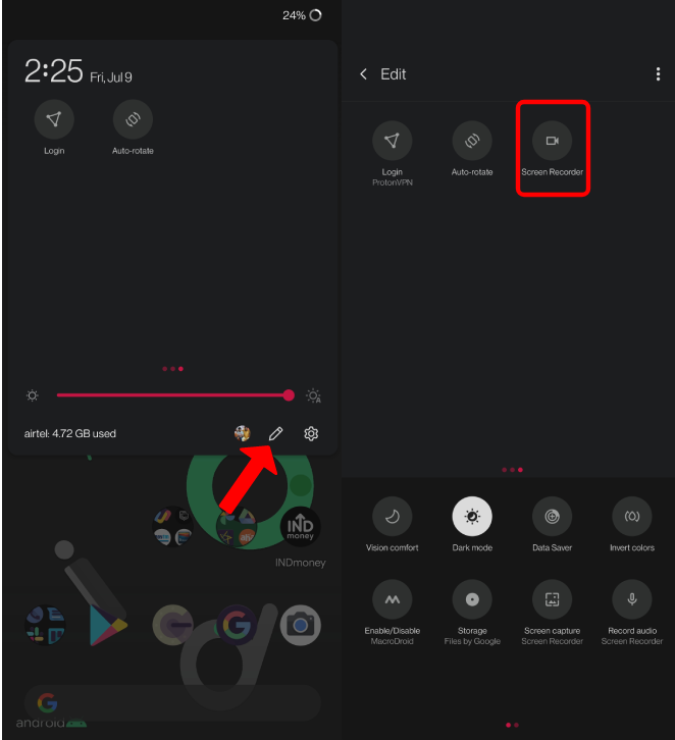
On Android, open the Quick Settings panel and look for the Screen Recording button. If you can’t find it, tap on the Edit option and search for the screen recording button to add it to quick settings. Now just open the quick settings again and tap on the screen recording button to start recording. To stop, again tap on the same Screen Recording button. The file will be saved to the screen recording folder in your local storage.

Not all Android phones have the screen recording option built into the OS. If you couldn’t find the screen recording option on your phone, then you can go for the third-party recording apps one of which we discuss below.
5. Screen Recorder | Play Store
There are a plethora of screen recording apps for you to choose from on Android. But I have picked the Screen Recorder app from Kimcy929 as it replicates the in-built screen recorder on Android phones. Once you have downloaded the app, open it and grant storage permissions to save the recording files.
1. Open Quick Settings panel and tap on the edit button. Now you will find a Screen Recording tile created by the app that you have installed. Drag and drop to add the tile to your quick settings panel.
2. Open the quick settings and tap on the Screen Recording tile to start recording.

3. To stop, again tap on the same Screen Recording tile. The file will be saved to the Screen recording folder in your local storage.
What to Choose to Record Google Meet
You can use the in-built option if you are a Workspace user with a supported plan. If you are not or if you want to keep the recording to yourself, Vmaker is a no-brainer. But if you are looking for a better quality output than 720p, then you can choose the OBS Studio. In-built options on Android and iOS works great. We recommend asking for the consent of all the people in the meeting before recording as recording without permissions can be illegal.
Also Read:
- How to Download and Use Fun Google Meet Backgrounds
- How to Auto Mute and Turn off Video on Google Meet