Though PNG images are optimized for web, they can still be bloated with a lot of unnecessary metadata, colors, and other stuff. By removing all that, you can dramatically reduce the image file size without losing any quality, depending on your settings. The good thing about compressing PNG images is that they not only take less space on your hard disk but also loads faster and uses less bandwidth.
In this post, I will show how to reduce PNG image file size on Windows, MacOS, Linux, Android, and directly in your browser using a web app.
Related: Why Screenshot Are Always Saves As Png ?
Table of Contents
1. Reduce PNG Online
There are many online web apps that let you reduce or compress PNG images without losing much quality (lossy compression). TinyPNG is one such website that I use on daily basis. What TinyPNG does is, it scans the uploaded image and intelligently reduces the number of colors in the image. This, in turn, reduces the image size dramatically. In case you are wondering because how TinyPNG selects the colors, the compressed image is almost indistinguishable from its original counterpart.
To start using, head over TinyPNG and drag & drop the PNG images you want to compress.

As soon as you drag and drop, TinyPNG starts to compress the uploaded images. Once down, click on the “Download” link next to the image name to download. If you’ve uploaded multiple images, you can download them as a zip file by clicking on the “Download All” button. If you want to, you can even save the compressed images directly in your Dropbox account by clicking on the “Save to Dropbox” button.

Apart from PNG’s, TinyPNG can also compress JPG images. Moreover, if you have Photoshop installed on your system, you can install the TinyPNG plugin for Photoshop and use it from there. This eliminates the need to manually upload and download images. It is a paid plugin though.
2. Reduce PNG in Windows
For Windows users, you can use a free app called PNGGauntlet. This free software for Windows combines different tools like PNGOUT, OptiPNG, and DeflOpt to reduce PNG image size as much as possible. Unlike the web app TinyPNG where there is a loss of image quality, all be it a small amount, PNGGauntlet compresses a PNG image without any loss of image quality (lossless compression).
To compress PNG image in Windows, head over to the official website, download PNGGauntlet and install it like any other Windows software.
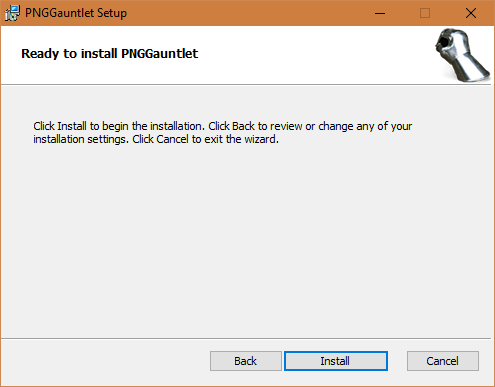
After installing, launch PNGGauntlet by searching for it in the Start Menu. Once opened, simply drag and drop the PNG images you want to compress.

Before you can compress, you need to set the output folder. To do that, click on the “Browse” button (three horizontal dots) next to the output field and select the desired destination folder. Once you’ve selected the output folder, click on the button “Optimize.”

After compressing the image, PNGGauntlet will show the reduced file size within the same window. Depending on the image, you might see different compression ratios.

If you want to customize the compression settings, you can do so by navigating to “Tools > Options.” However, I recommend you don’t mess with these settings unless you know what you are doing.
3. Reduce PNG in MacOS
To reduce PNG file size in MacOS, we are going use ImageOptim, a free and open-source application. Just like PNGGauntlet for Windows, ImageOptim compresses PNG images without any loss of quality. Apart from PNG’s, the software can also compress GIF and JPEG image formats. So, download ImageOptim from the official website, install and launch the application.
As you can see, the user interface is very minimal and straightforward. One thing to keep in mind while using ImageOptim is that it compresses your images in place. i.e, it will replace original images with compressed ones. So, create a copy of the original images before compressing.
To compress the images, drag and drop them into the main window. As soon as you do that, ImageOptim will automatically compress the images. You don’t have to press any buttons whatsoever.

Once compressed, you will see a green checkmark next to the image name. At the bottom of the window, ImageOptim will show how much disk space you’ve saved by compressing.

If you want to customize the quality settings, you can do so by clicking on the “Settings” icon appearing in the main window and then navigating to the “Quality” tab. By default, the image quality for JPEG, PNG, and GIF formats is set to 80%, which is good enough for most situations.

You can also change optimization level by navigating to the “Optimization Level” tab.

4. Reduce PNG in Android
Android has an app for everything. To reduce PNG file size in Android we are going to use a free app called Photoczip. This free app lets you compress, resize, and zip all your images. To start off, install Photoczip from Play Store and launch it.
On the main screen, the app will list all the folders that contain. Select the folder where you’ve placed your images. Since I placed all my images in the “png” folder, I’m selecting it.

Here, select all the images you want to compress by tapping on the “Checkmark” icon appearing on the upper-right corner. After selecting the required images, tap on the “Compress” button appearing at the bottom of the screen.

As soon as you tap on the button the app will compress the images. Once done, tap on the “Done” button to close the pop-up.

By default, Photoczip will store compressed images in its own folder, to know the folder location, tap on the “Menu” icon (three horizontal lines) appearing on the main screen and select the option “Settings.” You will see the default save location under “Image Save To” option. If you want to, you can change the default save location by tapping on it.

5. Reduce PNG in Ubuntu (Linux)
Last but not least, you can do the same thing in Ubuntu and any of its derivatives like Linux Mint using Trimage. This free application uses optipng, pngcrush, advpng and jpegoptim to compress and reduce image file size. To start off, open the terminal by pressing the keyboard shortcut Ctrl + Alt + T. Now, execute the below command to install Trimage.
sudo apt-get install trimage
Once installed, launch the application. As you can see, the user interface resembles the Mac application ImageOptim.

So, just like in Mac, drag and drop the images you want to compress and the application will automatically compress them.

Again, Trimage will compress the images in place. So, create a copy of the original images before compressing. This helps if there are errors or quality loss.
That’s all there is to do and it is that simple to reduce PNG file size in Windows, Mac, Linux, and Online. If you think there is a better way to do it then share it in the comments form below.
Also Read: Detect if the Image is Photoshop Fake or Not