NVIDIA Shield TV 2019 comes with a redesigned remote full of features such as backlight buttons, IR volume controls, and a dedicated Netflix button, which when press open the Netflix app on your TV. This command is hardcoded on the remote and we can’t just replace it with anything, at least not without third-party app. In this article, I’ll show you, how to remap the Netflix buttons to open other apps. Let’s begin.
Before we begin
Incase you didn’t noticed, the 2019 Shield TV remote already has one customizable button; the Quick Settings button. By default, it shows the Settings pane but you can change it to whatever you want. You can even set it to open an app such as YouTube, Chrome, etc.
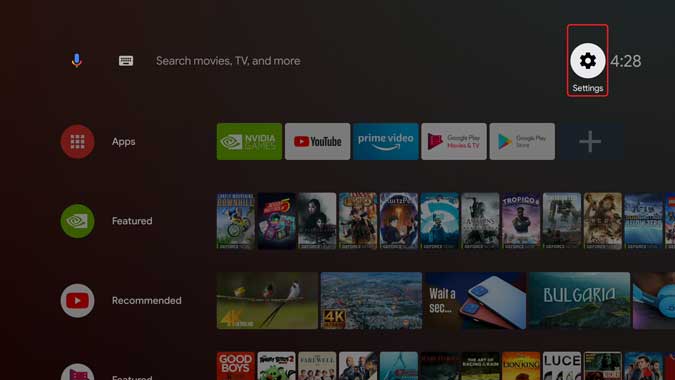
Step 1: Start by opening the Settings page, click on the gear icon on the top right corner, next to the clock.
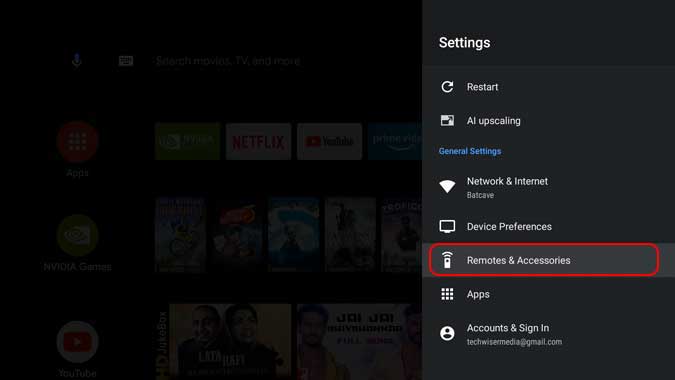
 Step 2: Navigate to Remote & Accessories under General Settings.
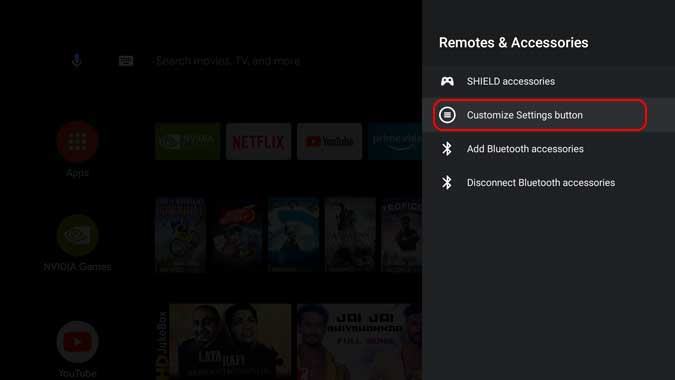
Step 3: You’ll find the Customize Settings button option, click to reveal the options.
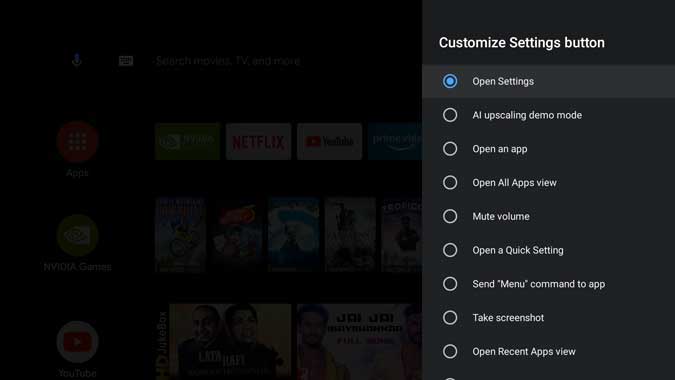
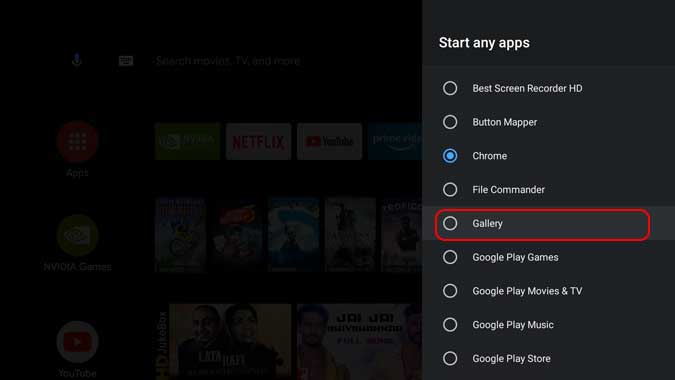
Step 4: On this page, you can choose what you want the button to do. For example, you can mute volume, take a screenshot, or open an app. Select ‘Open an app‘ if you want to assign an app to the button.
Step 5: Select an app of your choice and that’s it. Now, the button would open the app every time you press the button.
Map any button on the Shield TV remote
The above method works flawlessly but has one small problem, you can only assign different actions to one button. Frankly, I don’t even watch Netflix that much and I’d like to change it to something else. To achieve this in the easiest way possible is to install a Button mapper app. The app is available on the Play Store and you can just ask Assistant to install it for you.
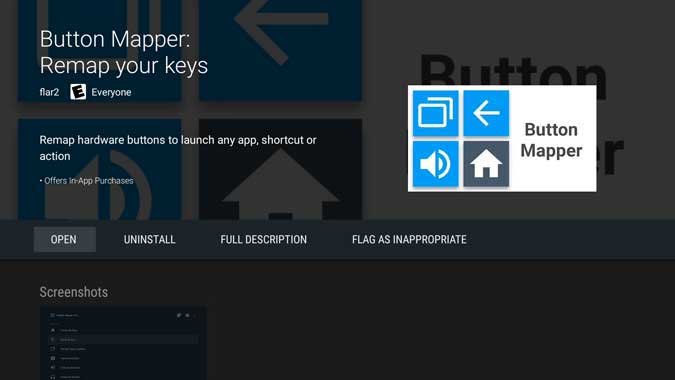
Step 1: Install and open the app from the Play Store.
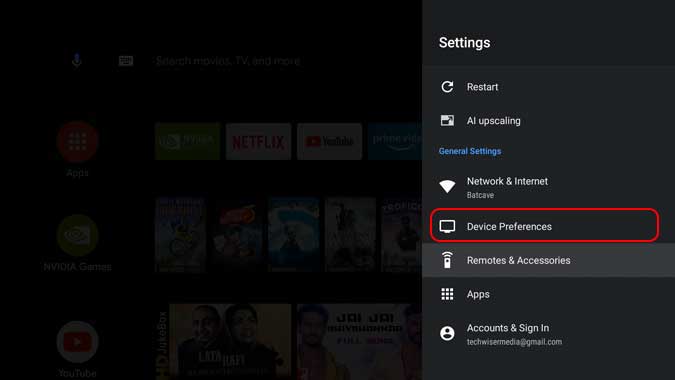
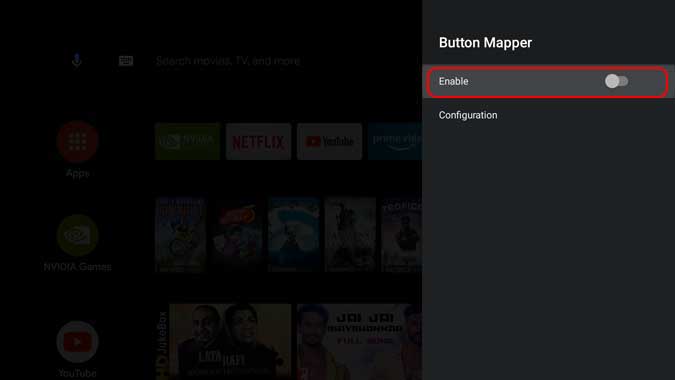
Step 2: Before assigning actions to Shield TV remote buttons, we have to enable an accessibility service that would allow us to override the preexisting commands. Open Settings and navigate to Device Preferences.
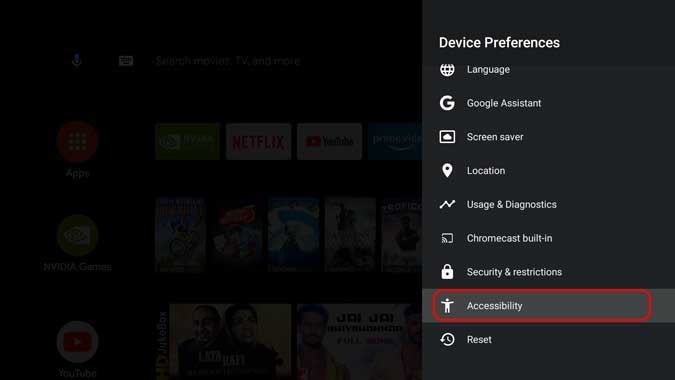
Step 3: Scroll to the bottom and select the Accessibility option from the list.
Step 4: You will find Button Mapper, select that option and toggle the Enable switch next to it.
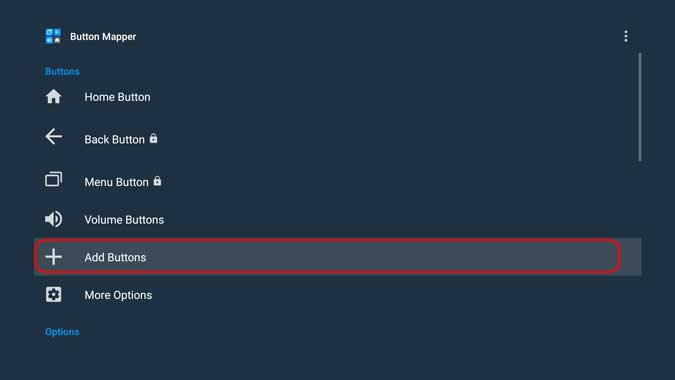
Now, go back to the Button Mapper app, here you will find a list of buttons to which you can assign actions. You will see a Home button, a back button, and even volume buttons. However, the Netflix button is not recognized by the app so we’ll manually add it to the list.
Step 5: Select Add Buttons.
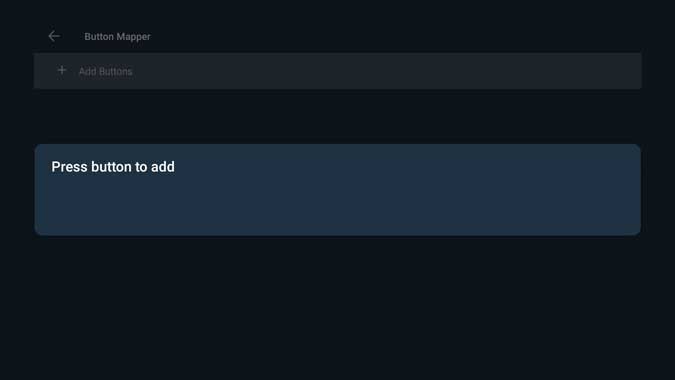
Step 6: The app would now ask you to add the button, Press the Netflix button or any button that you want to customize.
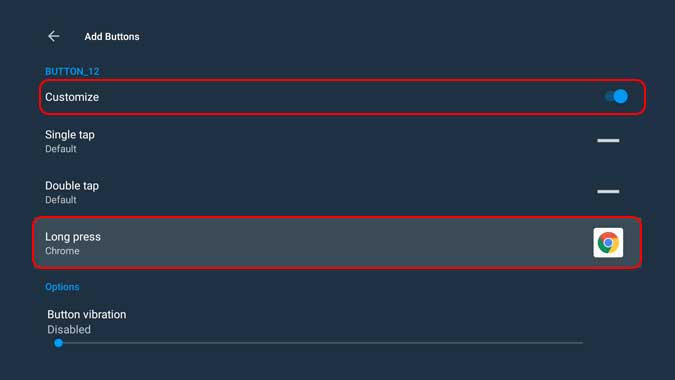
Step 7: Now that the button is mapped, simply enable the Customize toggle switch and assign an action. You can choose between three different triggers; single tap, double-tap, and long press. It means that you can assign three different actions to the same buttons.
There you go, that’s all you need to do to customize the remote buttons on your 2019 Shield TV. It does, however, has a drawback. It doesn’t block the existing action assigned to the button but instead superimposes the custom action. For example, if you were to customize the Netflix button on the Shield TV remote with Plex or YouTube, it would still open Netflix when you press the button but right after it does it would also open the customized action so you won’t even notice it.
Remap remote buttons on NVIDIA Shield TV, Pro, and Tube?
While the first method is fine if you want to customize one button on the remote. however, the Button mapper app gives you the power to customize every button on the remote in three different ways. Theoretically, you can assign 48 different actions to all the buttons on the remote which is just overkill.