Ever since Apple switched to making its own chips, the gap between iPhones, iPads, and MacBooks has reduced. Since the internal CPU architecture is the same, you can install and run iOS apps almost flawlessly on an M1 MacBook. Of course, ‘almost flawlessly’ because the MacBooks aren’t touch screen yet.
So, if you have just got your shiny new MacBook M1, running iOS apps on Mac is easy but tricky at the same time. The tricky part is Apple doesn’t allow you to sideload iOS apps on MacBook. Hence, apps that aren’t available on the Apple App Store will give you a hard time installing on the Mac.
Basically, there are two ways to run iOS apps on an Mac M1 chip. Let’s start with the easy one.
Installing and Running iOS Apps on Mac
1. Download from the Apple App Store
The most straightforward method to run iOS apps on a Mac is to install them from the Apple App Store.
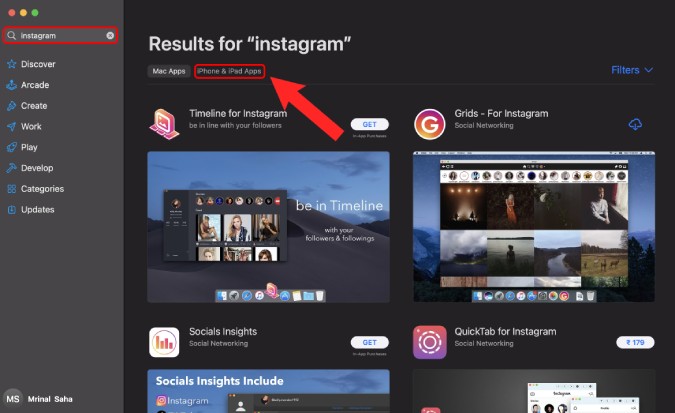
1. To do that, just head over to the App Store, type the iOS app name that you want to install, and hit Return.

2. Once the search results appear, you’ll see 2 sections at the top. By default, App Store shows results only for Mac apps. To switch to the iOS apps, click on the iPhone & iPad Apps tab.
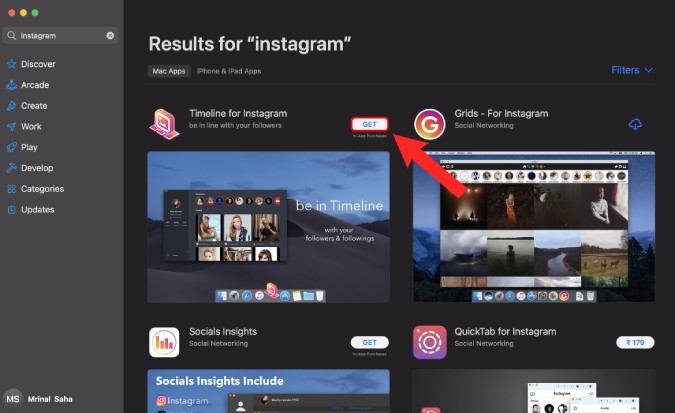
3. Once you find your desired app, click on the Get button to install the iOS app.
The downside to this method is app availability. The App Store search doesn’t display all iOS apps that are available on an iPhone or iPad. For instance, as you can see in the above example, Instagram doesn’t show up in the App Store search though available on both iPhone and iPad.
Why? Apple does this to help users avoid installing iOS apps that might not work properly on a Mac. However, at times, you just need to install the apps to try them out or even install one of your own apps to test. So, in such cases, you would have to use a third-party app like iMazing as described in the next method.
2. Use iMazing App
iMazing is an all-in-one app that lets you transfer iOS data as well as backup your iPhone, iPad, and iPod. But, in our case, we just need it to download and install iOS apps on our MacBook M1.
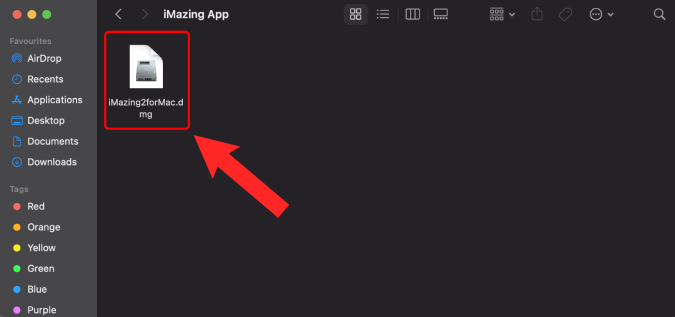
1. To do that, download iMazing from the official website.

2. Once you have downloaded the iMazing app, double-click on the DMG file and install the app.
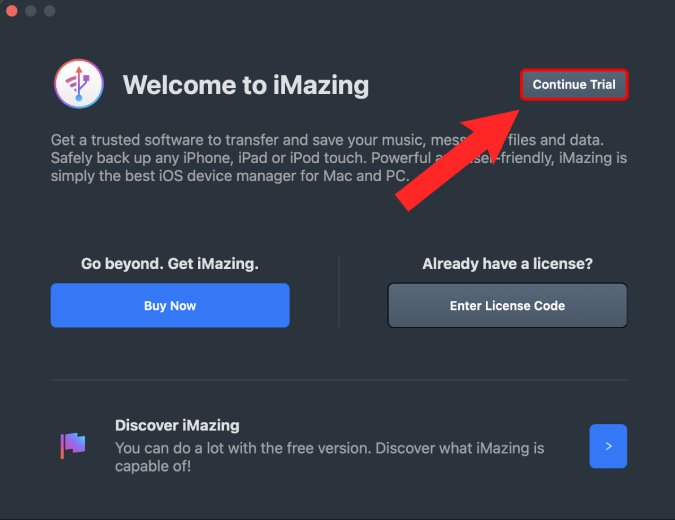
3. When you open the iMazing app, you would be asked to enter a license code. For our use case, we don’t need the paid version. Hence, click on the Continue Trial button to use iMazing in trial mode.
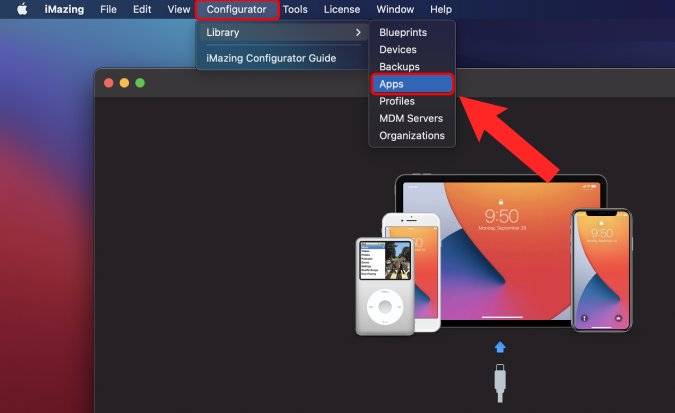
4. On the next step, you’ll be asked to connect an iPhone/iPad/iPod to your MacBook. This isn’t required for our purpose. Hence, we can skip this process. Just go to the top-level menu, click on the Configurator option > Library > Apps.
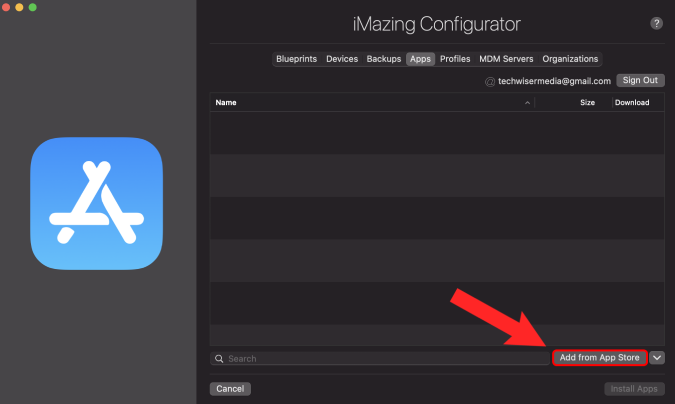
5. On the Apps page, you won’t see any iOS apps. We need to add iOS apps here from the iOS store. For that, click on Add from App Store button at the bottom.
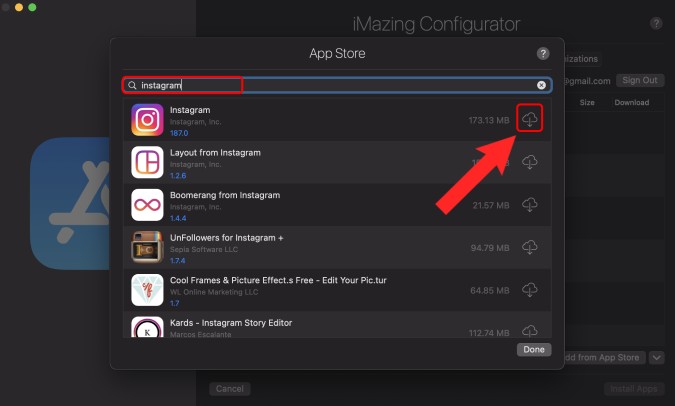
6. From the app list, type the app name and hit Return. For instance, let’s search for Instagram. Once you have the app search populate, click on the Cloud icon beside the app name to add it to app list.
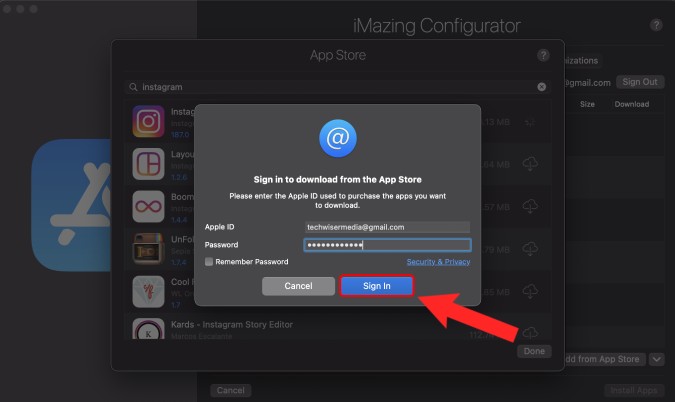
7. Next, you’ll be asked to sign in to the App store with your Apple account.
8. Once the app is downloaded, you’ll see it in the Apps tab on the iMazing app. However, the work is still not done. Right-click on the app and select Export .IPA option. IPA is the package format for the iOS app. We would need this IPA file to install Instagram on MacBook.
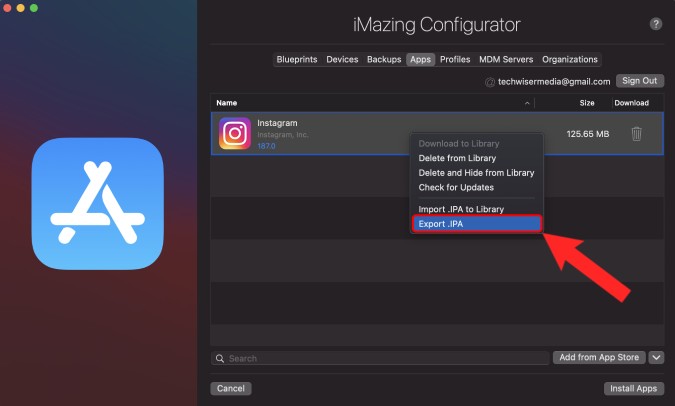
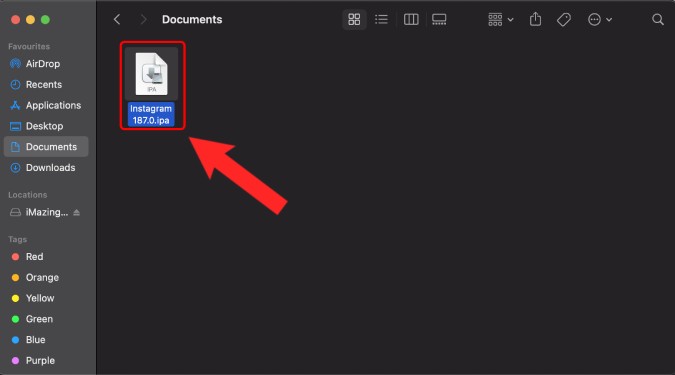
9. Select the folder location where you want to download the IPA file. The folder location is irrelevant but make sure you have it in an easily accessible place like Desktop, Downloads, etc.

10. Now, install the Instagram app by double-clicking on the IPA file.
11. You can access the application from the Applications folder or the Launchpad.

Wrap Up: Install and Run iOS Apps on Mac M Series
So these were the two ways to run iOS apps on Mac powered by the new M series. Apple stops you from sideloading iOS apps on MacBook due to compatibility reasons. iOS apps don’t scale well on a Mac screen and sometimes don’t even work as intended due to lack of touchscreen.
In case you face any issues while using iOS apps or random app crashes, it’s better to uninstall the app. That said, I have been using Instagram, Telegram, and a couple of other iOS apps flawlessly on the M1 for some time now.
Also Read: Top 9 Mac Apps to Improve Productivity