Assigning static IPs to each network device can be cumbersome. We advise you to do it on your router since it makes things pretty simple. However, assigning static IP at device level would override the settings on the router. Moreover, there are times when you don’t have access to the router. For those scenarios, we have a detailed article on how to assign static IP address to various devices. We are covering Ubuntu separately here since it has much more complexities.
So, here are 3 ways to set static IP on Ubuntu or any Unix based OS.
1. Setting Static IP Address Ubuntu Using GUI
We would be using Ubuntu here for the demonstration. But most of the configuration and settings would be similar on any Unix-based OS.
So, there are several ways to deal with the network-manager, GUI being the easiest. If you are new to Ubuntu and don’t like the command line, I would suggest changing it through the GUI. Firstly, we would need Subnet Mask before we start setting the static IP. To get these values, right-click anywhere on the desktop to open the terminal.

Once the terminal window opens, we need to run the following command.
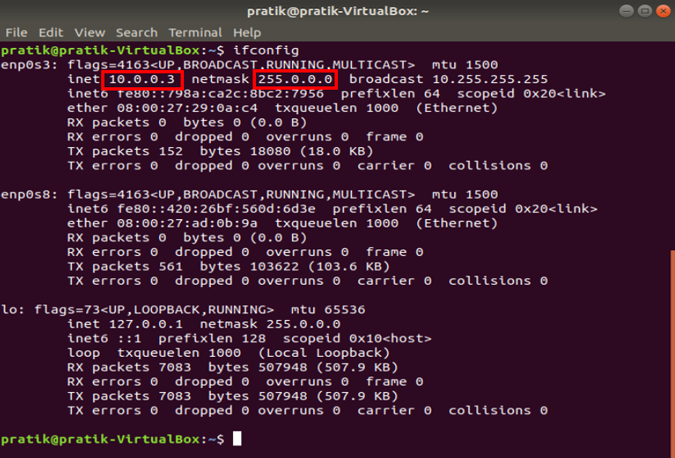
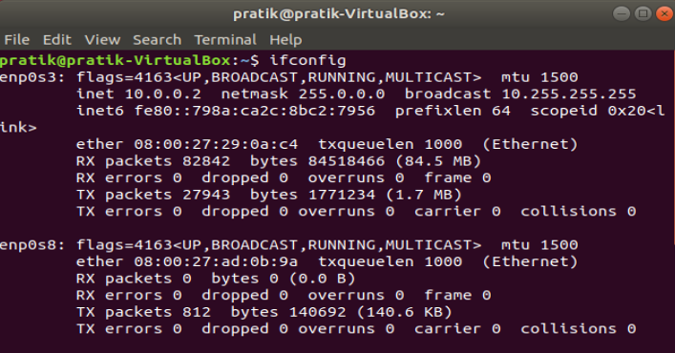
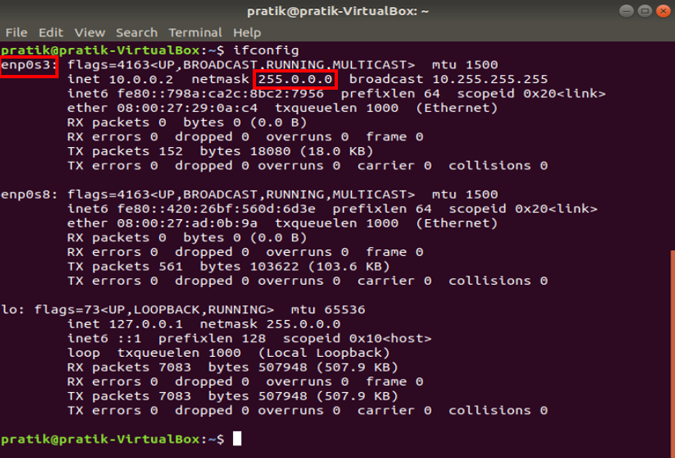
ifconfig -a
Note down the Netmask and the inet value we will need this in the later steps. In my case, the inet value is 10.0.2.15 and netmask is 255.0.0.0.
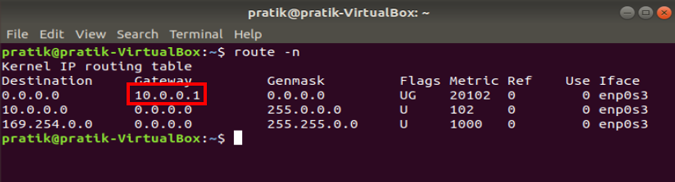
Once you have the subnet mask noted down, we also need the gateway address. Generally, it’s the first address of the network but to be sure let’s just check it. Run the following command on the terminal.
route -n
This command will show you the IP routing table. The first entry in the table will tell you the Gateway Address. In my case, the first entry is 10.0.0.1 which in turn is the gateway address.
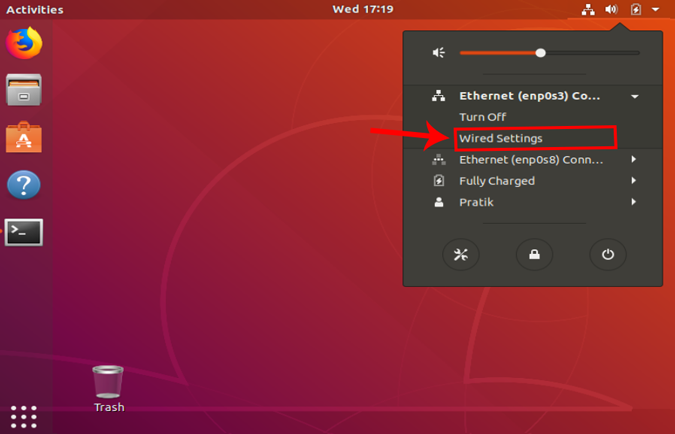
It is pretty simple from now on. Open the Network settings. To do that, click on the Network Icon at the top right corner of the desktop.
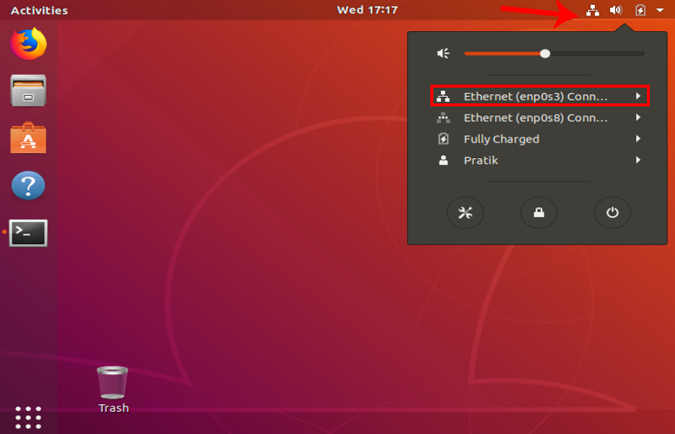
Now, navigate onto the active network. I am connected via a LAN cable so it would be Ethernet for me. In case, you are on Wi-Fi you should get the same in the tray. Make sure you click on the active network and expand the menu for more options. Click on Wired Settings from the extended menu to open the Network settings.
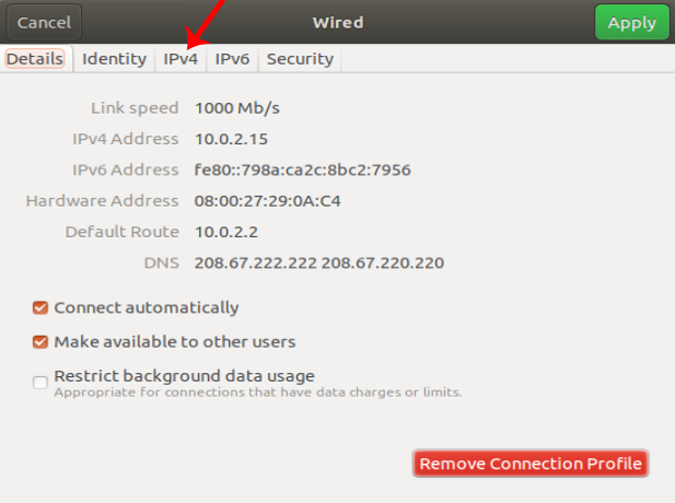
Once you get the Network Settings window, make sure you are on the Network tab. Click on the Settings icon beside the active network to open the adapter properties.
![]()
When you get the wired settings pop-up window, navigate to the IPv4 tab to change the IP settings.
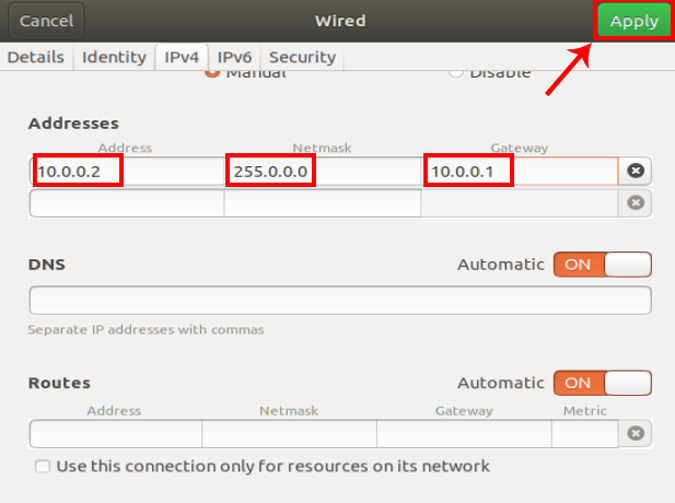
On the IPv4 tab, select the radio button which says “Manual“. A new window will appear with 3 text fields – Address, Netmask and Gateway. Now, before you apply the changes, we need to understand what are these values.
The IP address value which you set should be in the range of your earlier IP address. For eg, If your IP address was 10.0.0.2, your static IP should be between 10.0.0.1 – 10.255.255.255. Similarly, if it is 192.168.16.1, your static IP should be between 192.168.16.1-192.168.16.255. If you enter values outside your IP range, you might have issues with your Internet connection.
Netmask or Subnet Mask is used for subnetting the network. In simpler terms, subnet mask decides the number of IP addresses be allocated within a network. As, I’ve mentioned in the starting of this tutorial, my subnet mask is 255.0.0.0.
Finally, the gateway, it is the router’s IP address. Usually, it’s the first IP allocated to the network, or you can find out by using the command route – n as we did above. In my case, the gateway is 10.0.0.1.
Once you have all these values, you need to enter the IP address, Netmask and Gateway Address which we have noted down before accordingly. Once it is validated, you can click on the Apply button to register the changes.
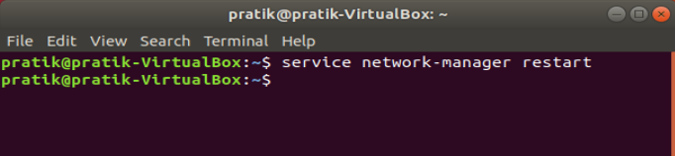
Again you need to restart the network manager for the changes to take effect. You can do it manually via command line by just using the following command
sudo service network-manager restart
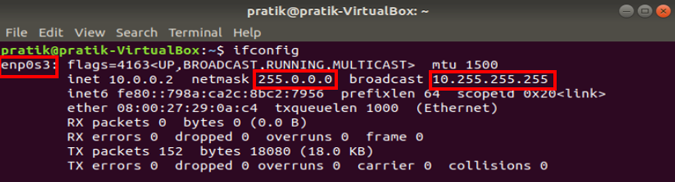
Alternatively, you can just switch off and switch on the Network adapter. Once done, run ifconfig on the terminal to check the IP address. It should be the same IP address which you have specified in the IPv4 settings.
2. Setting Static IP Address Ubuntu Via Command Line
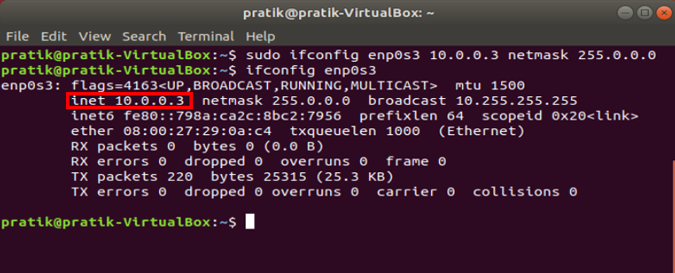
The fastest way to do this would be via command line. If you are good with commands then this method should do the trick. However, to set a static IP via terminal we would need Subnet Mask like before and also the Adapter name. Do an ifconfig -a to fetch those values.
Once you have the values, run the following command.
sudo ifconfig enp0s3 10.0.0.3 netmask 255.0.0.0
In this command, eng0s3 should be replaced by your adapter name; 10.0.0.3 by your static IP address followed by your netmask.
When you run the following command, the entry will not be logged in the configuration file. This is not the standard practice if you are managing a server.
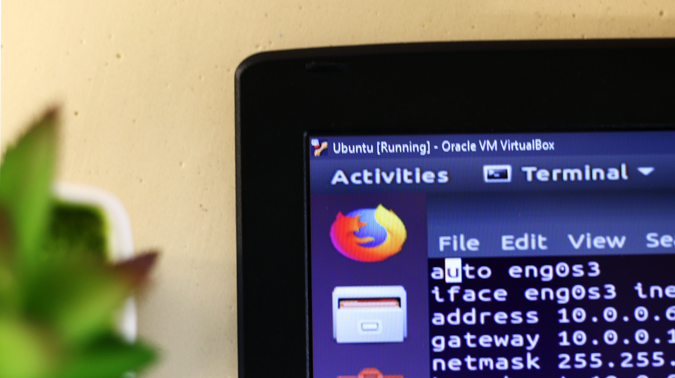
3. Setting Static IP Address Ubuntu Via Configuration File
The problem with all the above-mentioned methods is you don’t have things documented at a place. It’s not at all recommended to make changes this way on a server. The recommended way is by editing the configuration file. This way all the changes are documented and you can simply override the previous change by commenting the lines.
The configuration file is /etc/network/interface. You need admin permissions to edit this file. But before, we will need lots of values like Subnet mask, gateway address, broadcast address and adapter name. Just run ifconfig -a on the terminal to get the adapter name, Subnet mask and broadcast address values.
For the gateway address, run the following command on the terminal.
route -n
This command will show you the IP routing table. The first entry in the table will tell you the Gateway Address. In my case, the first entry is 10.0.0.1 which in turn is the gateway address.
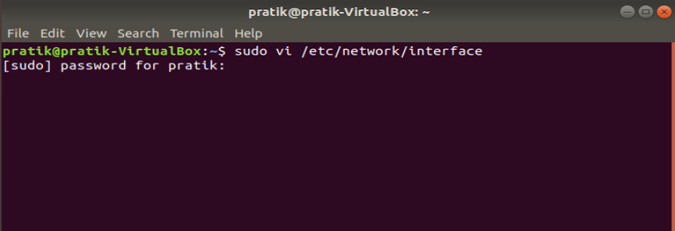
Now we need to open the configuration file to add changes. To do that, run the following command.
sudo vi /etc/network/interface
If you are not familiar with vi editor and controls, you can also use gedit. gedit is a graphical interface for editing files. To open the file in gedit run the following command
sudo gedit /etc/network/interface
Once the file opens, it should either be blank or have previous configurations. In case you have configurations defined previously, just comment them out instead of deleting. Prefix all the lines with “#” and the lines would render useless now. Now, we would need the adapter name, subnet mask and broadcast address which we have noted down earlier.
Press “i” if you are using vi to get into insert mode. Type the following code and replace the values accordingly with your own values
auto enp0s3
 iface enp0s3 inet static
 address 10.0.0.6
 netmask 255.255.255.0
 network 10.0.0.1
 broadcast 10.0.0.255
 gateway 10.0.0.1
But before you enter these lines, you need to understand the code. “auto enp0s3” will restart the interface automatically at booting of the system. “iface enp0s3” is a suffix for defining the interface enp0s3. “inet” stands for IPv4 protocol while “inet static” means defining a static IP for the specified network adapter. Rest of the lines are pretty self-explanatory.
If you want to revert back to DHCP, you can change it to “inet dhcp”.
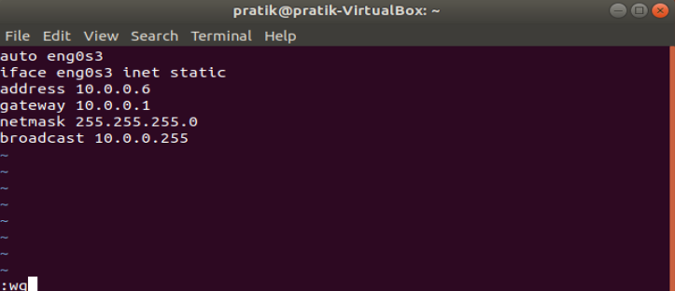
Once you have appended the code successfully, press Esc and type “:wq” to save the changes. Now, we need to restart the network for the changes to take effect. Run the following command to do restart the network adapter.
sudo service network-manager restart
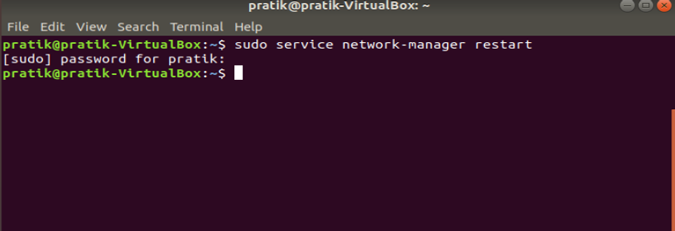
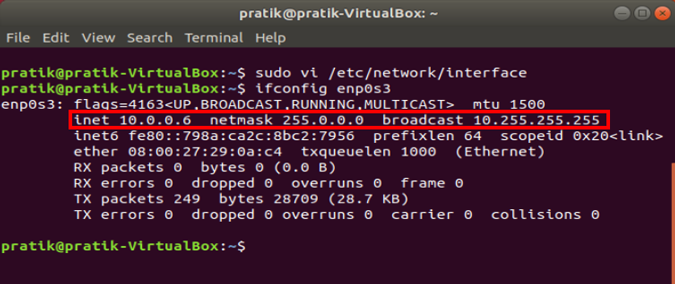
Post the restart, changes would take effect. To view the changes, run ifconfig again and see the following values. It should match the values that you have defined in the configuration file.
In case you want to make changes, comment out the previous lines and append the changes.
Wrapping Up: Setup Static IP Address in Ubuntu
If you are in a home network, then defining static IPs via the router would be the recommended method. In case of exceptions, you can try to assign Static IP Address In Ubuntu via GUI or command line. If you manage a server then follow the best practices and define static IP in the configuration file.
Once you have defined static IP, your device should use the specified IP and will override the changes made at the router level. Further, you can try user management in Ubuntu or try Changing Your GRUB 2 Splash Image In Ubuntu 12.04.
In case of any issues or queries, write it below in the comments and I will get back to you.