There are multiple ways to take screenshots on Windows 10. You can either use the conventional PrtSc or the native Snipping tool or even third-party apps such as Lightshot. But, there is another handy way to take a screenshot, email them or even send them to nearby devices. The tool is known as Snip & Sketch and here’s how you use it.
Snip & Sketch vs Snipping Tool
The “Snipping Tool” is a legacy utility being carried forward from Windows 7 like the Control Panel. With the end of support for Windows 7 just a month away, Microsoft will eventually remove these tools in a future Windows 10 update. All the features of the Snipping Tool are carried forward in Snip & Sketch with cosmetic overhauls. The new Windows snip seems more handy with a non-intrusive interface that works well with the clipboard manager.

How to Use Snip & Sketch in Windows 10
Unlike the conventional Snipping Tool, you cant trigger Windows Snip directly by pressing Win+Shift+S. This will trigger the Windows snip and you would see a small toolbar at the top with everything else faded out. Alternatively, you can even access the “Snip & Sketch” tool through the Windows Start menu.

The Snip toolbar includes four different options. You can either take a rectangular snip, a free-form snip, a fullscreen snip, and of course, app window snip which automatically detects the selected window once you hover your cursor over it. Do note that, in order to snap an app window snip, it needs to be running in the foreground.
Once you have taken the snip, the image is pasted on your clipboard automatically. You can easily do a “Ctrl + v” to paste the screenshot in apps like Slack, WhatsApp or Gmail. The screenshots are not saved as an image automatically. To do that, you have to save the image via the ‘Snip and Sketch’ app. You can open the app via the Start menu search or click on the app notification in the Action Center.

Within the app, you get numerous options to crop, annotate, highlight, add notes in the image. Moreover, you also get a share button which makes it handy to either share the image via Microsoft mail or nearby Windows devices by Bluetooth and Wi-Fi.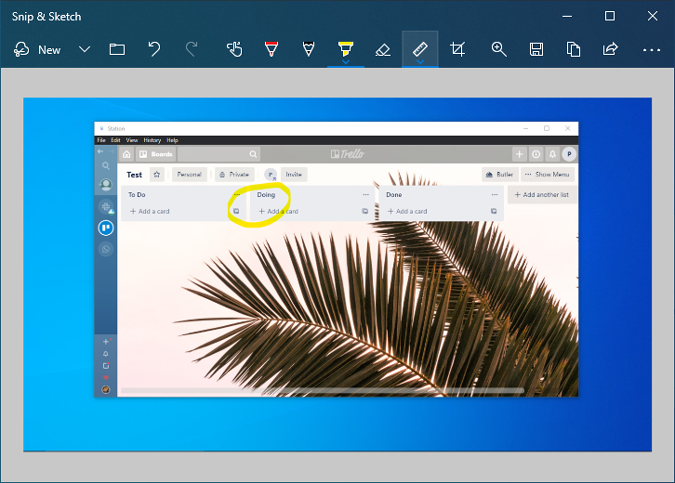
Disable Snip & Sketch notifications
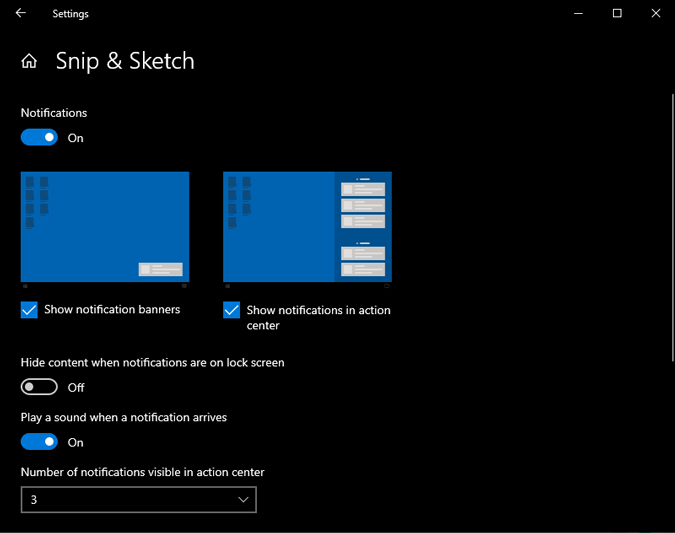
In case you don’t want the notification pop-up every single time you take a snip, you can disable it through the “Notification & App Settings”. In the recent Windows 10 update, you have the option to disable notification banners and action center notifications separately. Just head over to the Notification & App Settings, sort the app notifications by most recent and you would have “Snip & Sketch” on top of this list. Tap on it and you should be able to customize screen snip notifications.
For more queries or issues, let me know in the comments below or come hang out with me on Twitter.
Also Read: ScreenToGif – Best GIF Editor for Windows