When you are using the same Apple ID and have enabled the appropriate options in Settings, iCloud connects your iPhone and Mac, syncing all contacts on both devices. In this guide, we will go a step further and show you multiple ways to sync or transfer contacts from iPhone to MacBook when using the same or even different Apple IDs. Plus, we will also see how to import all the contacts or just a few selected ones.
Table of Contents
1. How to Sync Contacts from iPhone to MacBook via iCloud Using Same Apple ID
If you are a long-time Apple user, chances are you use iCloud to store your contacts. When you set up your iPhone or Mac and sign in using your Apple ID, things like iCloud contacts, reminders, calendars, etc., are automatically enabled, which sync data between different Apple devices. But if you later turned it off, are unsure if you have it enabled, or if contacts do not sync between iPhone and Mac, follow the steps below.
On iPhone:
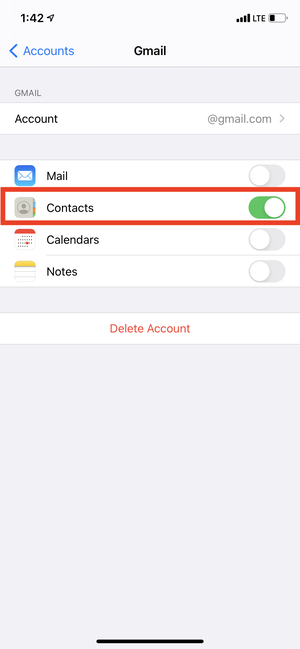
1. Open the Settings app, tap on your name from the top, and then tap on iCloud.

2. Here, make sure the switch for Contacts is green.

On Mac:
1. Click on the Apple logo from the top left and choose System Preferences from the drop-down menu.

2. Click on Apple ID. If you are using macOS Mojave or earlier, you may not see Apple ID. So, click on iCloud instead.
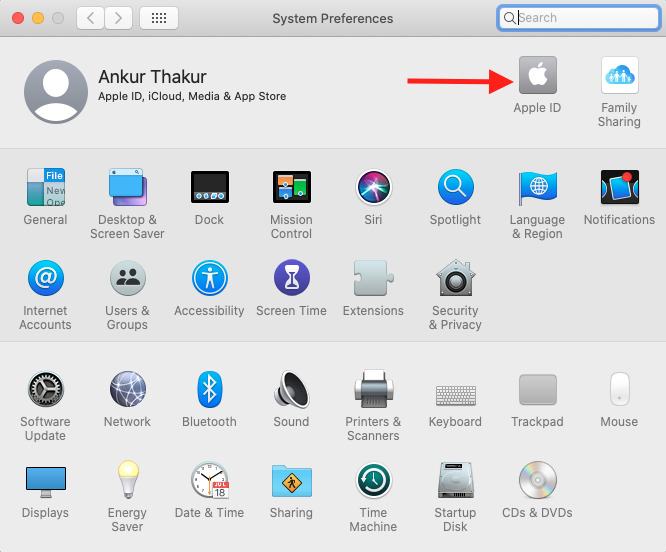
3. Just below your name, ensure that the Apple ID mentioned here is the same as the one on your iPhone. Next, from the left sidebar, click on iCloud and make sure the checkbox for Contacts is ticked.

You have successfully set up to sync contacts from iPhone to MacBook.
The benefit of using iCloud to sync contacts is that it happens automatically and almost instantly syncs all contacts and changes between your iPhone and Mac, thus keeping everything updated on all devices. In short, it is a “set once and forget” setting.
The only drawback is it does not work if iPhone and Mac (say, given by your office) have different Apple IDs. But we have a fix. Read on.
2. How to Sync Contacts From iPhone to MacBook via Google/Microsoft Account
If you have been an Android or Windows user and have recently stepped into the Apple garden, chances are you use Google or Microsoft account for storing contacts. So, here is how you can add your Google, Microsoft, or any other account to import contacts on your iPhone and Mac.
On iPhone:
1. Open the Settings app, scroll down, and go to Contacts > Accounts.

2. Tap on Add Account.
3. From the list here, select the service where your contacts are stored and complete the required sign-in process.

4. After signing in, ensure the switch for Contacts is on.
On Mac:
1. Click on the Apple logo from the top left and open System Preferences.
2. Click on Internet Accounts.

3. From the bottom left, click on the plus icon (+) and choose the desired account (like Google, Exchange, etc.) from where you want to sync contacts.

4. It will open the sign-in page. Here, enter the correct sign-in credentials, complete the process, and allow macOS the required permissions.

5. From the small popup, make sure to keep Contacts checked and click on Done.

You have successfully added Google (or your desired account) for importing and syncing contacts on your iPhone and Mac.
3. How to Import Contacts from iPhone to Mac via iCloud Web
For my office work, I use a personal iPhone and a MacBook Pro, which is allotted to me by my office. My iPhone has my personal Apple ID that saves the contacts in iCloud. Whereas the office Mac has the company Apple ID and iCloud contacts are turned off. In this situation, if I ever have to see or get my iCloud contacts on the office Mac, I use the iCloud web. Here is how.
1. Visit iCloud.com on the Mac and sign in using your Apple ID.
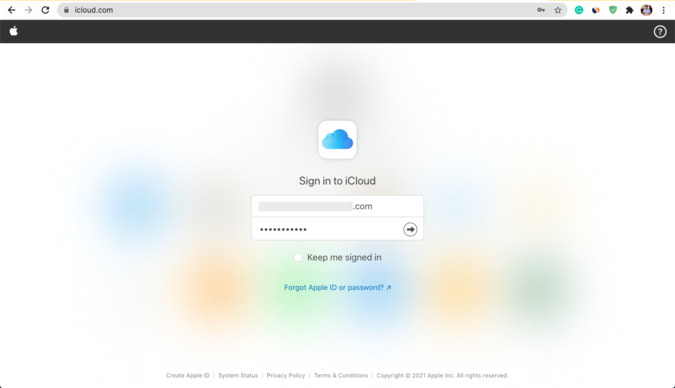
2. Click on Contacts.

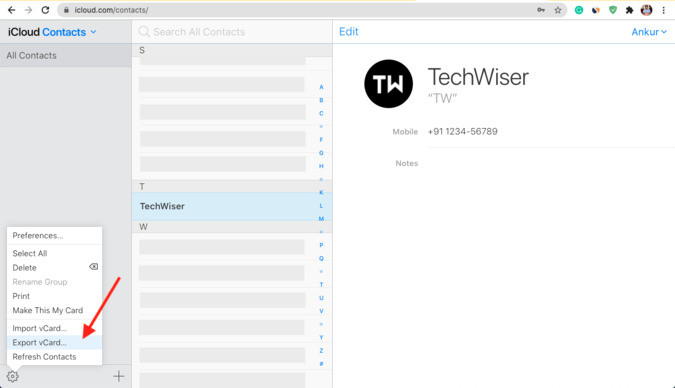
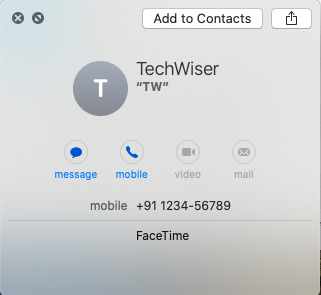
3. Here, you will see all your iCloud contacts. Click on one to see the phone number, email, and other details. You may copy it from here.

4. Or, to import a contact, select it and click the settings gear icon from the bottom left. Next, click Export vCard. If you want to select and export multiple contacts, press & hold the command key and click on the desired contacts to select and export them. You also have the option to Select All.
The selected contacts will be downloaded as a .vcf file. You can open it to add it to macOS Contacts app. Or, if it has a single contact, select and press the space bar to preview it offline whenever needed. You may also save this .vcf file in iCloud Drive, Google Drive, etc., for additional backup.
4. How to Import Contacts from iPhone to Mac via iTunes or Finder
This method works only if you do not use iCloud to store and sync contacts on your iPhone. If you use iCloud, then contacts are already syncing wirelessly, thus making wired transfer obsolete. So, if you wish to follow the steps below, open the iPhone Settings app > your name from the top > iCloud > and ensure Contacts are disabled.
1. Connect the iPhone and Mac using the appropriate Lightning cable.
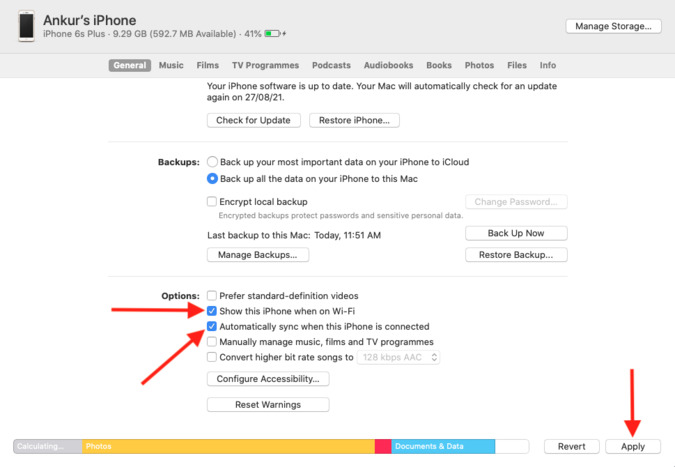
Note: For the future, you may also enable to sync over Wi-Fi. After this, when iPhone and Mac are on the same Wi-Fi network, they will sync automatically. Check these two boxes that you see in the image below and click on Apply.
2. On macOS Mojave and earlier, open iTunes. On macOS Catalina and later, open Finder. (I am using Finder.)
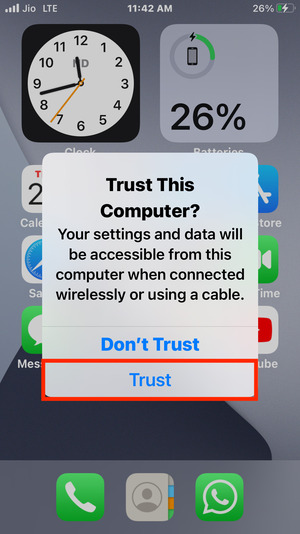
3. Locate the iPhone inside Finder or iTunes and click on Trust if asked.

4. Next, unlock your iPhone, tap on Trust, and enter your iPhone passcode.
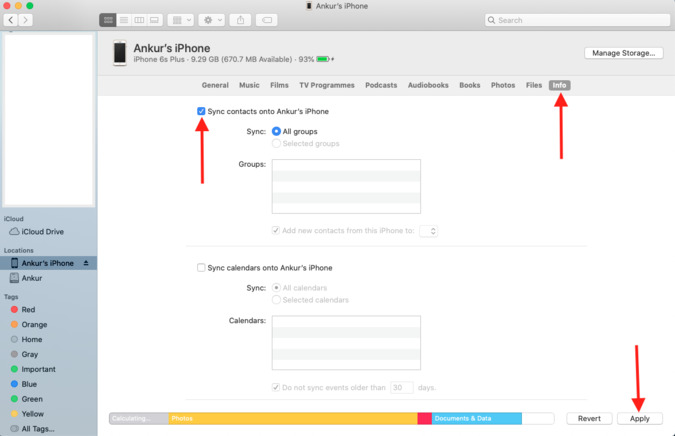
5. Click on Info.
6. Check the box for Sync contacts onto [iPhone name]. To sync everything, select All groups. This will match the contacts on your iPhone and Mac and sync those that are missing from both devices. Finally, click Apply.
Note: If you would like to replace existing iPhone contacts with those on the Mac, click on Replace Contacts.

5. How to Transfer Contacts from iPhone to Mac via AirDrop
Before you begin, make sure you have switched on Wi-Fi and Bluetooth on your Mac. Also, open Finder > AirDrop and set the visibility to Everyone. If AirDrop is not working, learn how to fix it.
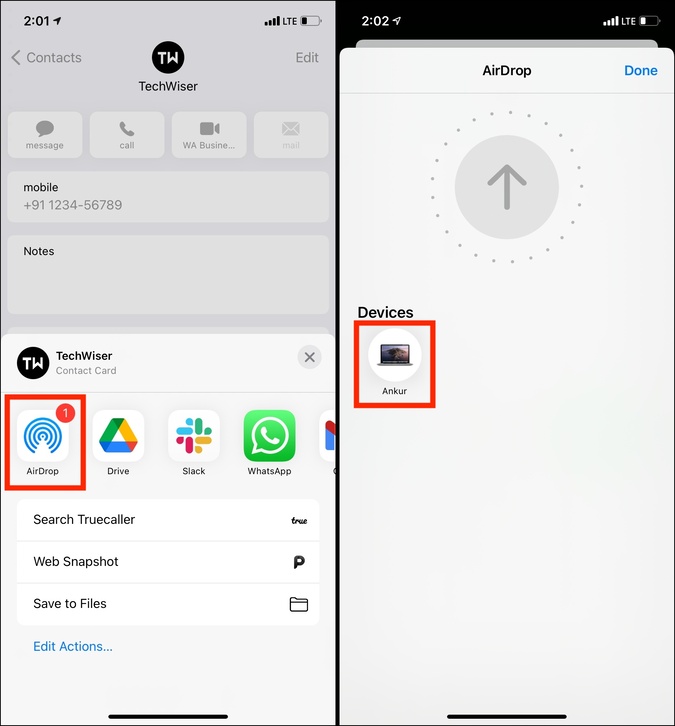
1. On iPhone, open the Phone app > Contacts and tap on a contact name. You can not select multiple contacts.
2. From the bottom, tap on Share Contact.

3. Tap on AirDrop and select the Mac to send the contact there. It will transfer as a vCard, and you can see it in Mac’s Downloads folder. Open it to add to the macOS Contacts app.
6. Use Email, iMessage, Google Drive, or Similar Apps to Transfer Contacts from iPhone to Mac
Just like AirDrop, you can use email, iMessage, notes, Google Drive, or other such apps to transfer contacts from iPhone to Mac. This method is useful if you wish to quickly have one (or a few contacts) on your computer.
1. Open the Phone app > Contacts and tap on a contact name.
2. Tap on Share Contact and choose email, iMessage, notes, or one of the other apps.
3. Once you have added/sent/saved the contact on the desired app, open the same on the MacBook. You will find the contact there. If you use Google Drive or Email, it will be sent as a vCard.

7. Use a Third-party iPhone app to Transfer all Contacts from iPhone to Mac
I have mentioned this method at the last because it involves using a third-party app. But if the above methods do not cater to your liking, here is how to use an app to transfer contacts from your iOS device to Mac.
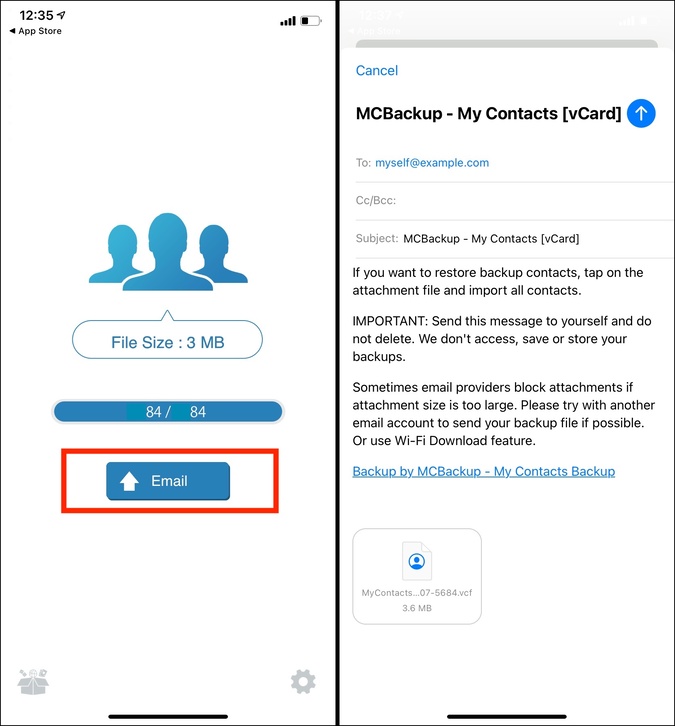
1. Open the iPhone App Store and search for Contact Backup or VCF File. It will show multiple results. You can use one after reading the description. For me, My Contacts Backup does the job well. So, I am using that for the steps below.
2. After downloading the app, launch and permit it to access your contacts.
3. Tap on Backup.

4. Next, tap Email (and in To: enter your email) to send the VCF file with all your iPhone contacts to yourself. Next, open this email on your Mac and download the VCF file. Open the VCF file to add it to the macOS Contacts app.
Wrap Up: Successfully Transferred Contacts from iPhone to MacBook
There are multiple ways to sync and transfer contacts between iPhone and Mac. I hope this post was helpful. To sum up, if you own both iPhone and Mac and use the same Apple ID, the first two methods (iCloud and Google/other accounts) are the best. And if Mac and iPhone have different Apple accounts, you may use any of the remaining methods to import contacts. Finally, in rare cases, if contacts do not show up on your iPhone, we have a separate guide to help you fix that.