It’s no secret that Windows 11 tends to run into problems every now and then. Fortunately, Microsoft provides you with a wide range of troubleshooters that can help you deal with most of those common issues. But what happens when the Windows Troubleshooter app itself stops working or runs into an error? If you’ve been bugged by a similar issue yourself, this guide has a few tips that will help you fix Windows 11 Troubleshooter not working error. So, let’s begin.
Table of Contents
1. Check Path for Temp Folder
Every time you run a troubleshooter, Windows needs to create and save temporary files in the Temp folder. However, if Windows fails to locate this folder on your PC, then the troubleshooter will not work correctly. To overrule this, check to see if the set path for the Temp folder is correct.
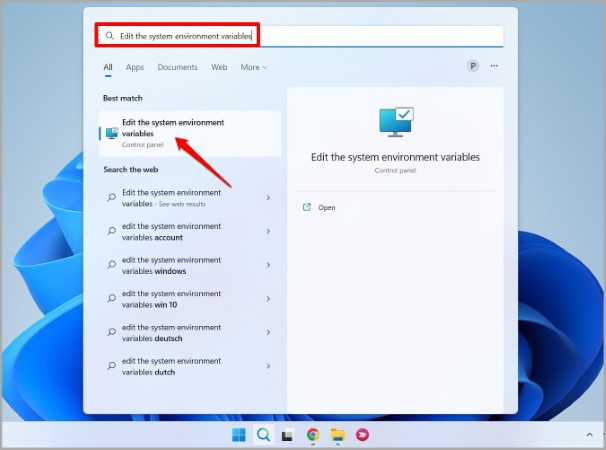
1. Press the Windows key + S to open Windows Search, type Edit the system environment variables in the box, and press Enter.
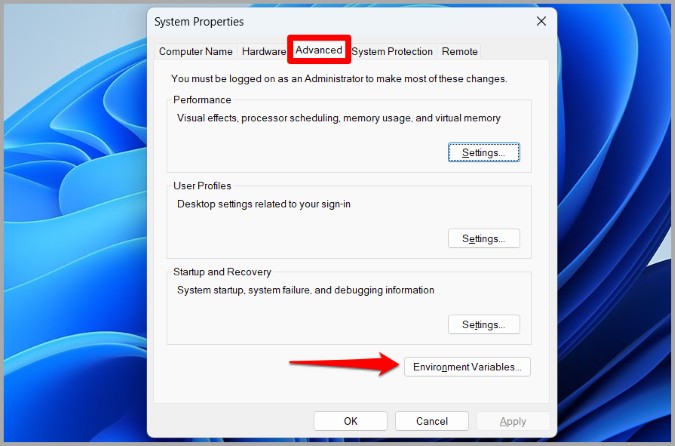
2. Under Advanced, click on the Environment Variables option.
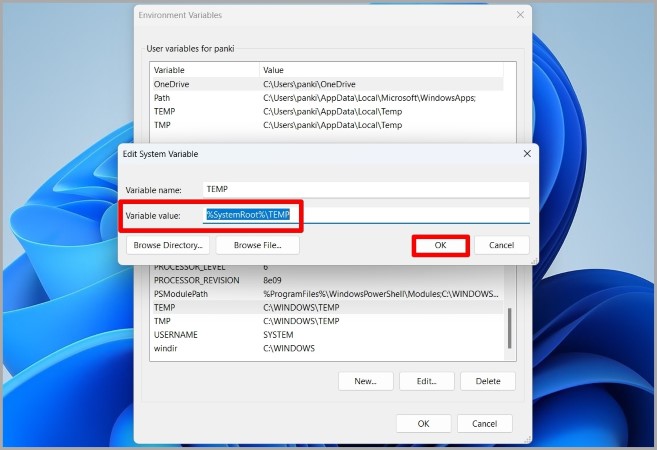
3. Under System variables, check the folder path for TEMP and TMP. It should be set to C:\\WINDOWS\TEMP.

If the path is set to something else, double-click on TEMP and change the Variable value to %SystemRoot%\TEMP before hitting OK. Do this for the TMP folder as well.
Restart your Windows PC after this and try running the troubleshooter to see if it’s working.
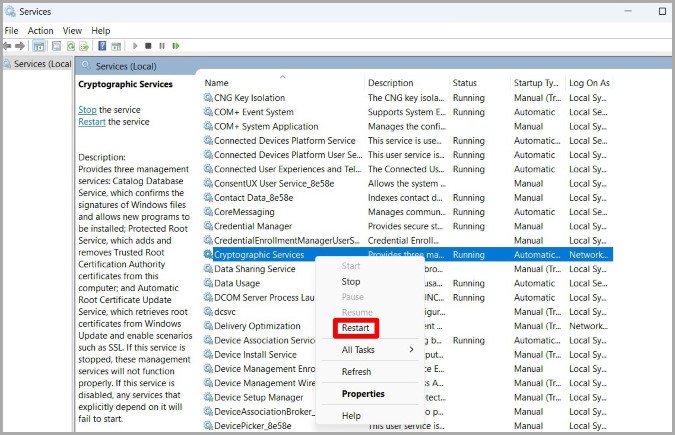
2. Restart Cryptographic Service
Cryptographic Service is a small program that needs to run in the background for the troubleshooter to work. If the service has encountered a problem, you’ll need to restart it by following the steps below.
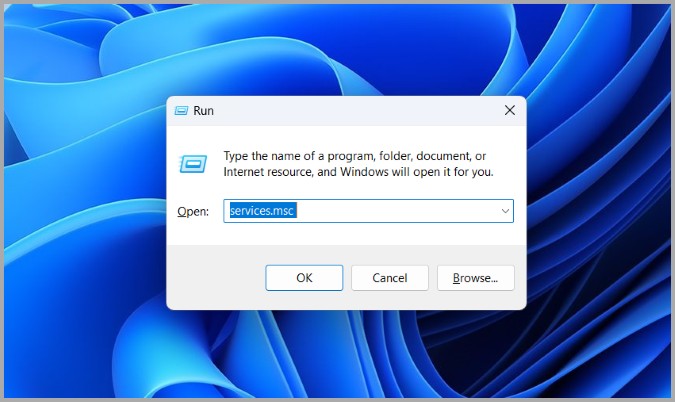
1. Press the Windows key + R to launch the Run dialog box. Type services.msc in the box and press Enter.
2. Scroll down to locate Cryptographic Services.

3. If the service is running, right-click on it and select Restart. If it’s not running, select Start.
Check to see if the troubleshooter works fine now.
3. Run SFC and DISM Scan
Issues with the system files on your PC can also affect troubleshooters on Windows. That is, if some critical system files are missing or damaged, the Windows troubleshooter may not work as expected. You can fix this easily by running an SFC scan followed by a DISM scan. Read on to learn how.
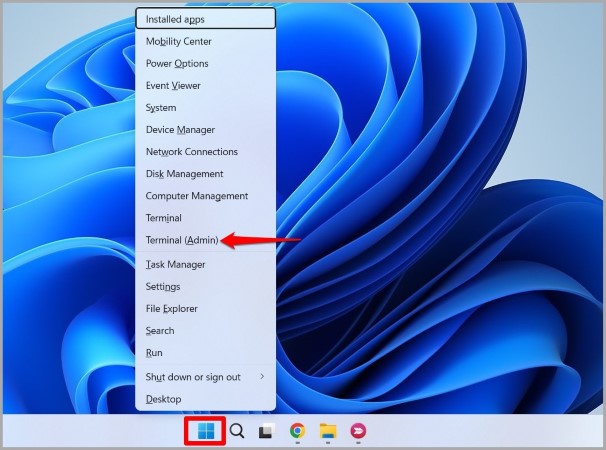
1. Right-click on the Start button and select Terminal (Admin) from the list.
2. Click on Yes when the User Account Control prompt appears.
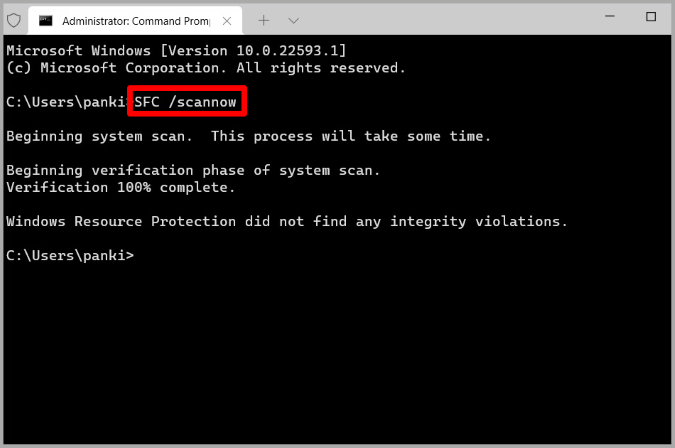
3. Type the following command and press Enter.
SFC /scannow
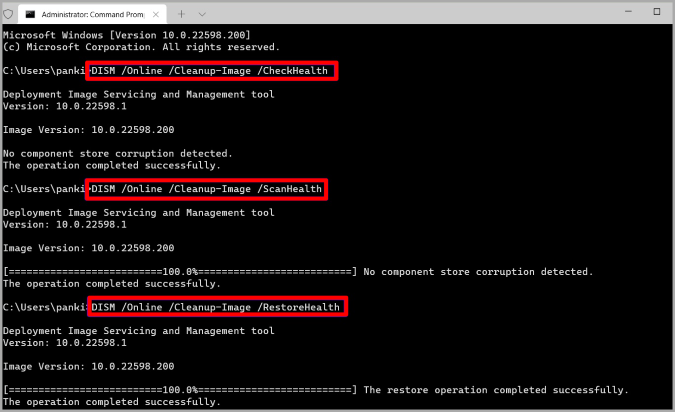
4. After running the SFC scan, run the following commands one by one.
DISM /Online /Cleanup-Image /CheckHealth
DISM /Online /Cleanup-Image /ScanHealth
DISM /Online /Cleanup-Image /RestoreHealth
After running the above commands, check to see if the Windows troubleshooter is working alright.
4. Run Disk Cleanup
At times, old temporary files stored on your PC can also interfere with Windows troubleshooter and keep it from working correctly. Disk Cleanup is a handy utility that can help you get rid of those temporary files with ease. Don’t worry, clearing these files won’t affect your apps or data in any way.
To run the disk cleanup utility on Windows, follow the steps below.
1. Open the Search menu, type disk cleanup, and press Enter.

2. Use the drop-down menu to select the C: drive.
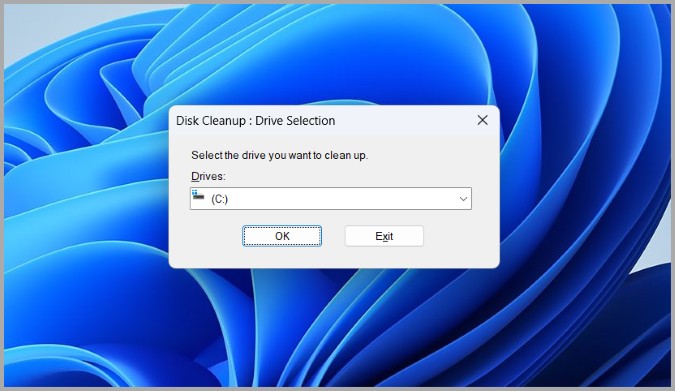
3. Under Files to delete, mark all the checkboxes and hit OK.

4. Choose Delete Files when prompted.

Once cleared, try running the troubleshooter to see if it works fine.
5. Check Group Policy
Another reason why troubleshooters may not work on Windows is if they’re disabled from Group Policy. In that case, you can follow the steps below to ensure that all the users are allowed to run troubleshooters on your PC. You’ll need to be logged in as an administrator for this to work.
Note: Group Policy Editor is only available on Windows Pro, Enterprise, and Education editions.
1. Press the Windows key + R to open the Run dialog box, type in gpedit.msc, and press Enter.

2. In the Group Policy window, use the left pane to navigate to Computer Configuration > Administrative Templates > System > Troubleshooting and Diagnostics > Scripted Diagnostics.
Make sure that all three entries on your right are set to Enabled or Not configured state.

If any entry is set to Disabled, you can double-click on it and change it to Enabled or Not configured. Then, hit Apply to save changes.

Restart your PC afterward and try running the troubleshooter one more time.
6. Run Troubleshooter in Clean Boot State
Third-party apps and services running on your PC can also interfere with the Windows process. When that happens, Windows may fail to perform certain tasks or run into errors while doing so. To verify this, you can try booting your PC in a clean boot state. Here’s how.
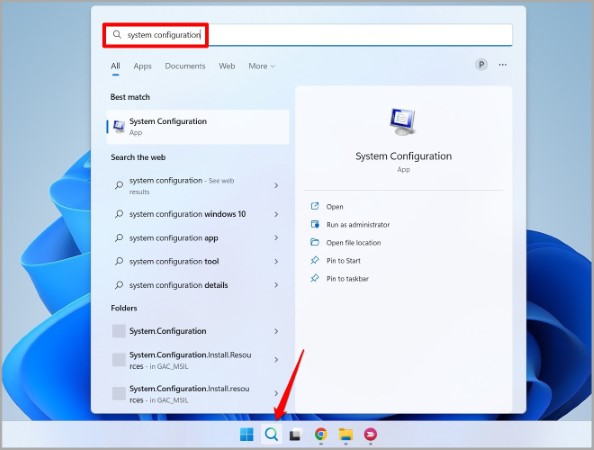
1. Open the Search menu, type in system configuration, and press Enter.
2. Switch to the Services tab, and tick the Hide all Microsoft services box. Then, click on Disable all button.

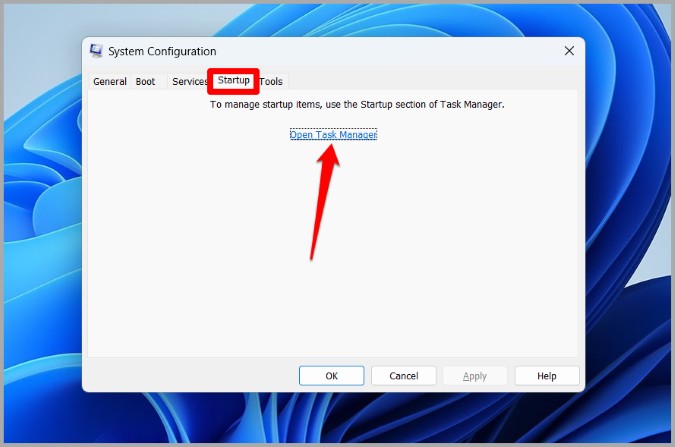
3. Head over to the Startup tab and click on Open Task Manager.
4. Select a third-party program and click on Disable at the top. Repeat this step to disable all third-party apps and programs.

Restart your PC to enter the clean boot state and try running the troubleshooter again. If it works, then you can be sure that the issue is caused by a third-party app or service. You can try removing any recently installed apps or programs to see if it helps.
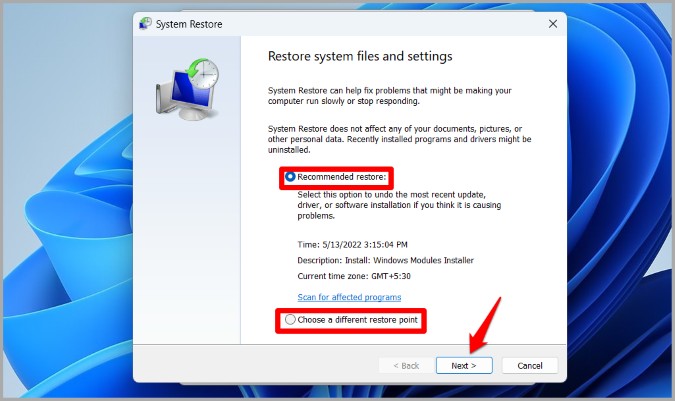
7. Perform System Restore
If removing recent apps or programs doesn’t help, then you’ve no option but to perform a system restore. This will allow you to undo any recent changes made to your PC and restore it to an earlier state before the problem first occurred.
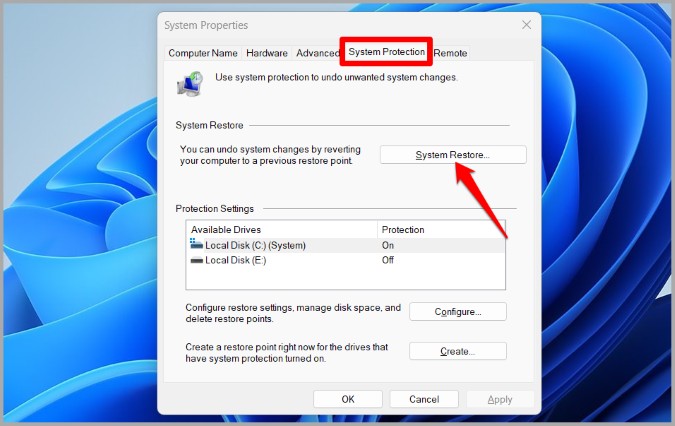
1. Click on the search icon on the Taskbar, type in create a restore point, and press Enter.

2. Under System Protection, click on the System Restore button.
3. You can either go with the recommended restore point or select one yourself by choosing the second option. Once selected, click on Next.
4. Lastly, click on Finish.

Your PC will restart and revert to a previous state. This should definitely end up fixing the underlying issue and get troubleshooters to work again.
No More Trouble
It’s easy to get confused when a utility that’s meant to help you fix problems stops working itself. Hopefully, implementing the troubleshooting tips has helped you fix Windows 11 troubleshooters and put your mind at ease.