Renaming files on Windows is easy. Simply right-click on the file and select the rename option from the context menu, and you can edit the file name instantly. But if you have to rename multiple files on Windows, it isn’t as straightforward. Nonetheless, there are quite a few ways rename multiple files in batch on Windows, with each having it’s pros and cons.
Renaming Multiple Files at Once on Windows
Let’s start with the native option available in the File Explorer on Windows 10 and Windows 11.
1. Renaming Files From Windows File Explorer
The native renaming option in Windows file explorer is powerful and should get the job done for most people.
1. Press Windows+E to open the File Explorer and multi-select all the files or folders that you want to rename. You can do that by holding Ctrl and clicking on the files to select with left click. You can also hold Shift and click on the start and end file to select all the files in between.
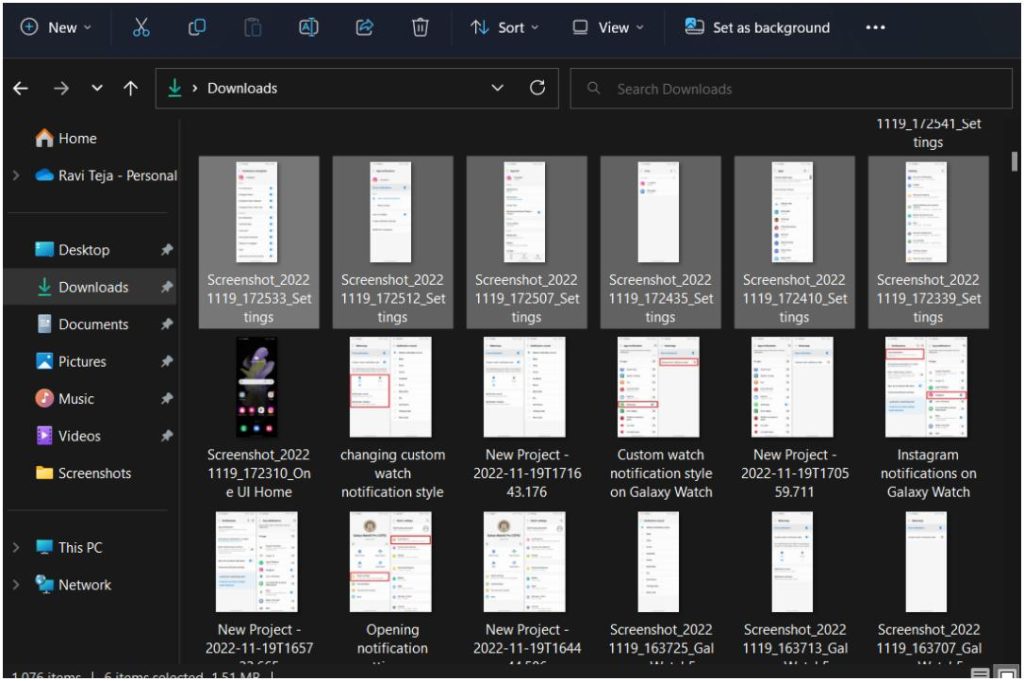
2. Once selected, right-click on the first file and select the Rename option.
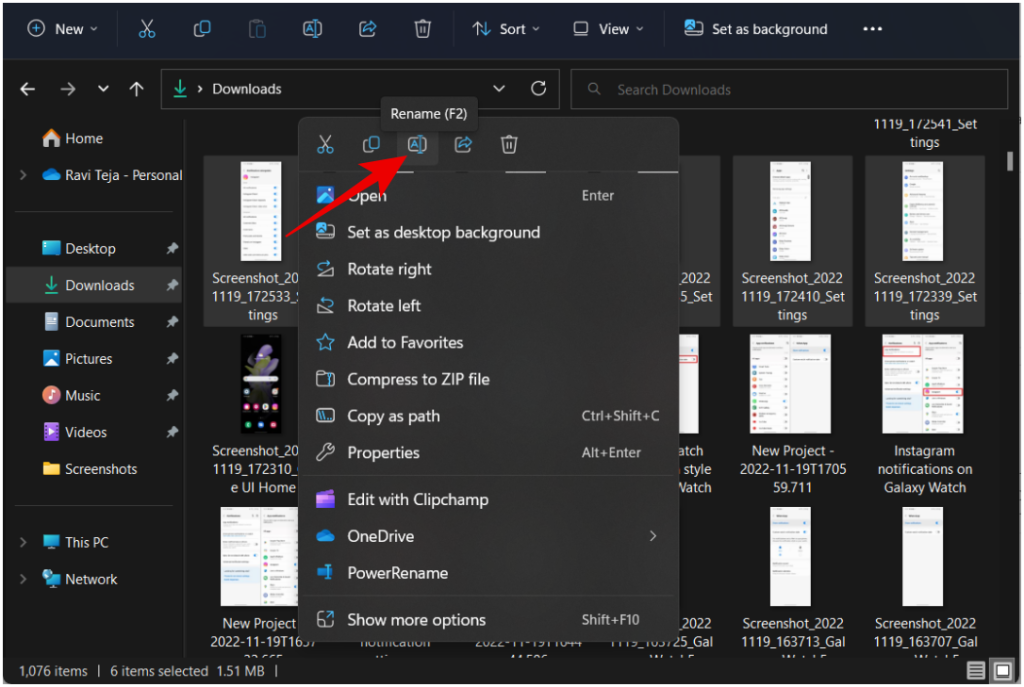
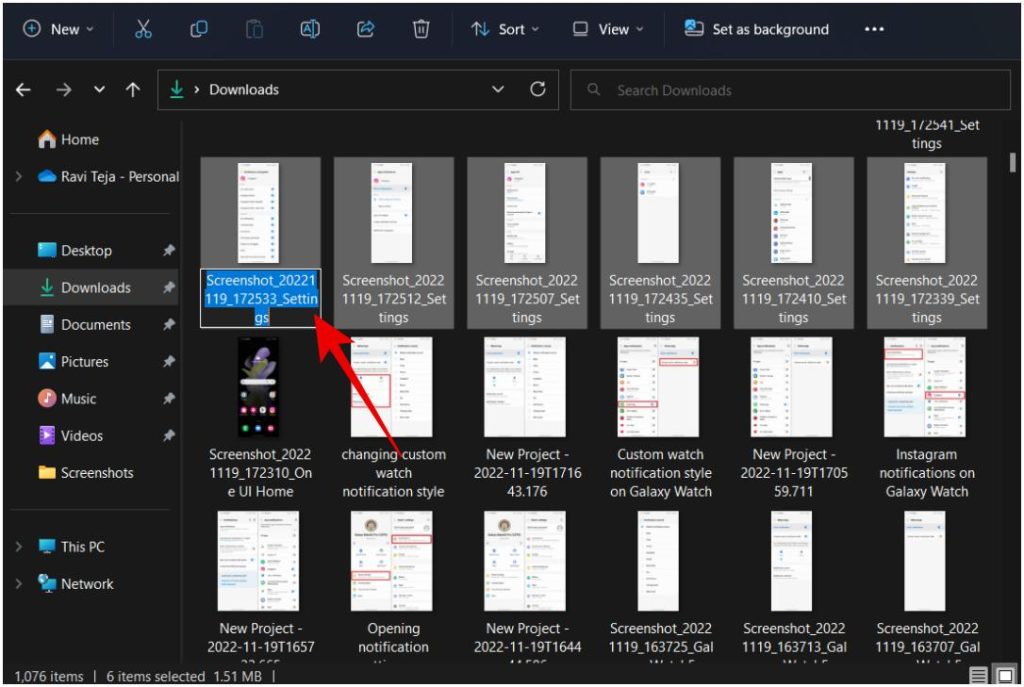
3. Enter a new name for the file you press Enter.
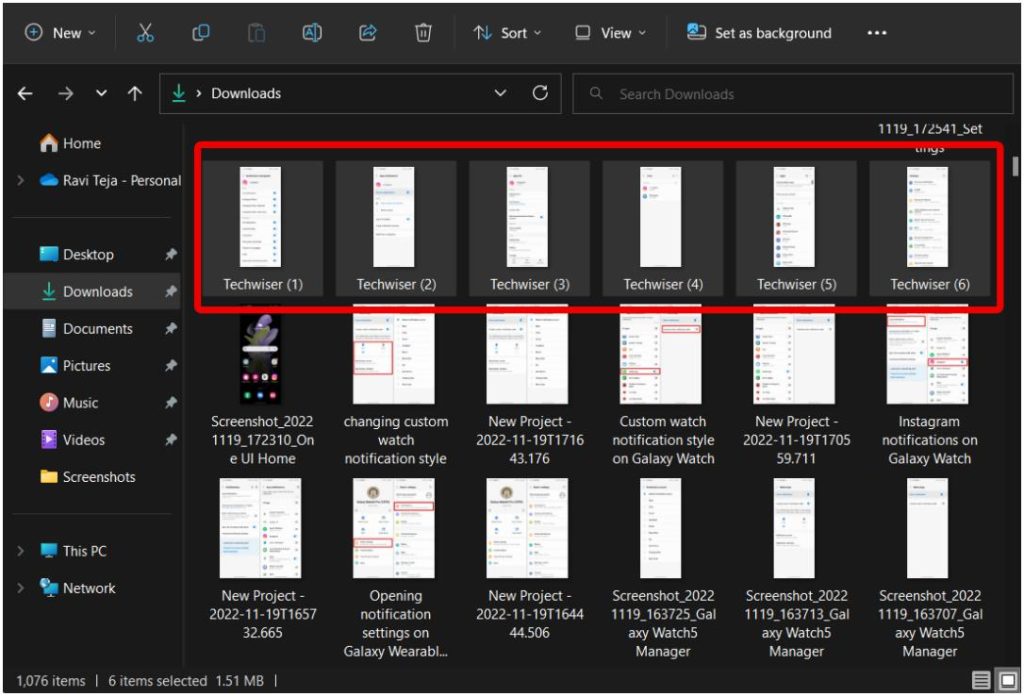
4. This will rename all the selected files by adding a serial number at last. For example, suppose you have renamed the file name to Techwiser. In that case, it will rename file to Techwiser (1), the next one as Techwiser (2), and so on for all the remaining selected files.
4. On the other hand, you can also rename the first file and then press Tab to rename the next one. That way, you can give a different name to all the selected files. The process is much faster than selecting the rename option for each file individually.
Pros:
- It’s a native option available on the Windows File Explorer
- Will automatically add a number at the end to differentiate
- Can give a different name for each file by using the Tab button
Cons:
- Cannot edit only a part of the filename if needed
- Cannot edit the files in the folder
- Using the tab button is much slower
2. Renaming Files Using PowerRename
Power Rename is an extension of Microsoft’s Power Toys application which is free and open-source. Compared to the native option, Power Rename brings some advantages to the table. First, you can use it to edit only a part of the file name. Second, you can also add details like the date of the file created to its name automatically. This feature will come in handy when you want to rename files taken with your DSLR or your screenshots to something meaningful.
1. Download the PowerToys app from GitHub and install it. You can also download it from the Microsoft Store easily, but it will be a few versions behind.
2. Open the app, select the Power Rename option in the sidebar, and enable it.

3. Now open File Explorer and select all the files and folders you want to rename. When you select the folder, it not only selects the folder but also all the files and folders within.
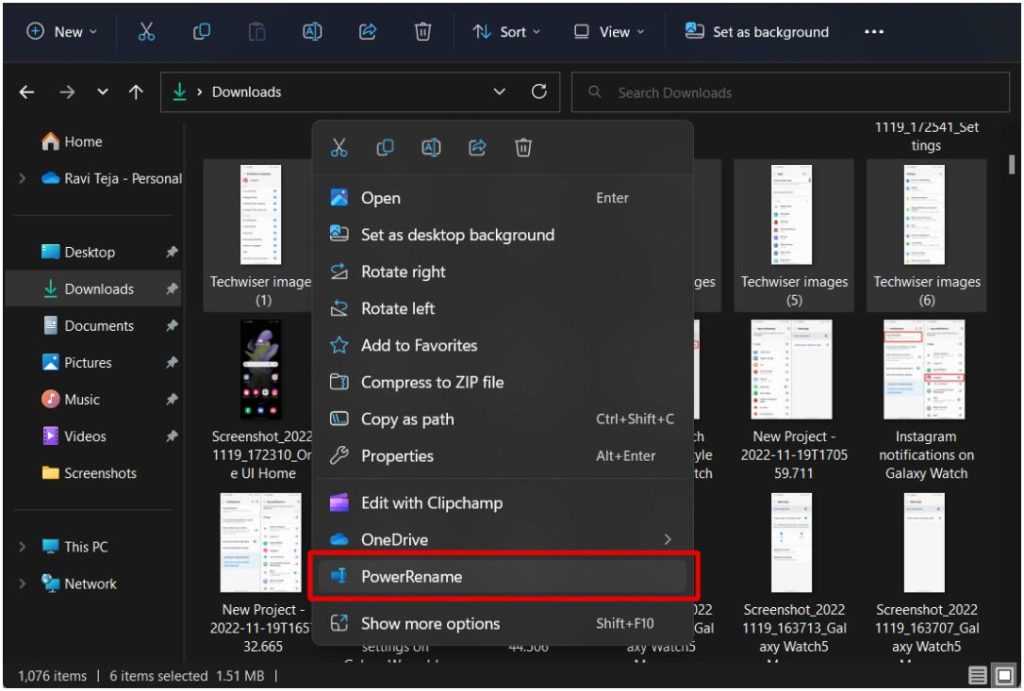
4. Once selected, right-click and select the Power Rename option.
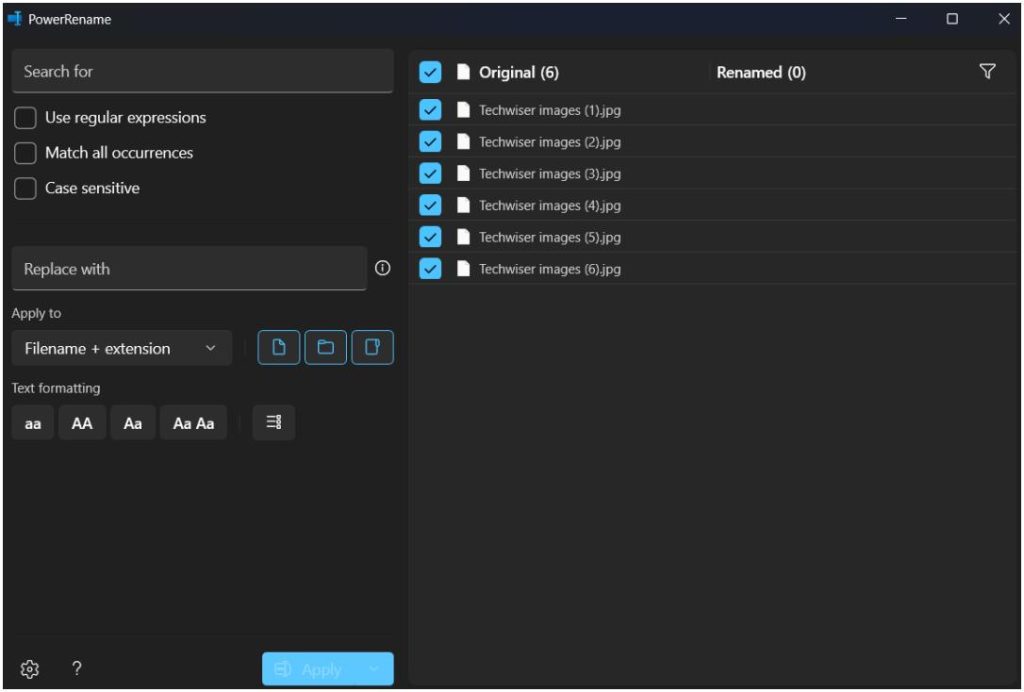
5. It opens the Power Rename window with all the selected files and also files inside the folder.
6. With Power Rename you need to search for the name in the filename and then you can replace that with the name you want. For example, if many of your files contain the word images, you can search for ‘images’ keyword, then you can replace with some other name like ‘photos’. So if the filename is ‘Techwiser images’, it will get renamed to ‘Techwiser photos’.
7. Just enter the name that you want to be replaced in the Search for section at the top right corner. Enable Case sensitive to select files with exact capitalization. Enable Match all occurrences to replace the text for all the occurrences.
8. Now you can enter the name that you want to replace with in the Replace with section.
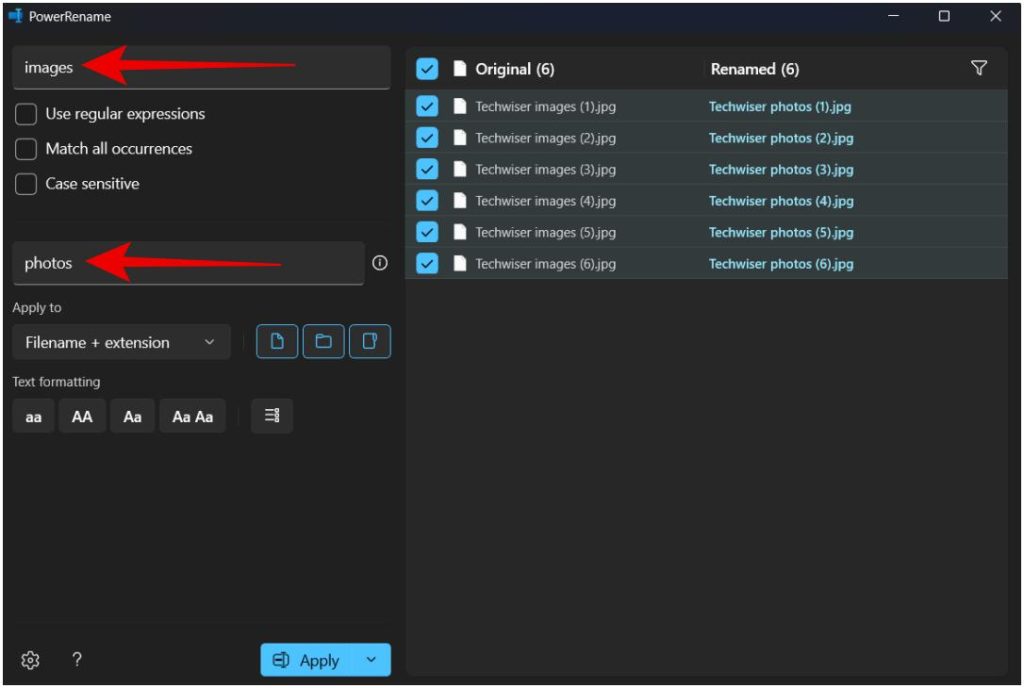
9. The preview will show both the original and renamed version of the files/folders so you know what the final result looks like. So you know the final outcome.
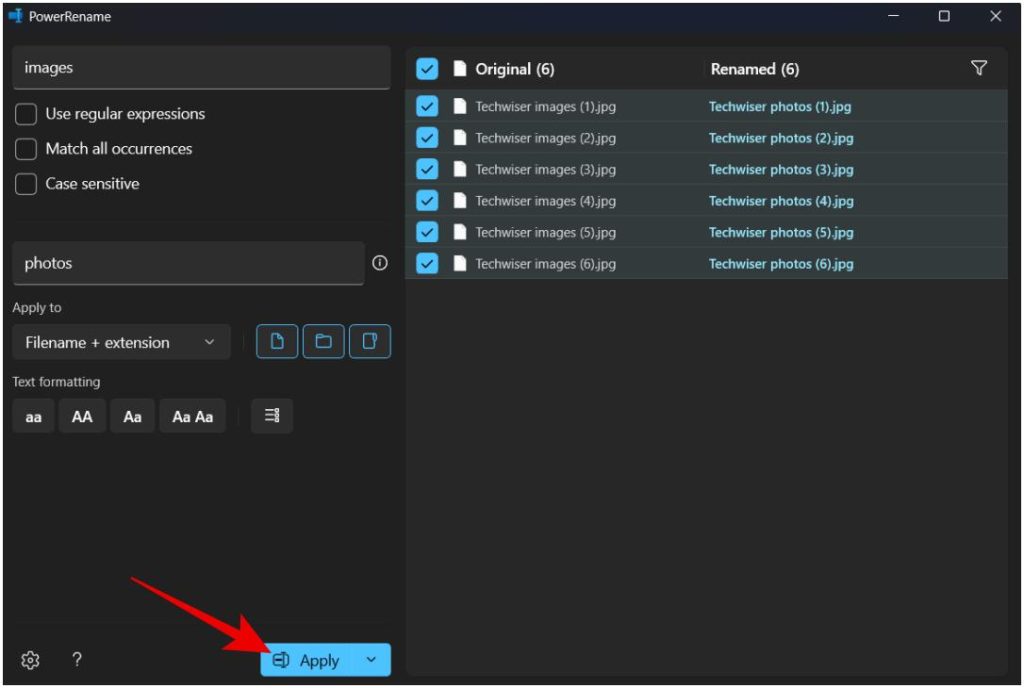
10. Once done, click on Apply at the bottom left corner to rename the files in bulk on your Windows computer.
Pros:
- Ability to rename files from multiple folders
- Can directly start renaming from the File Explorer
- Can rename a specific part of the filename
- Have the option to add details like when the file was created in the name
- Ability to exclude specific file names or file types when renaming
Here are some more regular expressions for a more robust search while renaming files and folders on Windows File Explorer.
Cons:
- Usable only when all the needed files have the same name in their filename
- Need to install the app manually.
3. Renaming Files Using Command Prompt
You can also rename multiple files using CMD or Command Prompt on your Windows. Though the process has a bit of a learning curve, it can make things faster as you get the hang of it.
1. Open the Command Prompt by pressing the Windows key and searching for CMD.

2. In the Command Prompt, type cd and enter the file’s location. For example:
cd C:\Downloads\photos

3. Now type dir to show all the files and folders in that file location.

4. Finally to rename, type ren, then type the name of the file, and then type the filename to which you want to rename. For example, ren originafilename.jpg newfilename.jpg command will change the originalfilename to newfilename. This way you can rename a single file.

5. To rename multiple files, use asterisk sign (*). To select the file based on the extension, just type *.extension. For example, if you prefer to select all jpg files, type *.jpg to select all the jpg files in the selected directory.

6. To select all files, type *.*. It means, it will select all file names with all extension types.
7. You can also type a*.* to select all files that start with a. Typing *a.* will select files that end with a. The possibilities are just endless in terms of selecting when using CMD.
8. Once selected, you also have multiple options for renaming. You can mention the file name to change or an extension that changes the extension for all the selected files.
9. You can use the question mark. Like ???.* will shrink down the file name to just 3 letters. So by adding or decreasing the question marks, you can shrink down the original filename to that many characters.
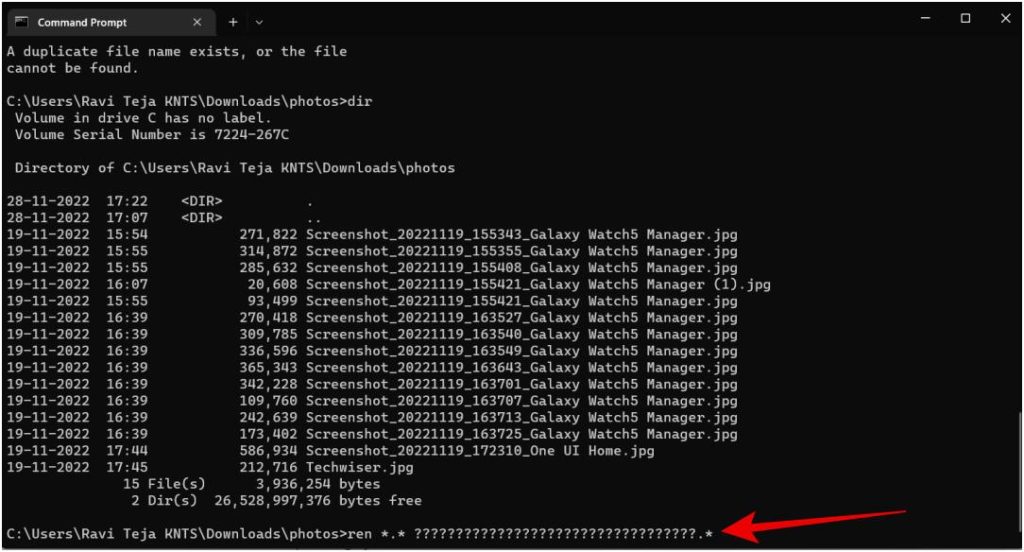
10. You can also type the file name and then add ??? to add the last 3 letters into the renamed file name.
Pros:
- Ability to select the files in many different ways
- Comes native to the operating system
- Can be used to shrink the original file name
- You can also add details like the date of the file created to its name
Cons:
- Needs a learning curse and is hard to get used to
- It will not place a number after the filename automatically, instead, it returns an error
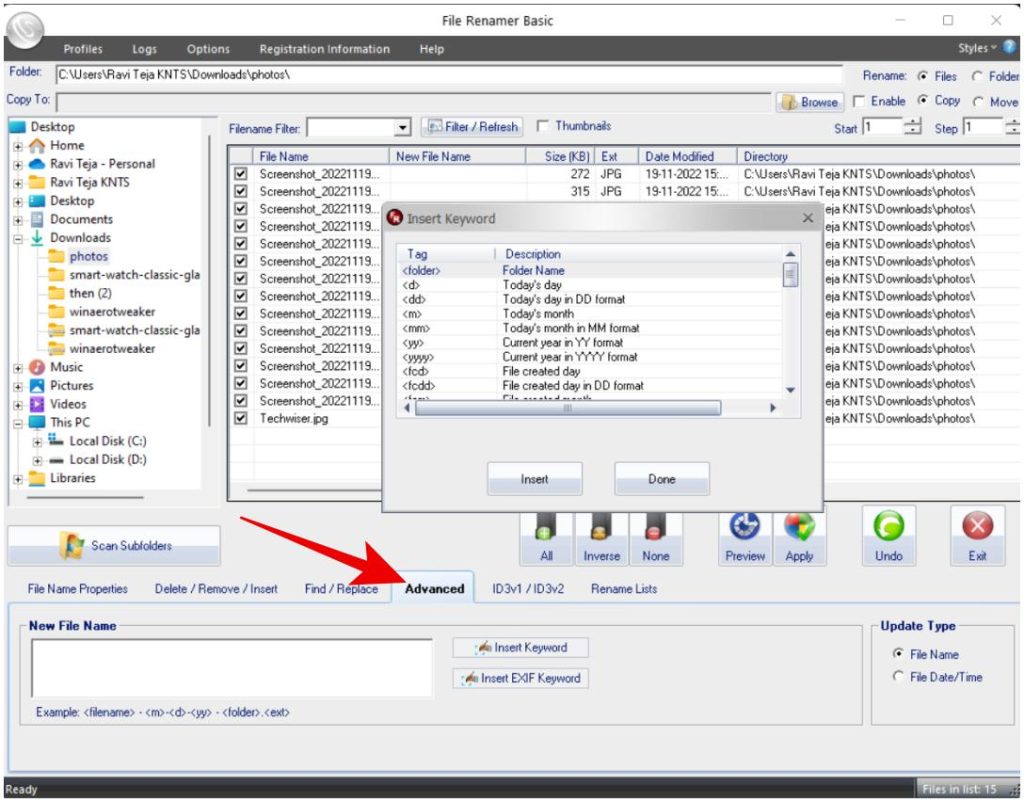
4. Renaming Files Using File Renamer Basic
While command prompt allows more customization and different ways to rename files in bulk on Windows, it is hard to use because of the lack of a user interface. Here come third-party apps that can rename multiple files, providing more options to select and rename. There are many apps like Bulk Rename Utility, Advanced Renamer, Metamorphose 2, etc. But File Renamer Basic is easy to get started with and carries most functions making it a good and balanced utility tool.
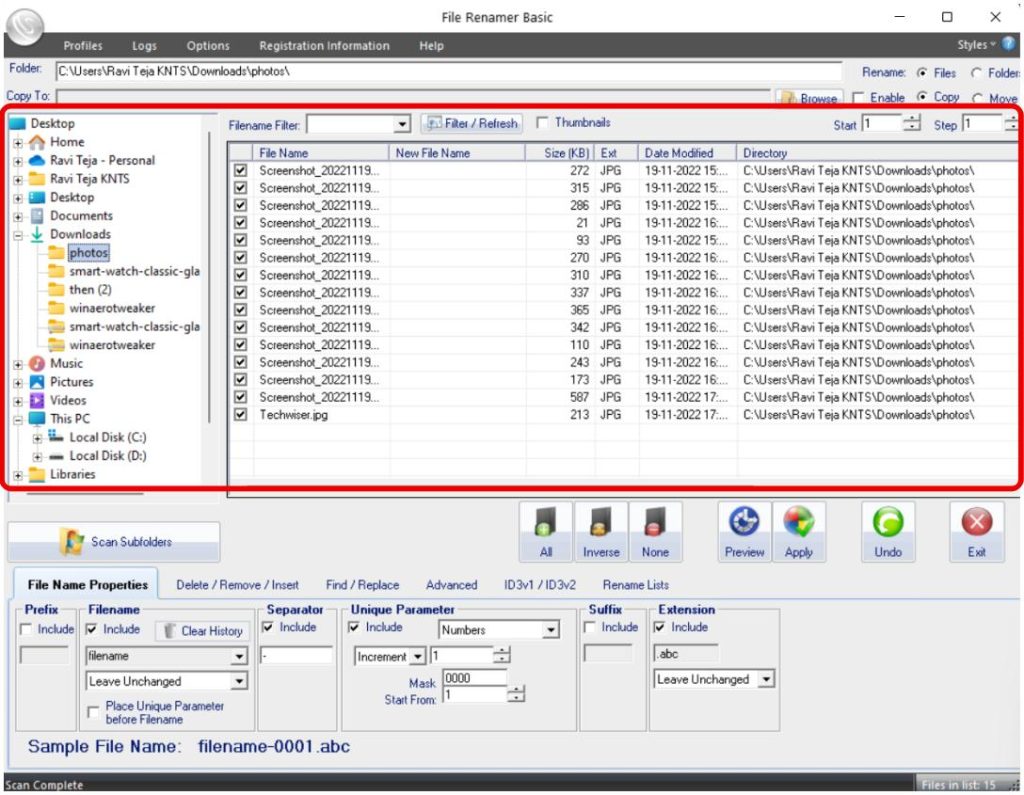
1. Open the link, download the File Renamer Basic app, and install it. The basic version is free to use.
2. Open the app and select the folder in the top left panel. Now you should see all the files inside that location.
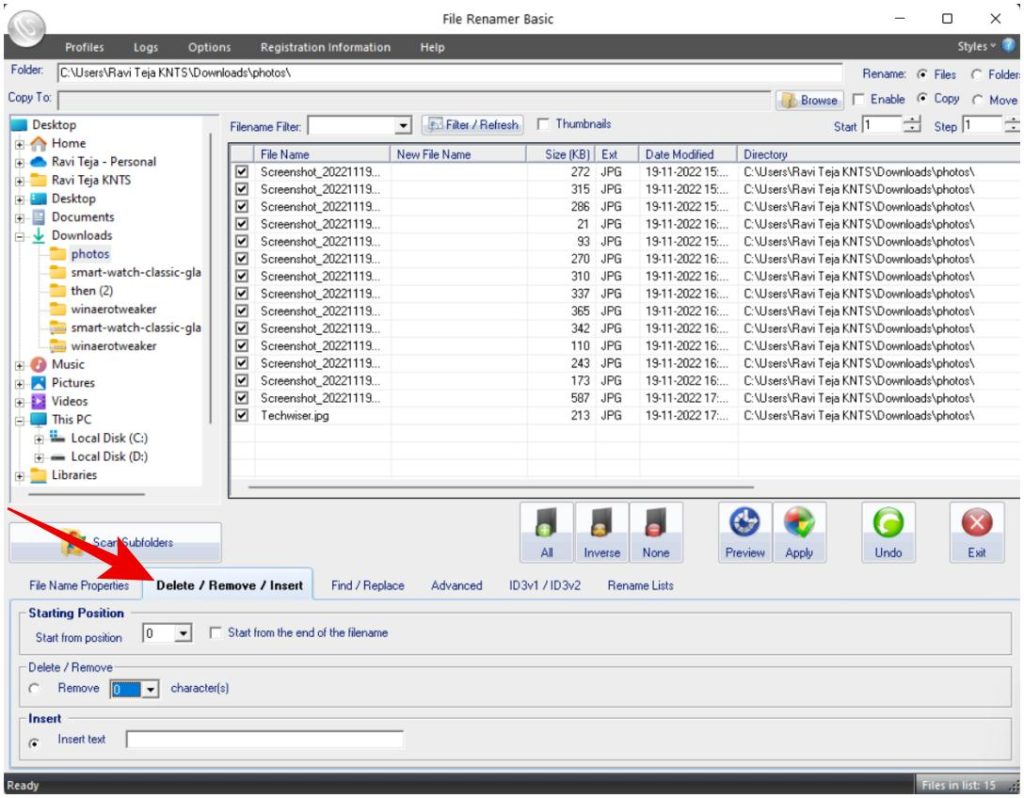
3. Now you can begin renaming files and folders in different ways. By choosing the Delete / Remove / Insert option, you can remove some characters from the front or end. You can also insert any new name at any position.
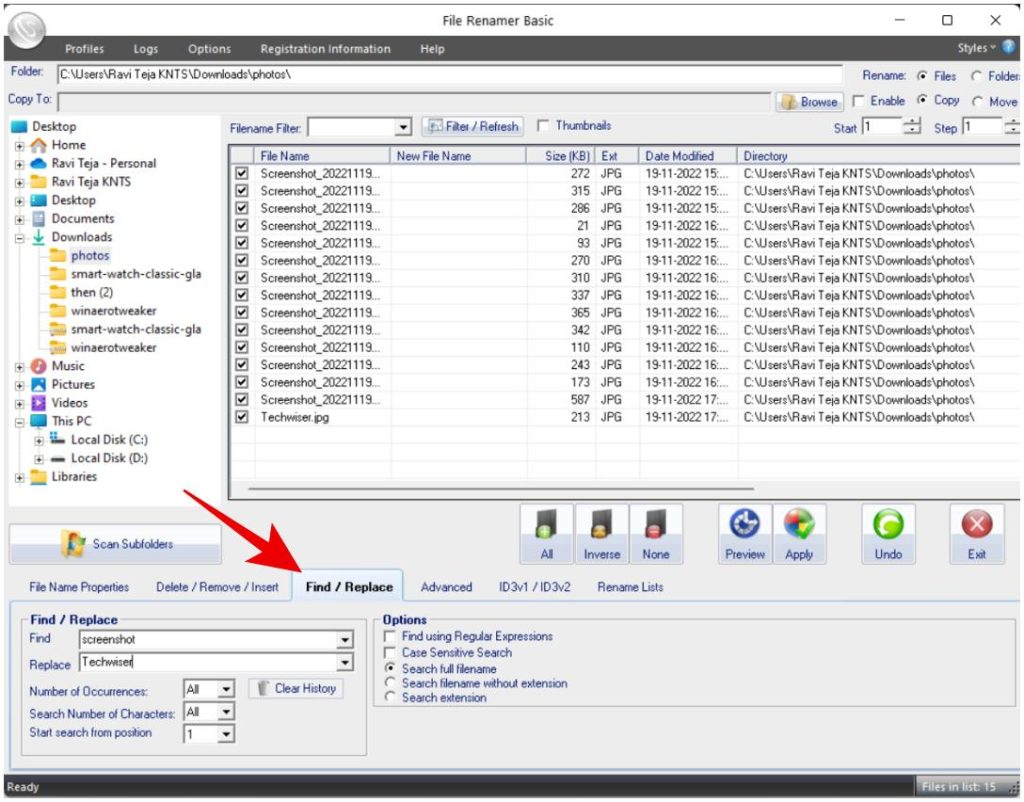
4. Use Find / Replace option like the power rename to find a common name across all files and replace it.
5. Advanced option lets you insert the file’s date, parent folder’s name, or even resolution.
Pros:
- Easy to use
- Can change the entire filename or part thereof
- Works great to shrink the file name or add an additional name to the original name
Cons:
- Doesn’t work from File Explorer directly
- Selecting files can be a bit clumsy and confusing
- Instead of just renaming, the app provides options to move renamed files to a different folder which can be confusing for some
Renaming Multiple Files on Windows
File Explorer can get the work done for most people. You can give the same name to all files with a serial number at the end or give different names to different files. To only change a part of the filename, try PowerRename. However, it is only useful when you have the same name in every filename. But can come in handy for renaming screenshots and DSLR photos. For more customization options, go for Command Prompt or the third-party apps to rename files.