In the recent update to combat security and privacy issues, Zoom announced 2 important changes to the platform, effective from 5th April 2020.
- All Zoom meetings, by default, will have a password. This won’t affect people joining via the Invitation URL but for those joining via Meeting ID will need to enter a password.
- All Zoom meetings will now have a waiting room enabled by default.
Now, in case you are wondering what’s a meeting room. Let me elaborate.
All About Zoom’s Waiting Room and How to Disable It
What is the waiting room?
For instance, suppose you have a physical meeting room that can accommodate 10 people at a time. In case only 10 people are invited, they can comfortably enter the meeting room sit and talk to you. Now, when the 11th and 12th person come, there’s no space in the meeting room and they have to wait in the lobby. The lobby can be considered as the “waiting room”. So, when there’s enough space or current people to leave the meeting room, you can allow the people waiting in the lobby to enter the meeting room.
In the case of Zoom, the participants can either be in the waiting room or an active participant. The active participant can share screen, video, chat, and speak during the call. The ones in the waiting room can do none of that.
Initially, waiting rooms were created so that virtual meetings don’t get bombarded with people. The meeting is filled on a first-come-first-serve basis and the rest of the people have to wait in the waiting room. But, to combat the incidents of ZoomBombing, Zoom has taken this as a temporary measure to secure public meetings.
How does it work now?
So, now with the new rules in place, does it affect the process of joining a meeting? Yes, it does. It’s now a 2-step process. Once you click on the meeting link, instead of the meeting window, you will bump into the following screen.

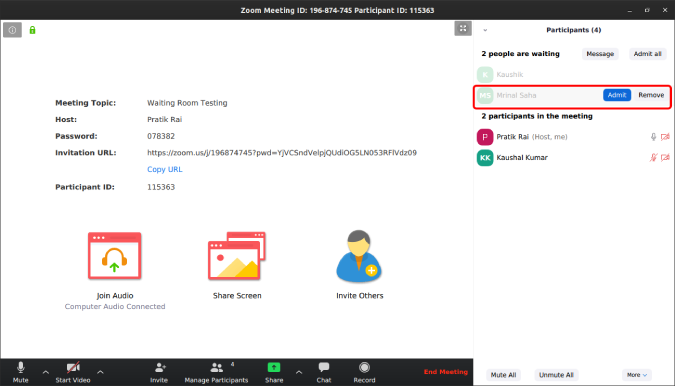
From the host end, he will see the name of all the participants in the meeting (both the waiting room and active participants). The host will now have to manually admit every person individually in the meeting room.

How to remove waiting rooms?
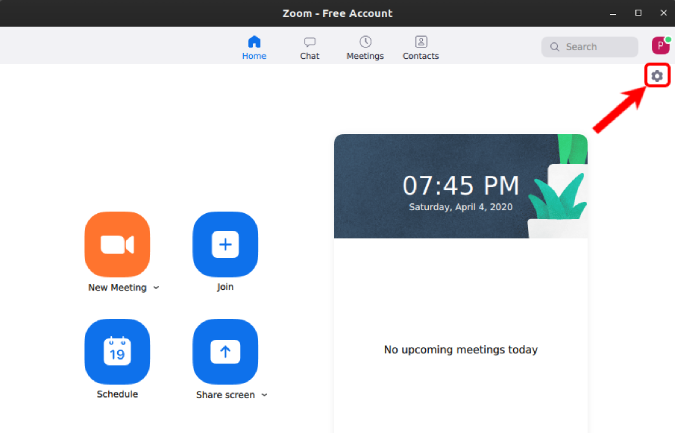
I don’t recommend doing this. In case you hold public meetings or share meeting invite URL on the Internet, I strongly recommend against disabling the waiting room. However, if you hold meetings with only your closed ones, it can be a bit annoying to deal with the meeting rooms. To disable it, head over to the Zoom page and click on the gear icon.

Next, on the Settings page, navigate to the bottom and click on Advanced Features.

This will guide you to the web portal. You might need to sign in again on the Zoom website.

On the web settings, click on the Settings tab.

On the Settings tab, navigate to the option called “Waiting Room”. After you turn this toggle off, waiting rooms will be disabled.

Closing Words
Zoom has had its own set of woes around the security and privacy of the platform. It announced a 90-day feature freeze and employed third-party security to improve its service. It’s redirecting all its development to fix these issues. We’ll be covering Zoom in-depth and for more issues or queries regarding the tool, let me know in the comments below
Also Read: Zoom Tips & Tricks to Manage Your Video Conferences Better