It’s no secret that Microsoft wants us to use a Microsoft account on our PC for a seamless Windows 10 experience. Thus, while adding a Microsoft account on your PC is easy as ever, removing it still takes a bit of doing. Especially, if it’s the only account on your PC or if it’s an administrative-level account. Well, no matter the account type, there’re certain ways through which you can remove any Microsoft account from your Windows 10 PC. In this post, we’ll go through each one of them. So, without further ado, let’s get started.
Also Read: How to Shutdown, Restart, Schedule Windows 10 with CMD
Table of Contents
1. Use Control Panel
Using the Control Panel is an old-school way of managing things on Windows including user accounts. You can use it to remove any Microsoft account from your PC. Here’s how.
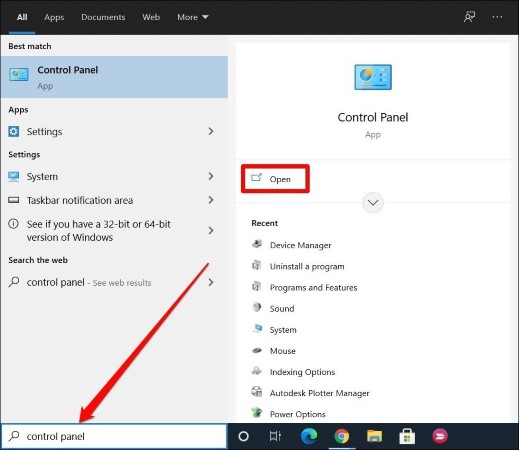
1. Open the Start menu, type in control panel, and press Enter.
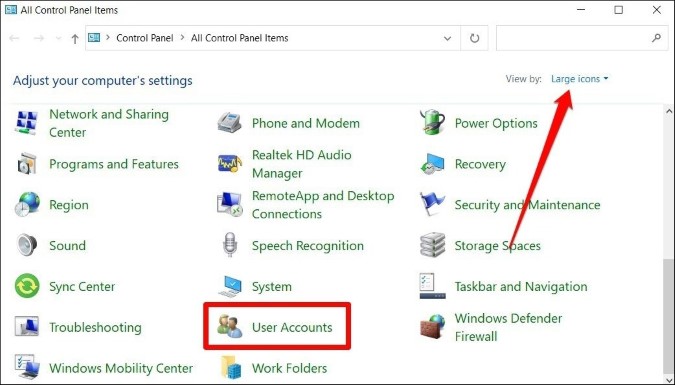
2. In the Control Panel window, change the view type to Large icons and go to User Accounts.
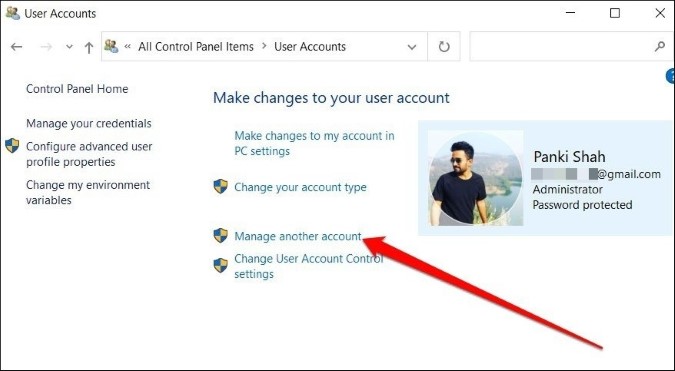
3. Next, click on Manage another account. Here, you’ll find a list of all the accounts on your PC. Click on the one you wish to remove.
4. Click on Delete the account button. Next, you’ll be asked whether or not Windows should keep the files related to the account. Pick one accordingly and follow the on-screen instructions to complete the removal of the account.

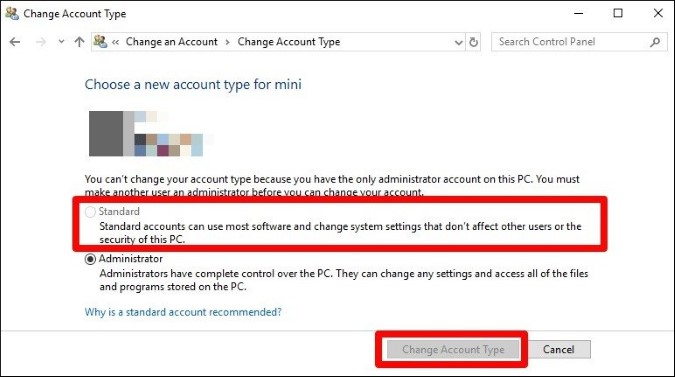
If it’s an administrative-level account that you’re trying to remove, Windows will not allow it. For that, you must change its account type to Standard first. Here’s how.
1. Launch Control Panel and go to User Accounts.
2. Switch to Standard and click on the Change Account Type button.
Once you’ve changed the account type, you can now remove that account by following the steps mentioned earlier. Alternatively, you can also use the Advanced User Accounts panel to remove a Microsoft account from your PC. Here’s how.
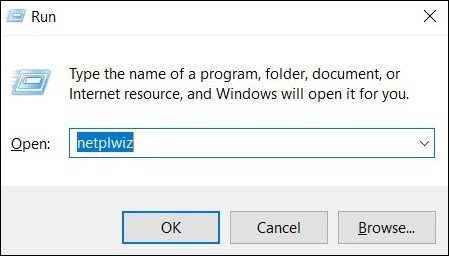
1. Press Windows Key + R to launch the Run utility. Type netplwiz and press Enter.
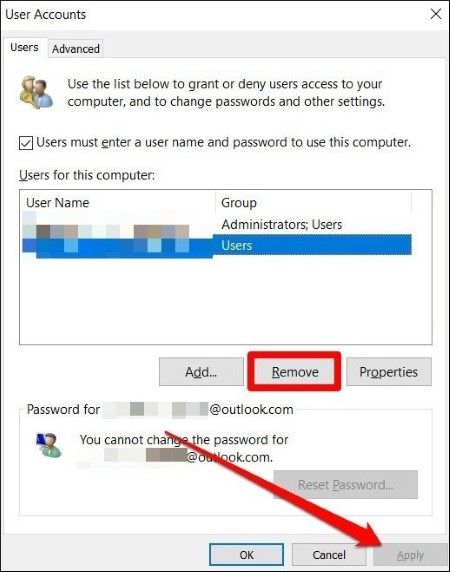
2. Select the account you wish to remove and click on the Remove button. Then click on Apply.
Restart your PC and the Microsoft account will be removed from your PC.
2. Switch to a Local Account
Although Microsoft wants you to remain signed in with your Microsoft account for the ultimate Windows experience, it also provides you with an option to use a local account instead. If you’re the only user on that PC, you can create a local account for yourself and then remove your Microsoft account from the PC. Here’s how it works.
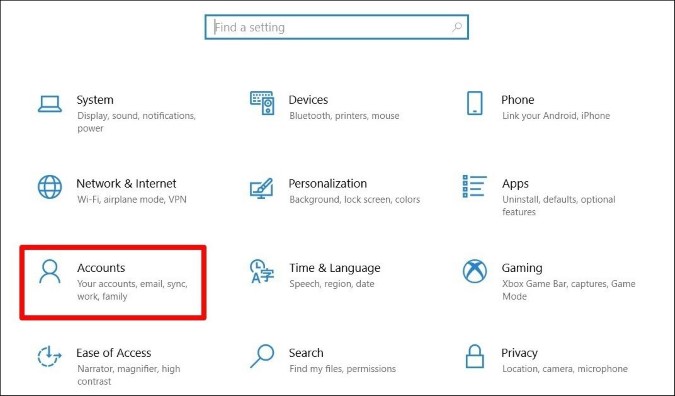
1. Open the Settings app and go to Accounts.
2. Go to Your info tab in the left windowpane and select Sign in with a local account instead.

3. Now follow the on-screen instructions to set up a username and a password for the local account.
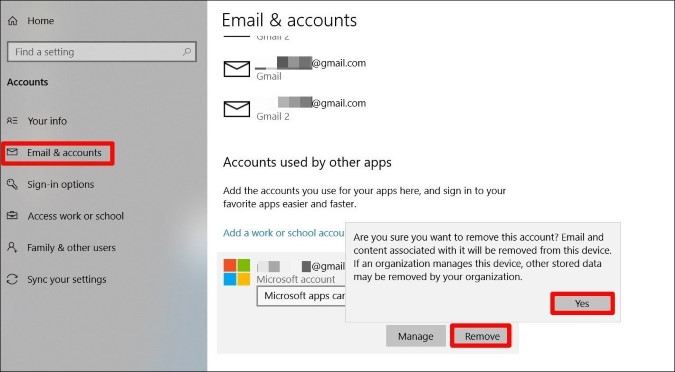
4. Once you’ve successfully set up the local account, go to Settings > Accounts > Email & accounts. Under Accounts used by other apps, click on the Microsoft account that you want to get rid of, and choose Remove. Then click on Yes to confirm.
That’s it. Now your Microsoft account will be removed from your PC and you’ll be able to use the computer with a local account.
3. Remove the Account Online
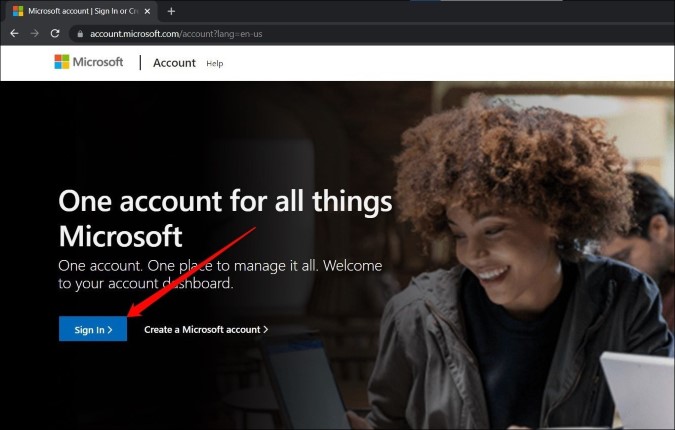
Apart from the above methods, you can also remove a Microsoft account from a PC by logging into your Microsoft account on a web browser. Here’s how.
1. Use any web browser to log in to your Microsoft account.
2. Here, under Devices, you’ll find a list of PCs that are connected with your Microsoft account. Click on the device from which you wish to remove the Microsoft account.
3. Now click on Remove this device at the top. Click on Remove when prompted.
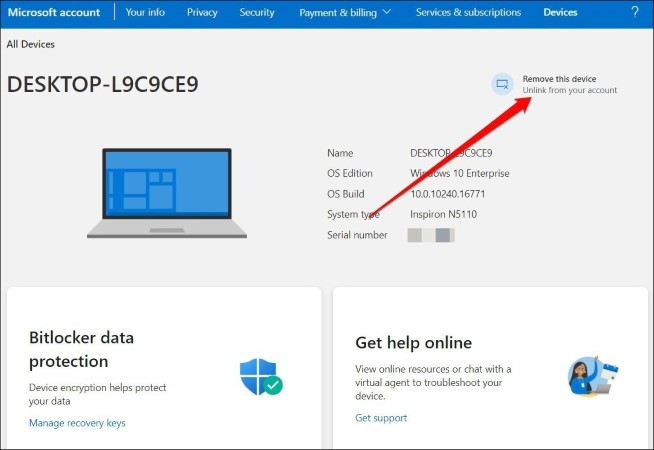
That’s about it. The Microsoft account will now be removed from the device.
4. Use Registry Editor
Apart from using the Control Panel, if you’re an admin, you can also remove a Microsoft account from your PC via the Registry Editor.
Before we begin, you must know that Windows Registry is an integral part of the operating system. Deleting Registry files without knowledge may lead to unresolvable issues on your PC. We recommend making a restore point before moving forward.
That said, if you’re comfortable using the Registry to remove the Microsoft account, here’s how to do it.
1. Press Windows key + R to open the Run utility. Type Regedit and press Enter.
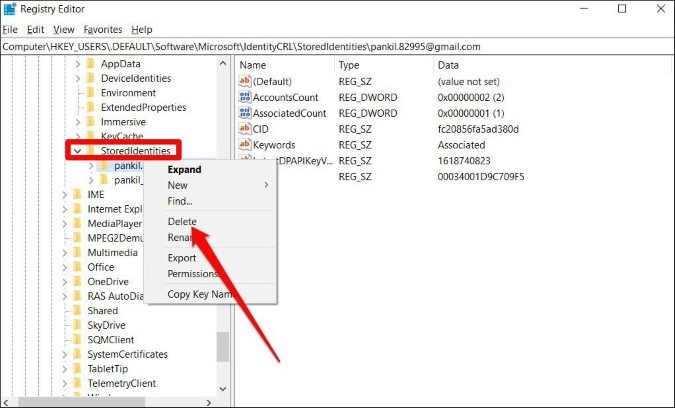
2. In the Registry Editor window, use the address bar at the top to navigate to the following key.
HKEY_USERS\.DEFAULT\Software\Microsoft\IdentityCRL\StoredIdentities
3. Expand the StoredIdentities key and you’ll find subkeys of all the accounts on your PC. Right-click on the account you want to remove and click on Delete. Click on Yes when prompted.
Restart your PC and the account should now be removed from your PC.
5. Stop Signing in to All Microsoft Apps Automatically
If you’re having trouble removing your Microsoft account from the PC with the methods above, you can ask Windows to stop signing you automatically into Microsoft apps. Here’s how.
1. Launch the Settings app and go to Accounts.
2. Go to Your info on the left pane and click on the link that reads Stop signing in to all Microsoft apps automatically.
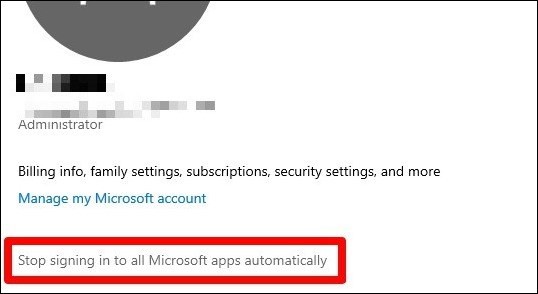
Now your account will be displayed as a local account. Navigate to Settings > Accounts > Email & accounts and remove your account from there (Refer to Step 4 under Point 2 above).
6. Disconnect School/Work Account
If you’re trying to find a way to remove a work or school account from your PC, then simply disconnecting that account from the Settings app may help. Here’s how to do it.
1. Open the Settings app and go to Accounts.
2. Switch the Access work or school tab on your left. Now expand the account you wish to remove and click on Disconnect.
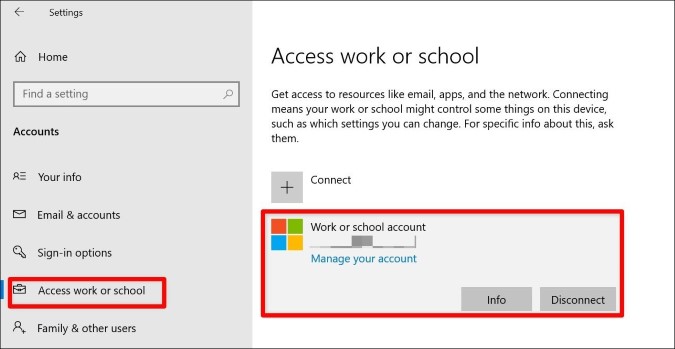
That should do it. The work or school account should now be removed from your PC.
7. Reset Mail App
If for some reason, you can’t seem to remove your Microsoft account with the methods above, then try resetting the Mail app before trying to remove your Microsoft account. Here’s how to do it.
1. Press Windows key + I to launch Settings app and go to Apps.
2. Scroll down to find Mail and Calendar and click on Advanced options.
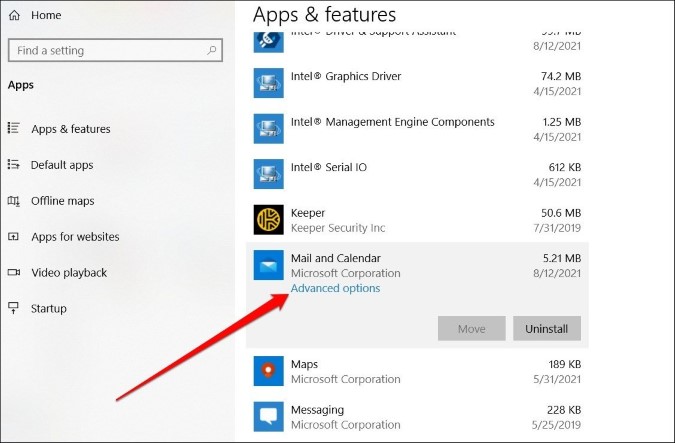
3. Scroll down again and hit the Reset button.

Once done, go ahead and remove that Microsoft account from your PC with any of the methods above.
FAQs
Can I remove the Microsoft account without a password?
Yes, if you’re logged in with an admin account, you can remove a Microsoft account without knowing its password.
Is it possible to remove the admin account from a PC?
Yes, if there are multiple accounts on your PC with administrative privileges, you can use one of those admin accounts to remove the other admin account.
Wrap Up: Remove Microsoft Account from Windows 10
So, these were some quick and easy ways to remove a Microsoft account from Windows 10. Among all, using the Control Panel or switching to a local account works the best. And if you want to remove your Microsoft account from a device you no longer have access to, you can always do it from the Microsoft website.
Also Read: 7 Reasons Why You Should Not Turn off Microsoft Defender on Windows 10