GIMP provides multiple ways to convert images to black and white. Each option is different with different flexibility levels and different results too. Here are all the ways you can use to convert the images and the differences between them. Choosing one over the other is just a matter of preference depending on your need.
Convert Images to Black and White on GIMP
Let’s start with the easiest option out of the bunch.
1. Enabling Grayscale Mode
By default, the image will open in RGB mode, but changing the mode to grayscale will change the image to black and white automatically. With grayscale, as the name suggests, you don’t have any additional control over the image as it directly changes the image’s color scheme. You cannot control the intensity or color channels either. Also, there is no option to set this to only one layer. Once enabled, it will be applied to the entire image with all the layers.
To convert the image to black and white using grayscale, click on the Image > Mode and select Grayscale radio.

This will convert the image to black and white instantly.
With grayscale selected, all your later inputs and edits will also be in grayscale. To change this, again, open Image > Mode and select RGB. This will reintroduce colors without changing the image that you had turned to grayscale.
2. Using Desaturation
Unlike the grayscale method, with desaturation, you can choose the intensity of the black and white image you need. This means you have the option not to turn the image to complete black and white if you prefer.
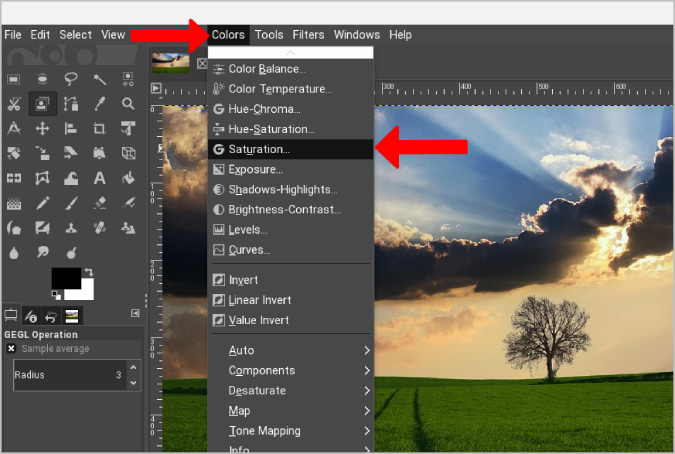
To convert the image to black and white using desaturation, choose the layer that you want to turn into black and white. You also have the option to select multiple layers by pressing the ctrl button.
Once selected, click on the Color option in the menu bar and then select Saturation.
This will open a pop-up window where you can change the intensity of the black and white shades using the Scale option.
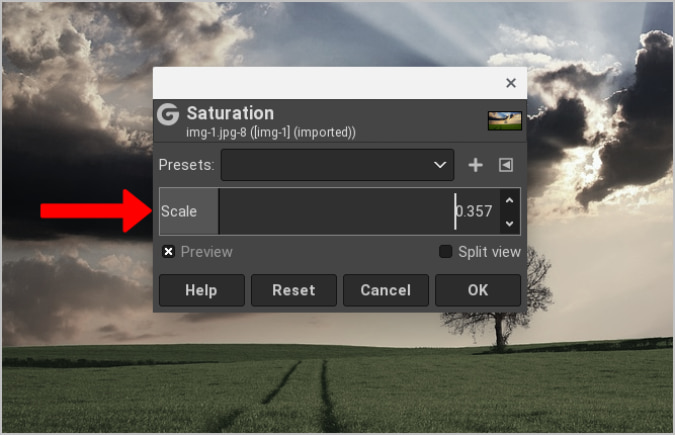
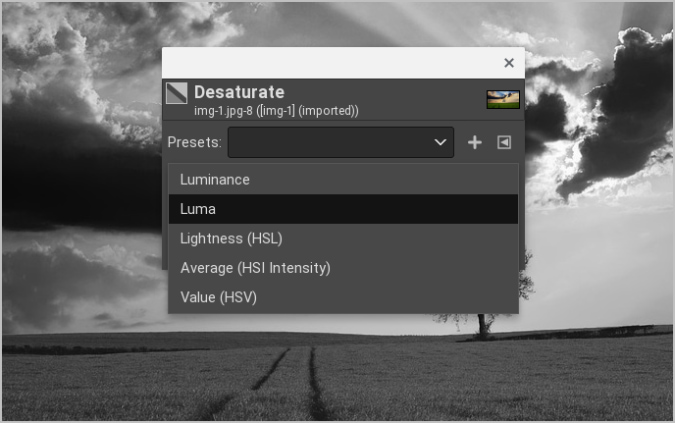
This tool will save the saturation level as a preset which means it will use the same settings for other images too later. Apart from that, there are other desaturation modes like Luminance, Luma, Lightness, Average, and Value. Each mode applies a different shade of black and white to the image that can be further tuned by changing the brightness and color channels. You can access these modes by opening Colors > Desaturate and then again selecting Desaturate.
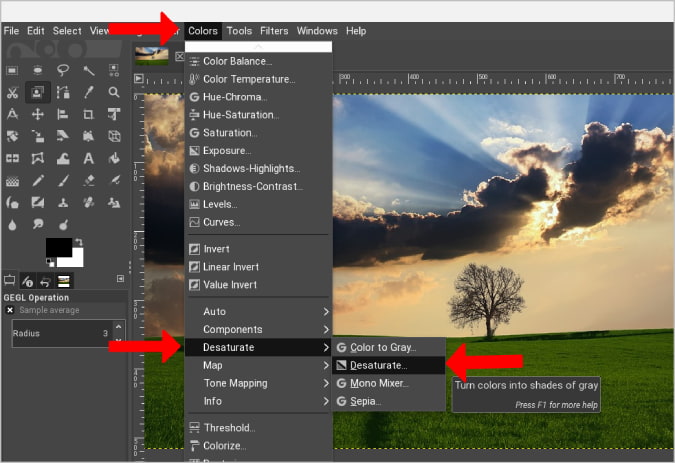
This will open a pop-up window where you can apply these modes to the image.
Instead of relying on the tool to provide various modes of grayscale, you can fine-tune the RGB channels manually to get the exact black and white that you need.
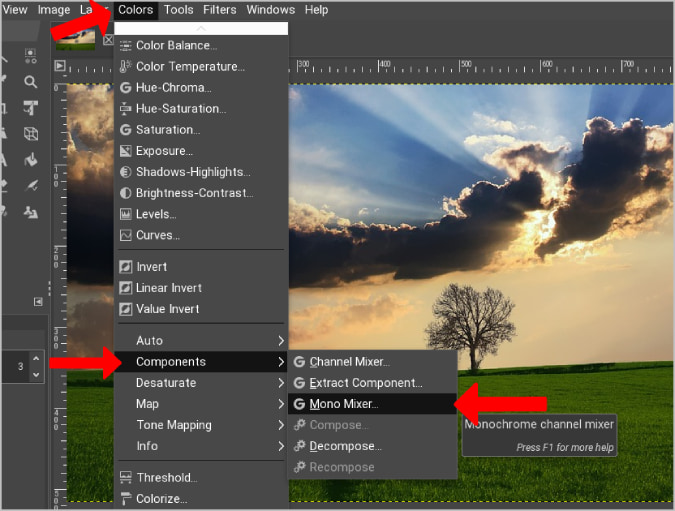
3. Adjusting Through Channel Mixer
With the Channel Mixer option, you can customize every part of the image. You can choose the red, green, and blue levels of the image to get the perfect black and white tone you are looking for.
To change the colors to black and white using the channel mixer, open Colors > Components > Mono Mixer. This will turn the image to black and white and open a pop-up window to customize the RGB channels.
Now you can play around with these RGB channels to change the tone of the black and white image. To maintain the same brightness level, the values should add up to 100%. For example, if you set the red to 31%, Green to 58%, and Blue to 11%, you will get the same black and white toned image as in the grayscale option. To prevent this brightness issue, you can enable the Preserve Luminosity toggle. It will adjust the RGB layers without affecting the brightness levels.
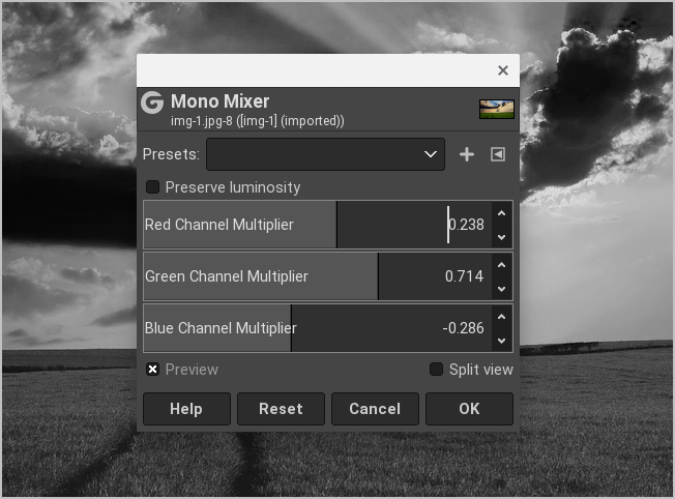
Here’s an example. If you are looking for a darker sky, decrease the blue channel level which will make your sky look darker. You can use this technique to change the channel colors to make certain things pop out.
The advantage of Channel Mixer is the flexibility. For me, it’s about adding more contrast and bringing out the perfect layout and lines in the images without increasing the noise.
Wrapping Up: Converting Images Black and White Using GIMP
The grayscale option is great to turn images black and white but lacks the control that intensity and channel options offer while tuning the image. Decreasing the saturation levels help set the intensity, but the final black and white image has a bit more noise compared to grayscale once when zoomed in. The channel mixing option allows tuning the image to suit your needs. You can control individual color, and so you can do things like turning the sky darker, making an object pop out with a vibrant shade, etc.
Also Read: