Is Windows 11 not responding to mouse clicks? Unfortunately, the issue is more common than you’d think. Faulty hardware, misconfigured settings, and corrupted drivers are just a few of the reasons why your mouse may stop working. In this guide, we’ve compiled a list of solutions that you can try if the left or right mouse click stops working on Windows 11. So, let’s start.
Table of Contents
1. Rule Out Hardware Issues
Before you try any advanced troubleshooting tips, it’s important to rule out any hardware issues. First, you should try unplugging your mouse and plugging it back in. This time, use a different USB port. Further, if you’re using a wireless mouse, replace the batteries to see if that helps.
Alternatively, you can also test your mouse on a different PC. If it works, then it’s likely a software issue on your PC and you should be able to solve it with one of the solutions mentioned below.
2. Disable ClickLock
ClickLock is a handy feature on Windows that allows you to drag files without having to hold down the mouse button for too long. However, this feature is also known to cause problems with mouse clicks on Windows. Here’s how you can turn it off.
1. Press the Windows key + S to open the search menu. Type in mouse settings in the box and press Enter.
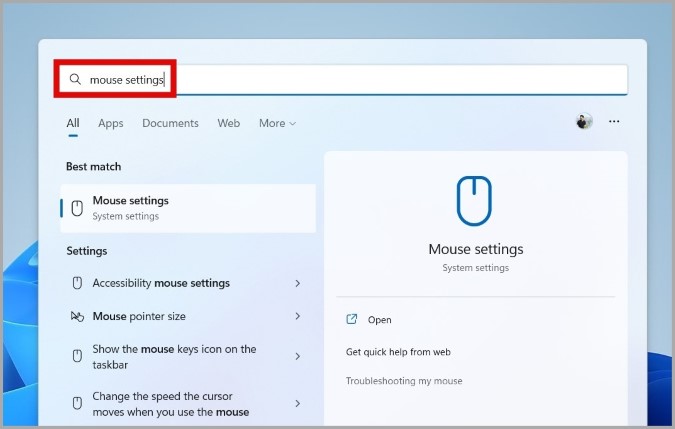
2. Use the Tab key to navigate to Additional mouse settings and press Enter.

3. In the Mouse Properties window, use the Tab key to highlight Turn on ClickLock, and hit the space bar to uncheck it. Then, use the Tab key to navigate to Apply and press Enter.
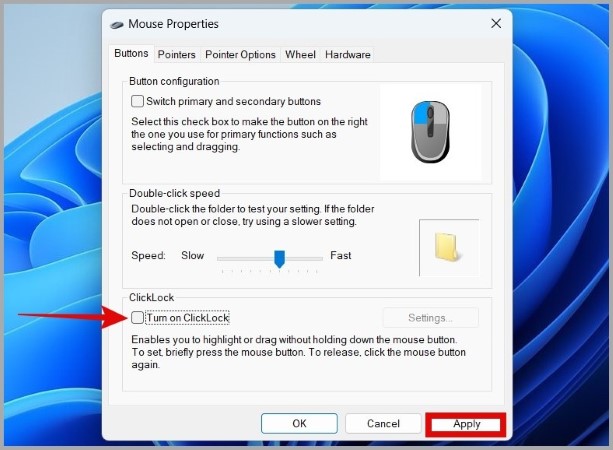
Check to see if Windows responds to mouse clicks now.
3. Update Mouse Drivers
Drivers on your PC help Windows communicate with your hardware devices. Naturally, if there’s an issue with the current mouse drivers on your PC, Windows will fail to respond to mouse clicks. To fix it, you can update the mouse drivers by following the steps below.
1. Press the Windows key + X to open the WinX menu. Use the arrow key to highlight Device Manager and press Enter.
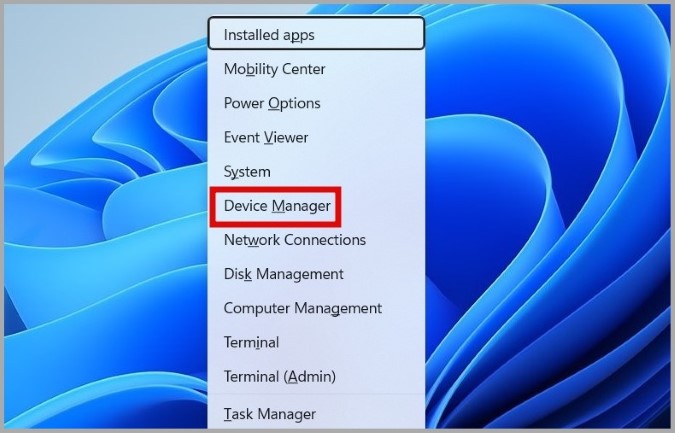
2. Expand Mice and other pointing devices and navigate to your mouse. Press the Shift + F10 on your keyboard to open the context menu and choose Update driver.

From there, follow the on-screen prompts to update the mouse drivers and see if that fixes the issue.
4. Run SFC and DISM Scan
Damaged system files on your PC can also lead to such anomalies. Thankfully, Windows offers some handy system tools that can help you repair those system files. Here’s how to run it.
1. Press the Windows key + X to open the WinX menu. Use the arrow key to navigate to Terminal (Admin) and press Enter.
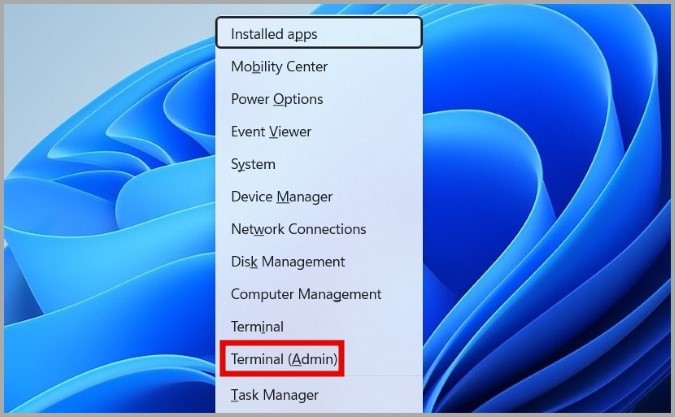
2. In the console, run the following commands.
sfc /scannowDism /Online /Cleanup-Image /RestoreHealthAfter running the above commands, open the WinX menu again, use the arrow keys to navigate to Shut down or sign out and press R on your keyboard to restart your PC.

5. Restart Windows Explorer
Windows Explorer is a critical process that provides Graphical User Interface (GUI) for many utilities on Windows 11. If the process is not working correctly, you may encounter issues while clicking on the Start menu, Taskbar, and Desktop.
More often than not, you can fix the issue by merely restarting the Windows Explorer process.
1. Press the Ctrl + Shift + Esc on your keyboard to open the Task Manager.
2. Use the arrow key to highlight Windows Explorer. Press the Shift + F10 on your keyboard to open the context menu, go to Restart, and press Enter.

6. Run Windows Troubleshooter
Windows offers a dedicated Hardware and Devices troubleshooter that can come in handy in such situations. It can automatically scan your PC for any hardware issues and recommend appropriate fixes. Here’s how to run it.
1. Press the Windows key + R to open the Run dialog. Type msdt.exe -id DeviceDiagnostic in the box and press Enter.
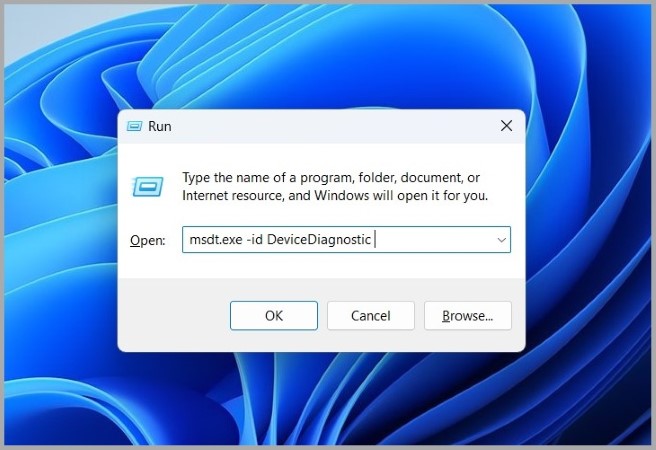
2. In the Hardware and Device troubleshooter, follow the on-screen instructions to run the troubleshooter.
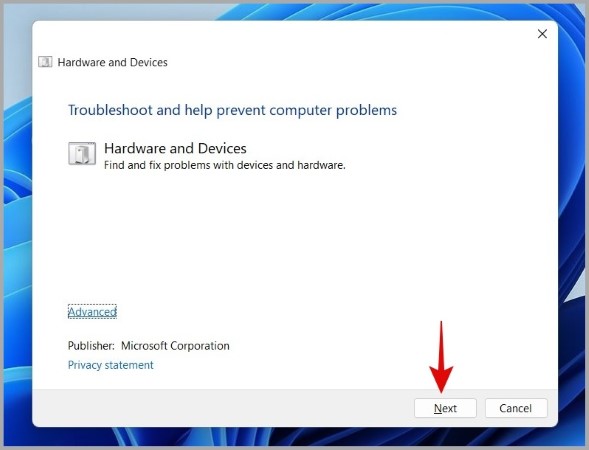
Following that, the issue will be resolved.
7. Try Clean Boot
At times, third-party apps and services on your PC can also create such problems. To overrule this possibility, you can boot your PC in a clean boot state.
1. Press the Windows key + R to open the Run dialog, type msconfig, and press Enter.

2. Use the arrow keys to navigate to the Services tab. Then, use the Tab key to highlight Hide all Microsoft services and hit the Space bar to tick the box.
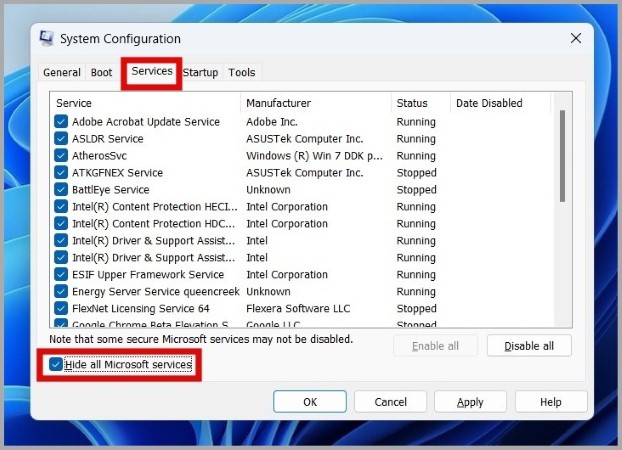
3. Next, use the Tab key to highlight the Disable all button and press Enter.

4. Next, move to the Startup tab, highlight Open Task Manager, and press Enter.

5. Use the arrow keys to navigate to a third-party app. Press Shift + F10 on your keyboard to open the context menu and select Disable. Repeat this step to disable all the third-party apps on your PC.

After that, use the WinX menu to restart your PC. After your PC boots, test your mouse again.
If this method solves your problem, it is likely that a third-party app or service on your PC is to blame. Apps and programs that you’ve installed recently are more likely to have caused the issue and uninstalling them should fix your problem.
8. Update Windows 11
If you haven’t installed any Windows updates in a while, you may be running an early build of Windows 11. If the mouse click not working issue is specific to your current build, updating Windows 11 should help.
1. Press the Windows key on your keyboard, type in windows update settings, and press Enter.
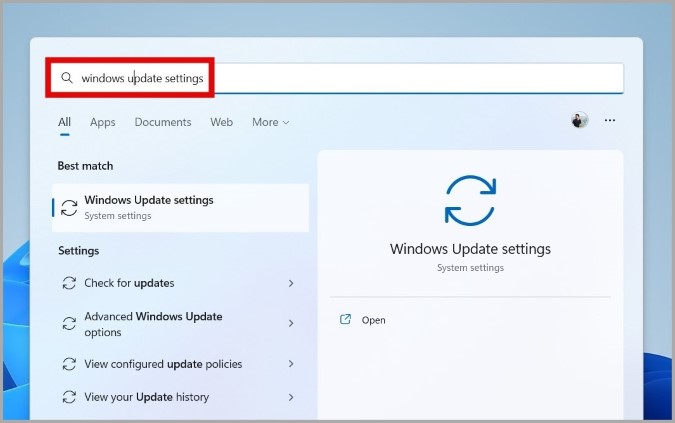
2. Use the Tab key to navigate to the Check for updates button and press Enter.
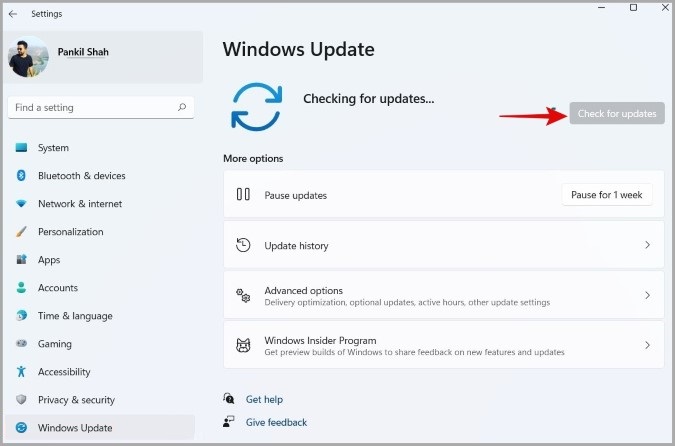
Download and install any pending updates and see if that fixes the issue.
Besides, if you’ve enrolled in Windows Insider Program to test new features before they are released, you may encounter such issues time and again. To avoid this, you should consider leaving Windows Insider Program.
Ready, Set, Click
Navigating through the Windows user interface without a mouse is difficult but still doable. In most cases, it’s the hardware that’s at fault rather than the software. Hopefully, one of the above solutions has helped you fix the left or right mouse click not working issue on Windows 11 and things are back to normal.